Cafe Theme
Designed by Kenny Sing as one of Elegant Theme’s Divi 2.4 demo sites, Cafe has been reverse engineered, expanded and built ground-up into a fully functional Divi child theme.
As well as exquisitely designed core pages which include a menu display, a 3-column blog page, a contact page, and a gallery showcase, Cafe comes complete with e-store functionality, seeing the Woo-Commerce-ready theme fit perfectly for a range of food and beverage clients wanting to sell related products online.
Quick Links
FAQ
- What are the child theme server requirements?
- What is demo data and how it works?
- Where to find help?
- What is a child theme and why should I use one?
- What is the difference between Divi Space's premium child themes and a standard (blank) child theme?
- What do I get when I buy a child theme?
- How do I choose the right child theme for my website?
- Do your child themes only work for one industry?
- I don’t know how to code. Will I be able to customize my child theme?
- I’m looking for a standard, blank Divi child theme. How can I make one of those?
- What about support, licensing, and updates?
- Are child themes included in your membership?
Whenever you update child theme, all of the files are updated so if you have made any changes to these files, those changes will be erased. We don't recommend making any changes to the child theme files.
Requirements
Before you can install and use our child theme, you need to ensure that you have the proper environment setup. The requirements are provided here
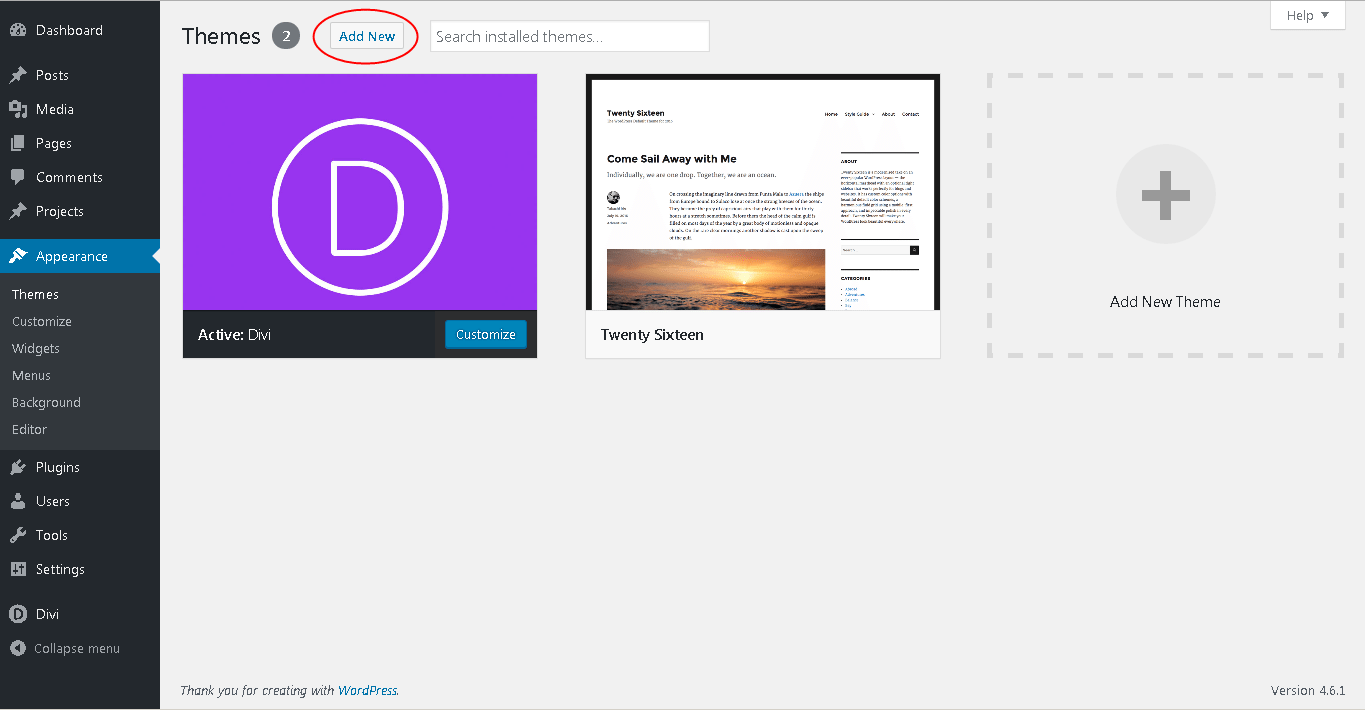
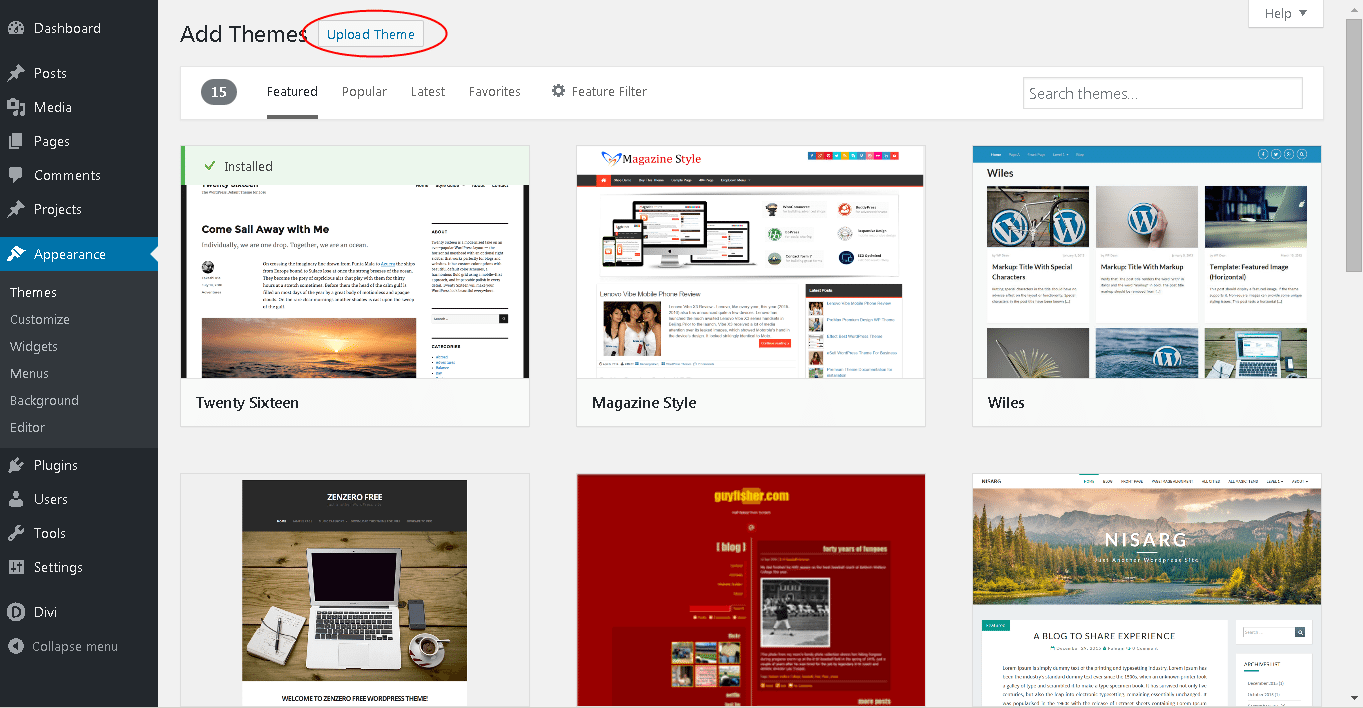
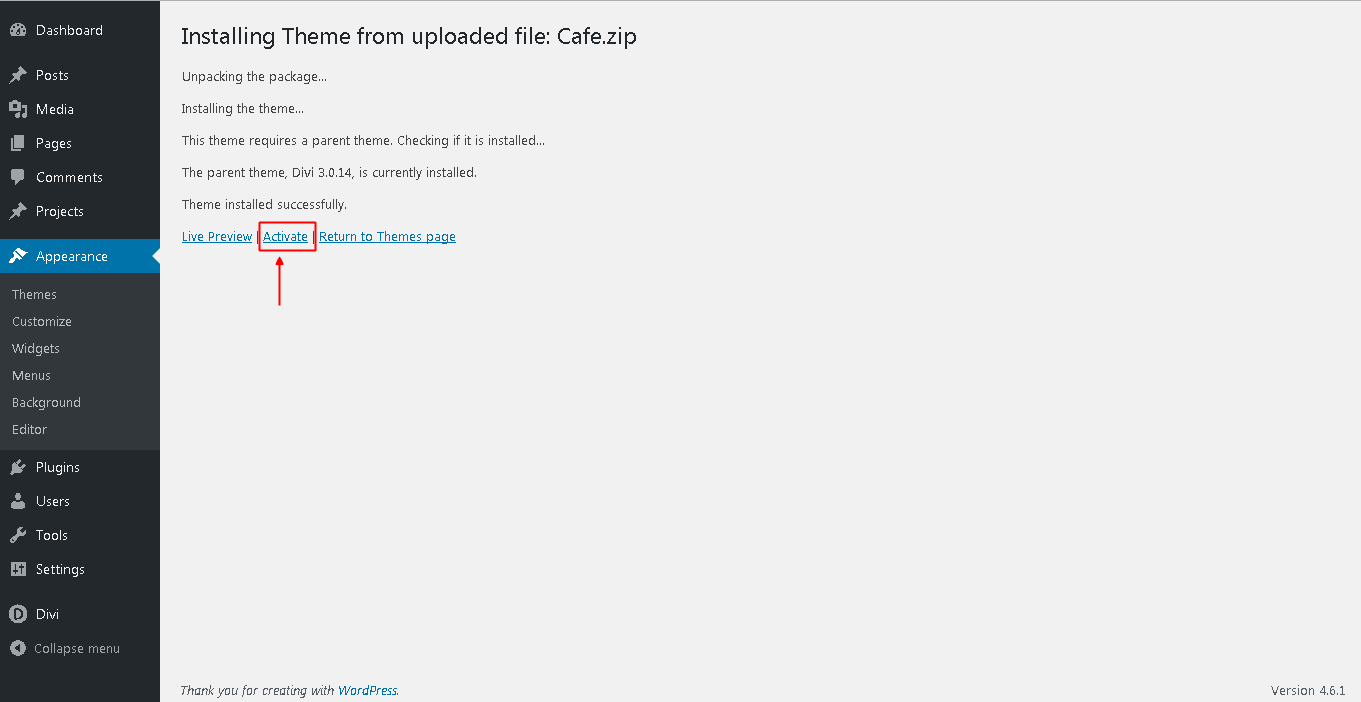
Installing the child theme
Please upload the Cafe Child Theme to you your self-hosted WordPress website. Make sure the Divi theme is already installed and activated.

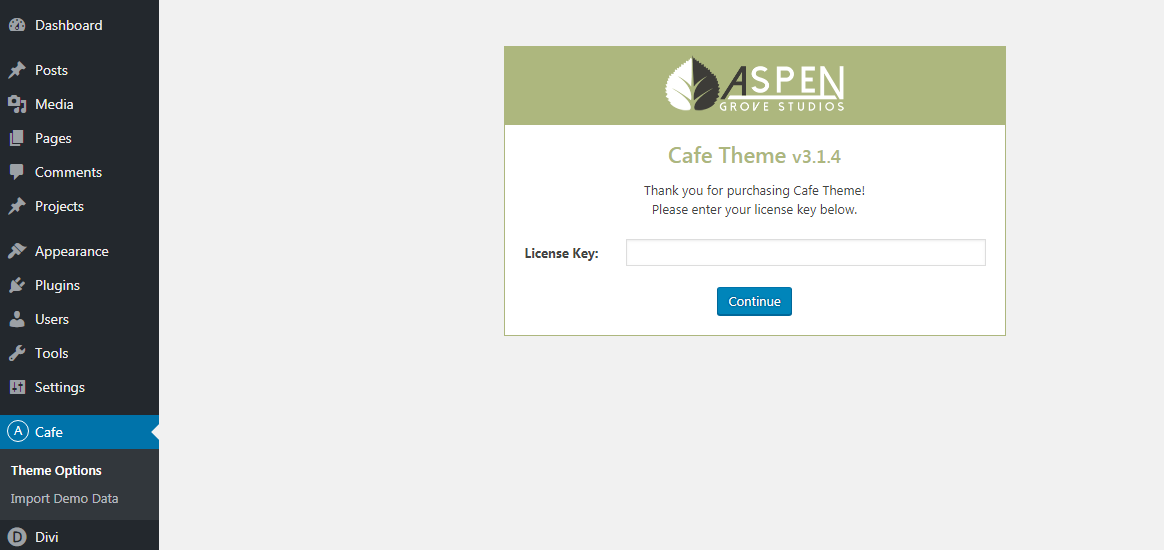
Enter license key
After you have activated the Child theme, click on the 'Cafe' menu item on your left Admin panel and register your license key in the input field provided in the dialogue box that pops up; then click 'Continue'.
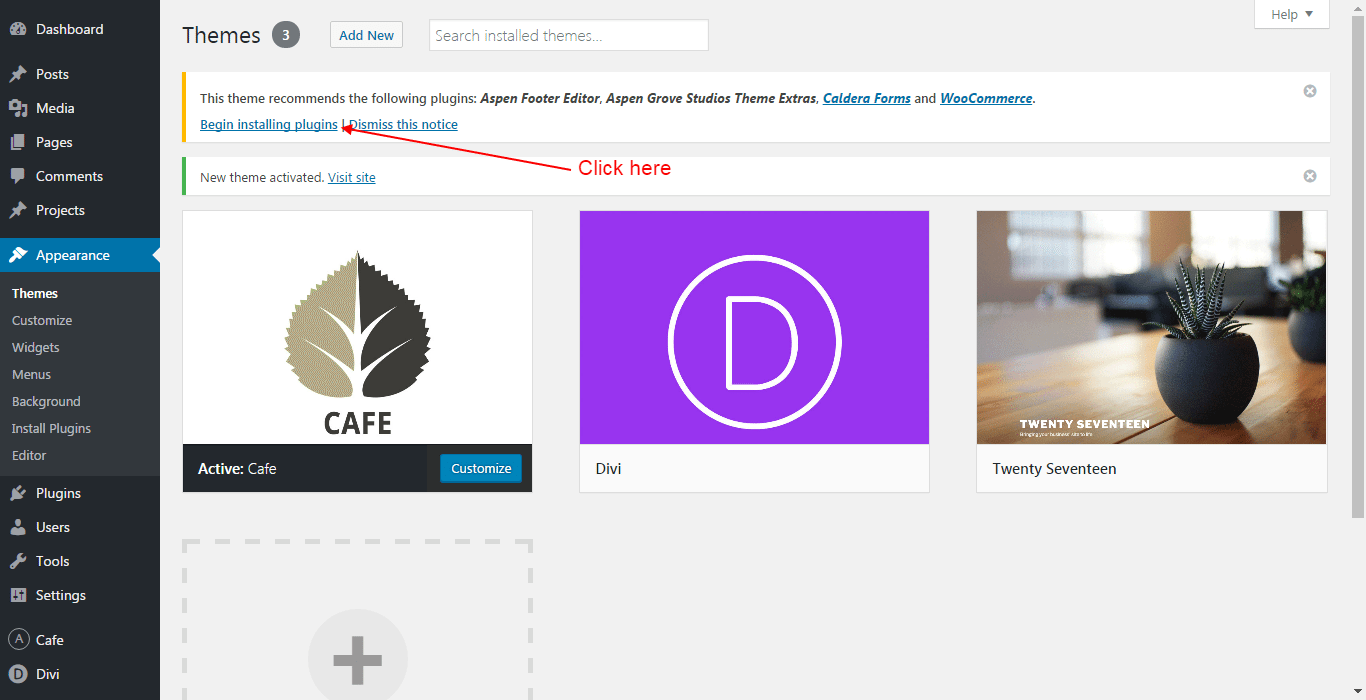
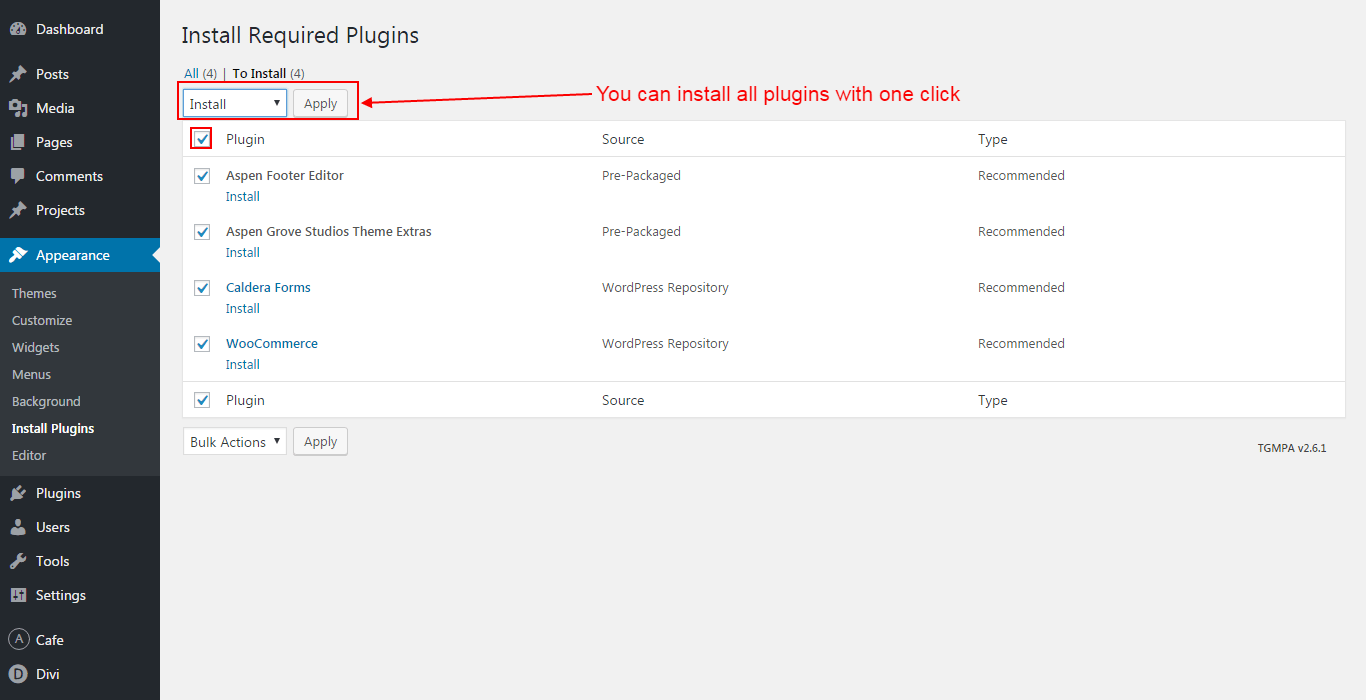
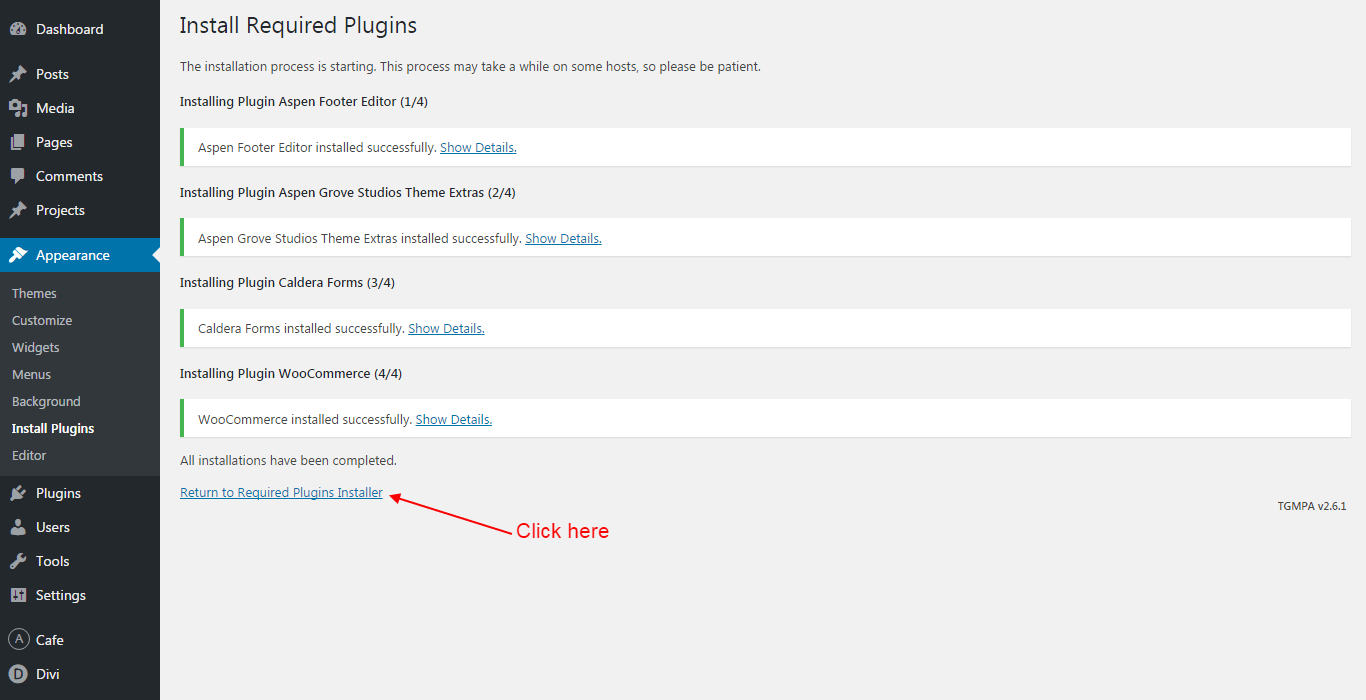
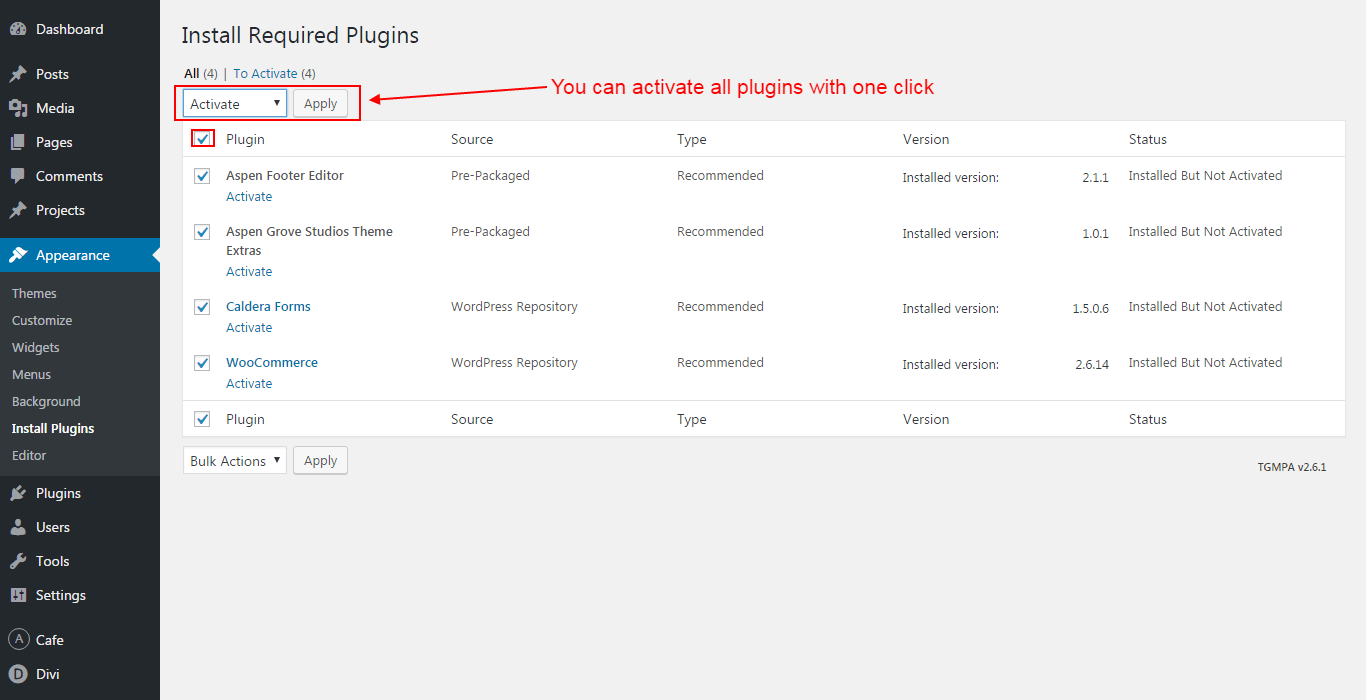
Installing the suggested plugins
Once the theme is installed on your site, the system will suggest you install & activate some Plugins. Please click the Plugin Name or Begin Installing Plugins link on the dashboard screen and start the process. This function is, however, optional.
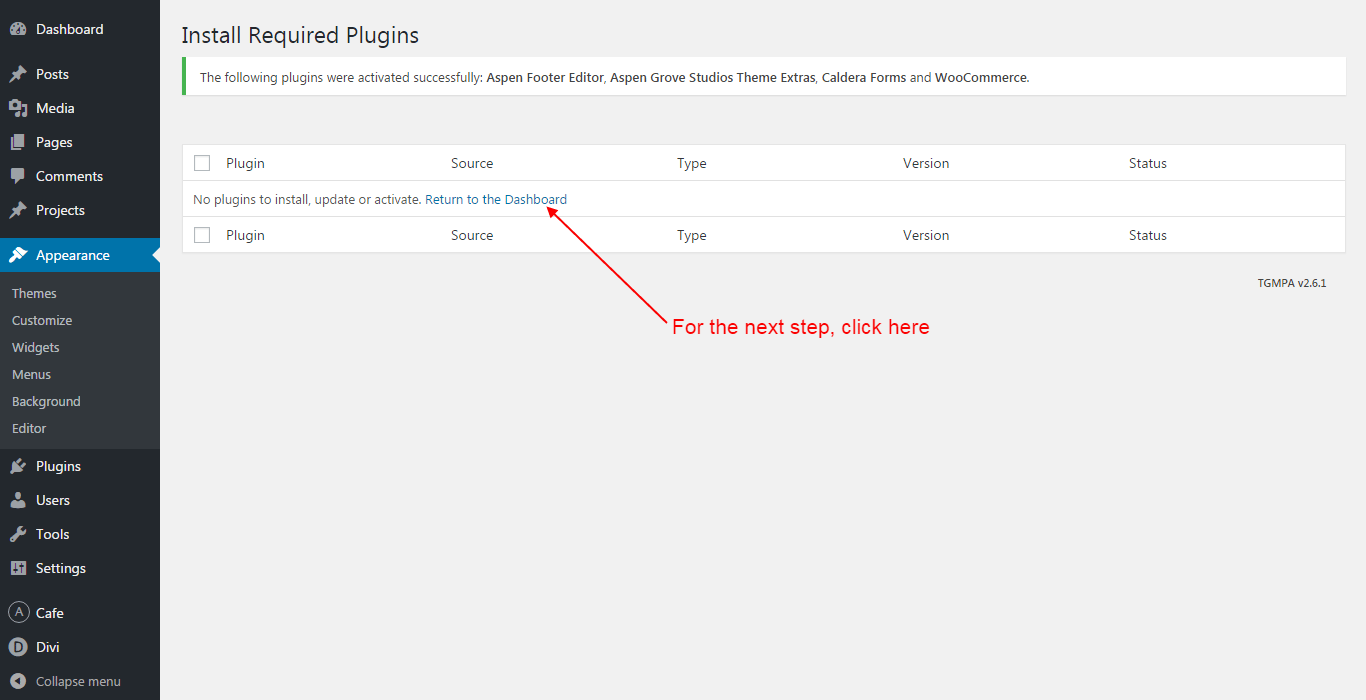
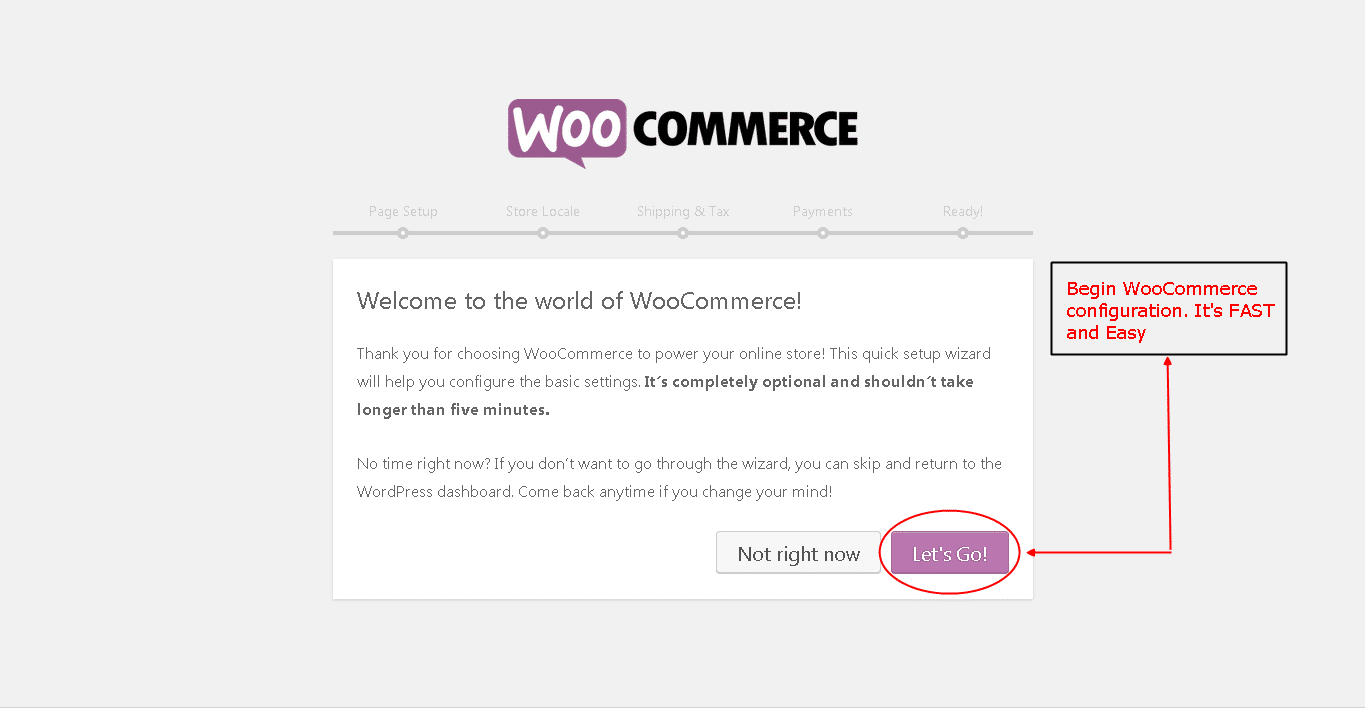
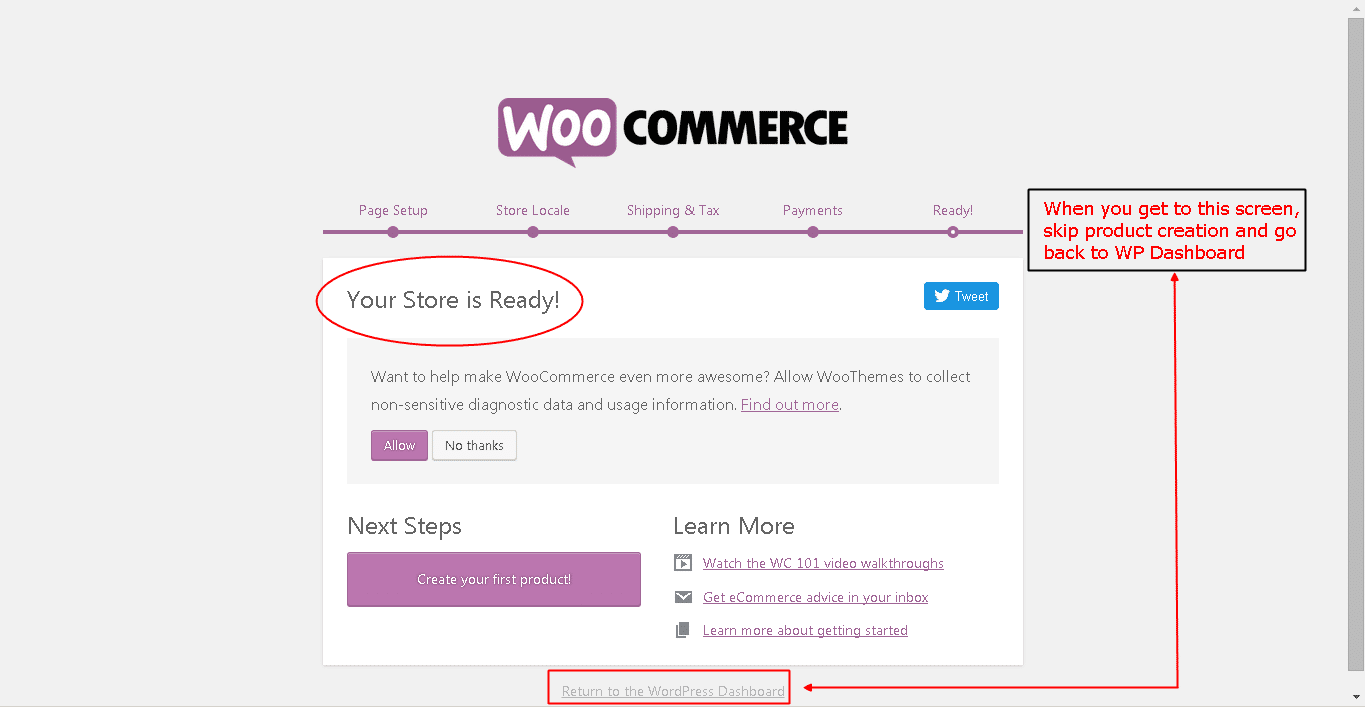
Please be advised that this Café Child Theme comes with a WooCommerce shop as one of its layouts. If you choose not to install WooCommerce, the shop section along with the related images and content will not be imported and you may see a message on the import page that some images have not been imported successfully. Please ignore the message. If you, however, choose to install & activate the suggested WooCommerce Plugin, do make sure you install the WooCommerce Pages as well. After the Plugin has been installed and activated, you will be directed to the WooCommerce installation wizard. After you get started, click ‘ Let’s Go!’ on the page setup screen… this will install all the necessary WooCommerce pages. You may complete the other steps now, or at a later time.
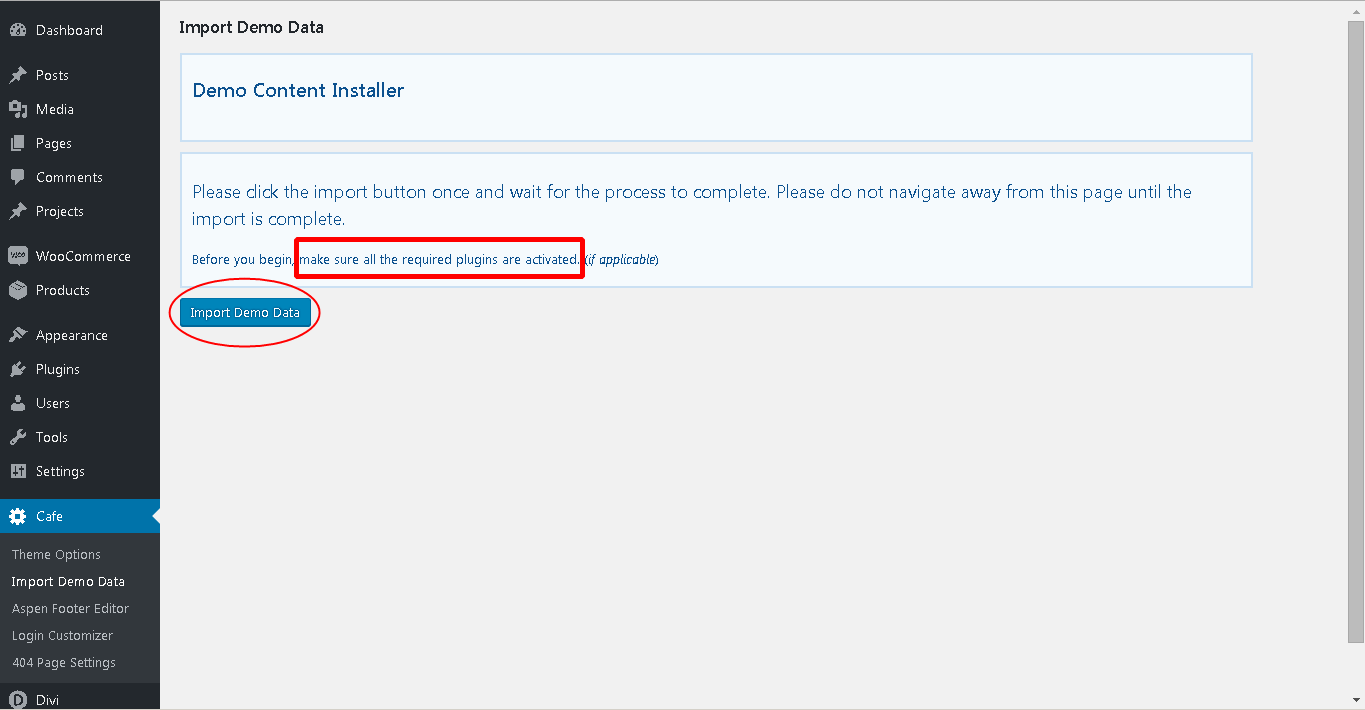
Import demo data
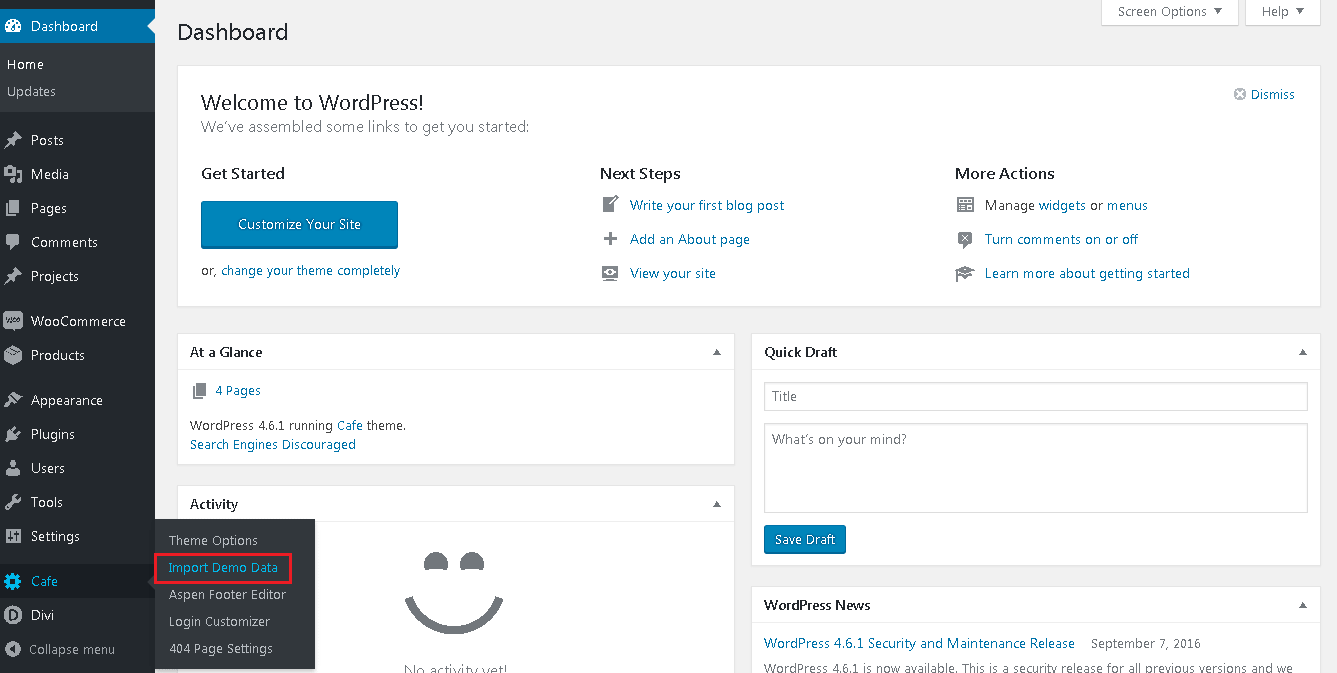
From the WordPress Dashboard, go to the newly added ‘Cafe’ tab on the left admin panel. Under the ‘Cafe’ menu, please click on ‘Import Demo Data’ only once. Please be patient while the demo data of the Cafe child theme is imported into your site.
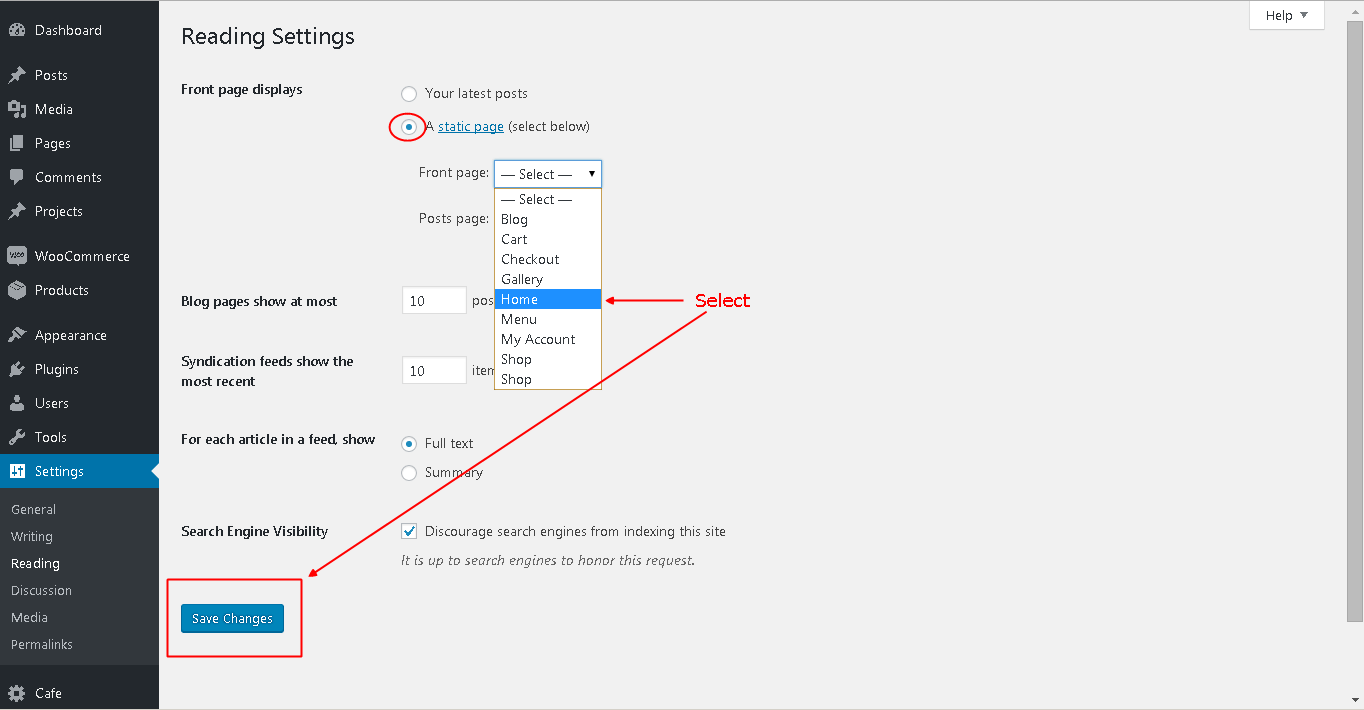
Homepage settings
Move to the settings area in your left Admin panel. Click ‘ Reading’, under ‘Front page displays’ select ‘A static page’ and for the Frontpage drop-down menu select ‘Home’, leave Posts page as is, do not select anything.
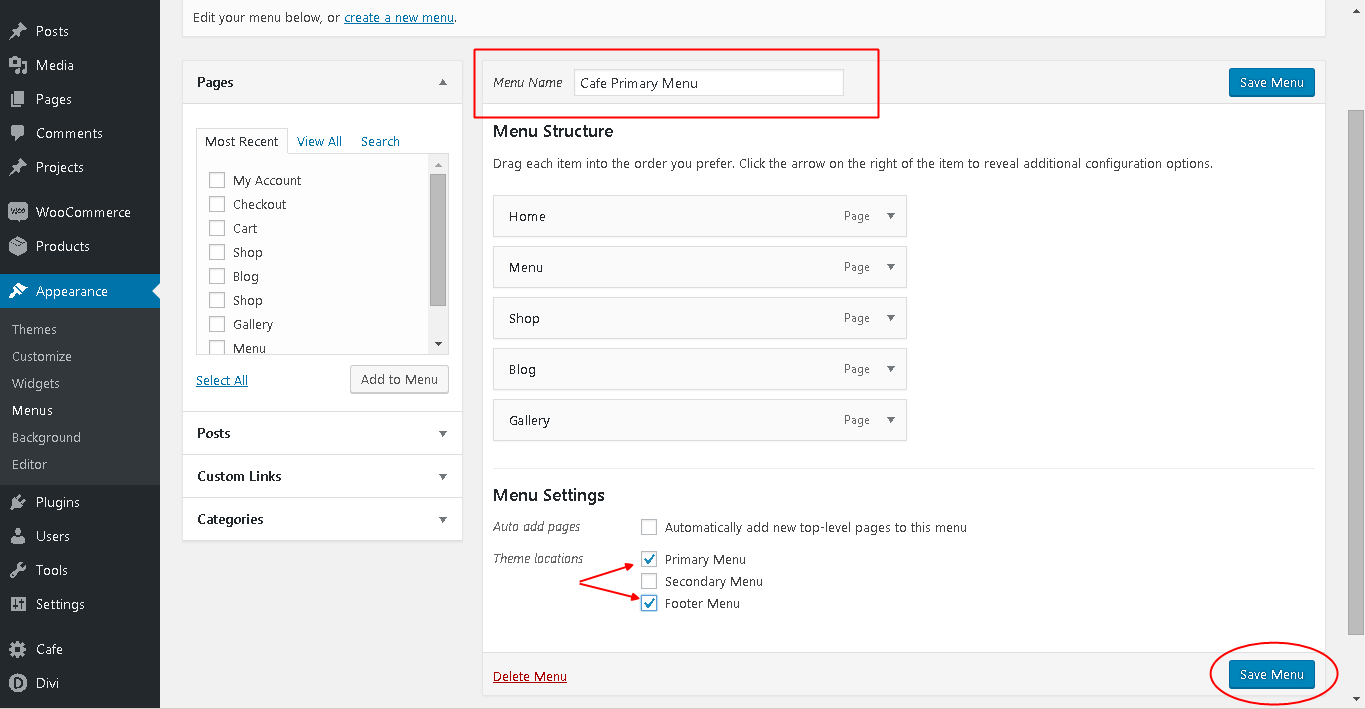
Menu settings
Move back to the ‘ Appearance’ tab in your left Admin Panel and select ‘Menus’. You should see a pre-built menu there named ‘Cafe Primary Menu’. Tick on the two checkboxes at the bottom of that menu that read ‘Primary Menu’ and ‘Footer Menu’. Hit the Save Menu button.
Additional child theme features
We have added some exciting and powerful new features to our child themes and are very excited about them. These new features, located under the "Cafe" tab of the child theme include: The Aspen Footer Editor The Login Page Customizer The Custom 404 Page Feature
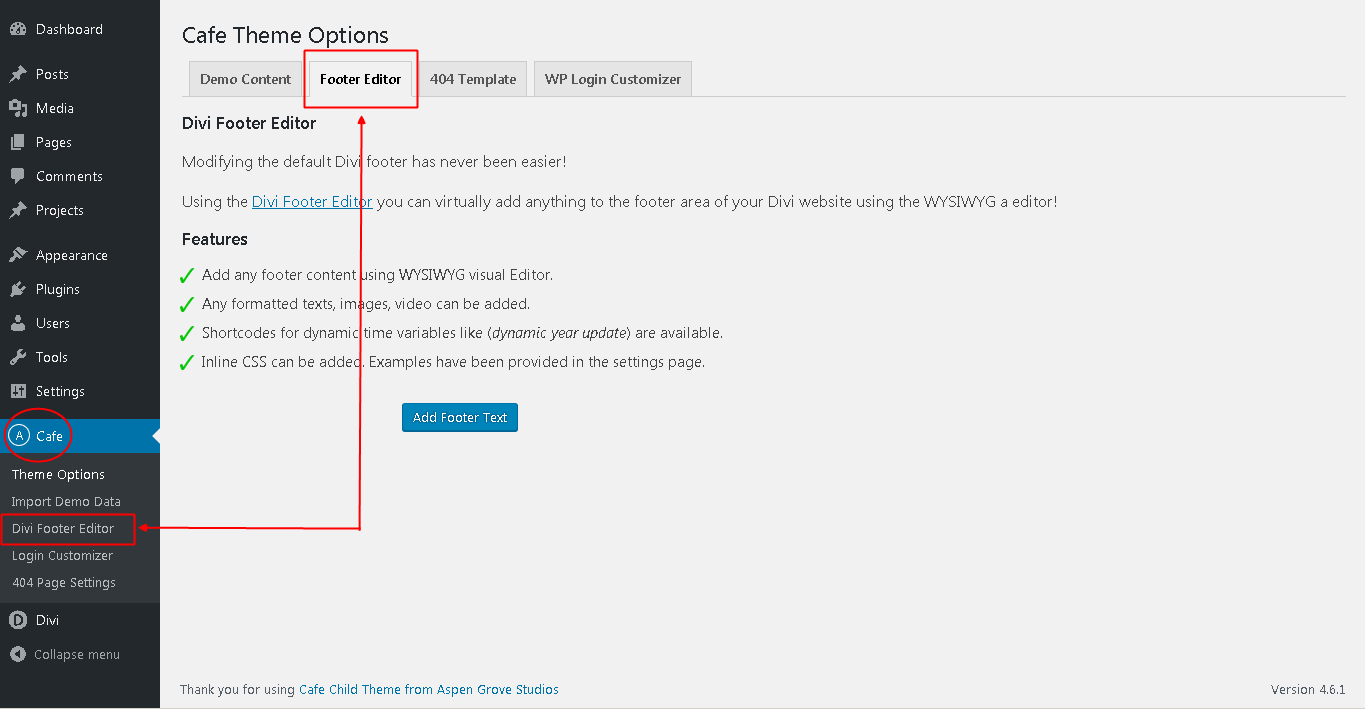
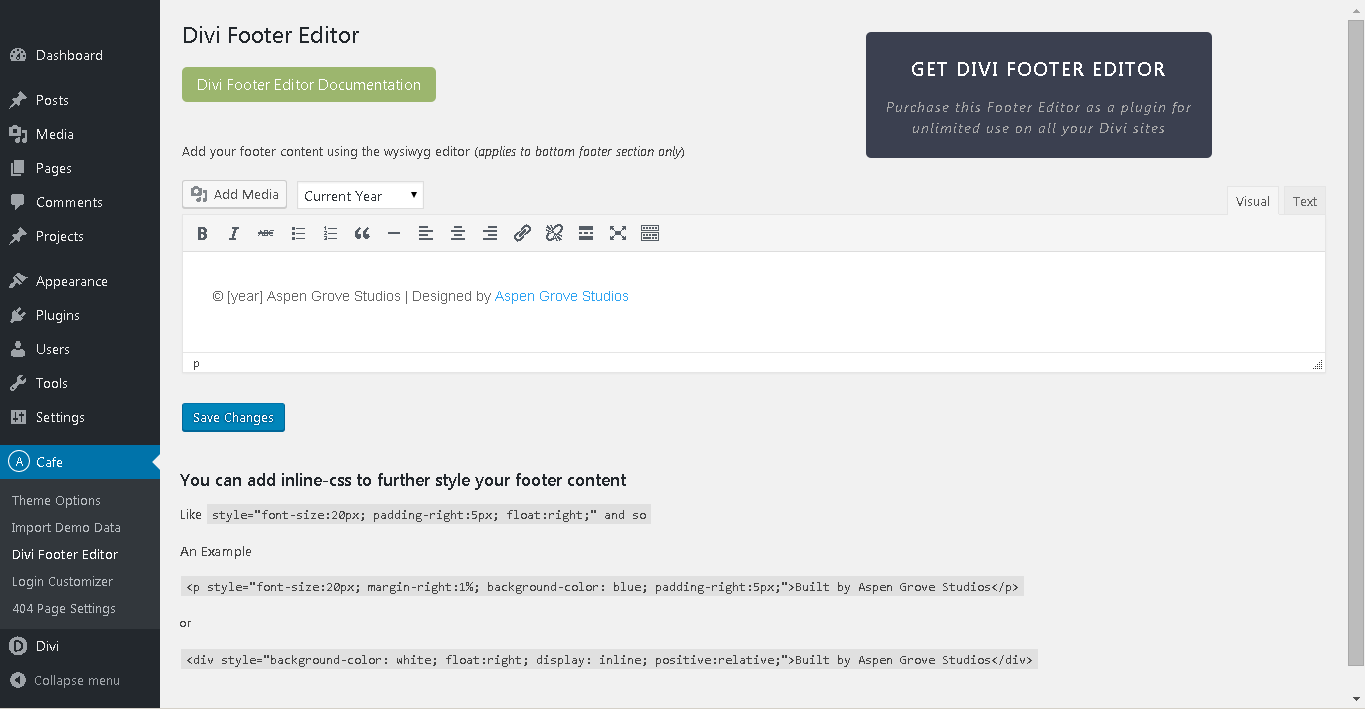
The Aspen Footer Editor
Aspen Footer Editor is an ultra-lightweight, yet powerful tool that allows you to easily edit your Divi or Extra website’s footer information (copyright). With this feature, you can add custom footer text and change the color, size, hyperlink, and even add images & videos! The best part? All of this is done within a simple to use WYSIWYG editor just as if you were editing a post or page. Once you have installed the Cafe Child Theme, you will see a new tab titled ‘Cafe’ in your WordPress admin menu (left sidebar). From there select ‘Divi Footer Editor’ and you will be taken to this feature’s dashboard. Once inside the Aspen Footer Editor’s dashboard, you will be greeted with a familiar sight: the standard WordPress page/post/WYSIWYG editor. Within this editor, you can add and style text, insert hyperlinks, add dynamic dates with the included shortcodes, and even insert photos/embed videos. Once you are finished styling your footer, simply click ‘save’ and you’re all done
The Login Page Customizer
The Login Page Customizer allows you to completely customize the standard WordPress Login screen with your company’s or client’s branding. You can upload your logo, set a custom background image or color, change the color of the links and more.
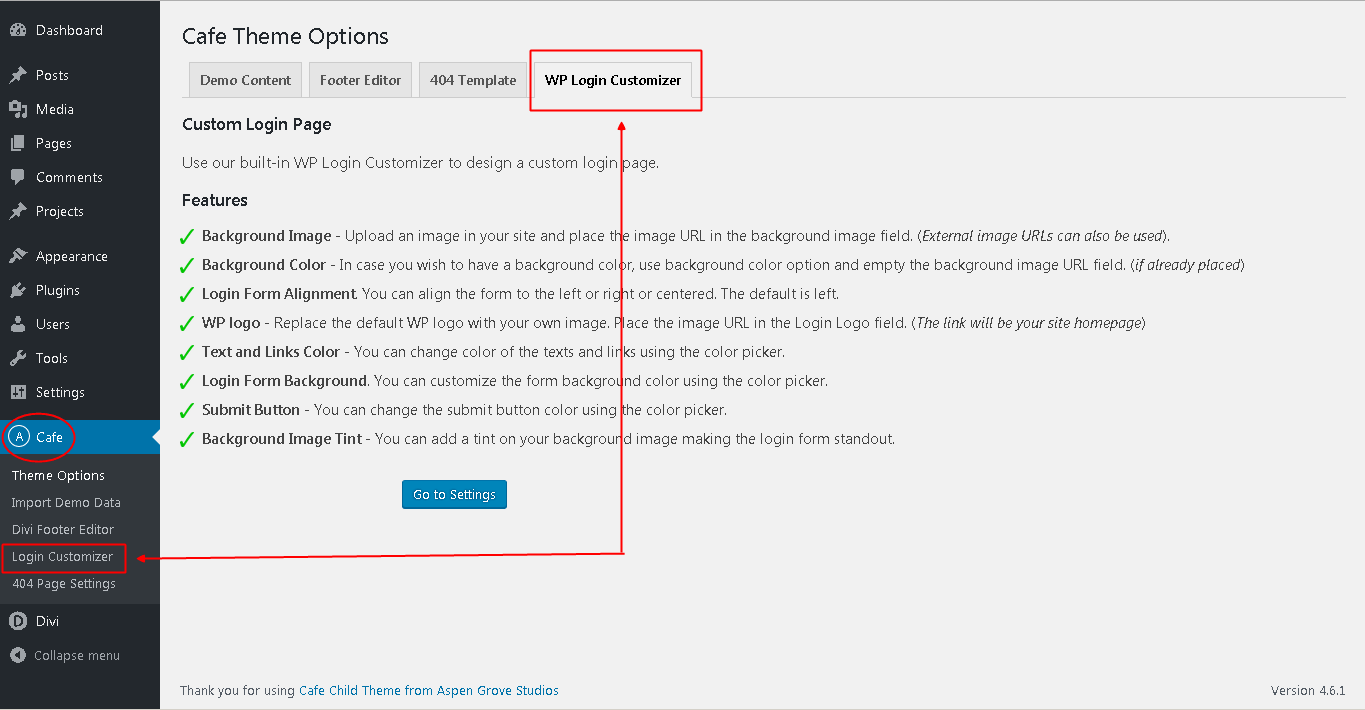
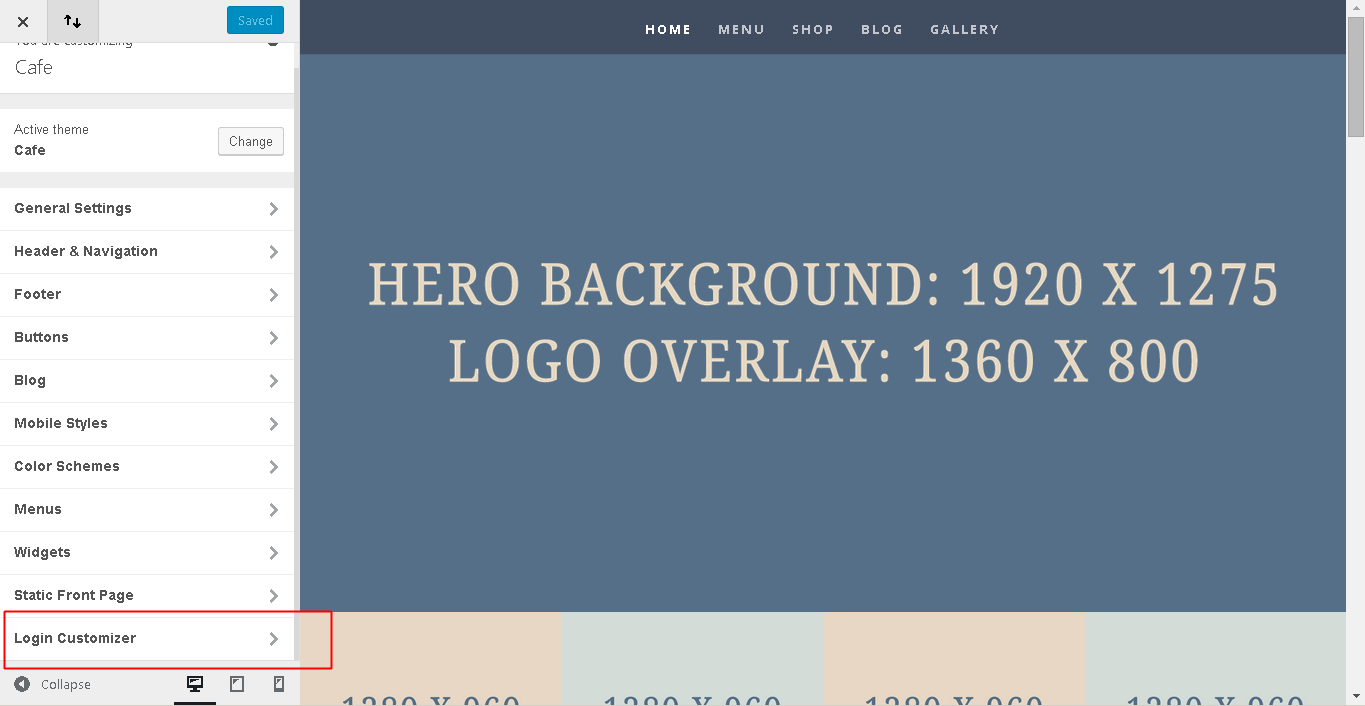
Once the Cafe Child Theme is installed, navigate to ‘Cafe’ >> Login Customizer >> and then select ‘Login Customizer’ at the bottom of the customizer menu. You will be given the following customization options:
- Background Image: You can set a background image just like the example shown above. Upload a big image ( preferably 1920px x 1080px) to your site using Media upload button. Copy the image URL and paste it in the BACKGROUND IMAGE field. Empty the field and then place the URL. You can also use an external image URL for this.
- Login Form Alignment: The default login form position for WordPress is centered. You can align this to the right, left or keep it centered.
- LOGIN LOGO (IN PLACE OF WP LOGO): Place your logo image ( preferable dimension 84px x 84px) URL in this field. The current WordPress logo will be replaced with yours. The login link will be site homepage instead of wordpress.org
- BACKGROUND COLOR: You can also choose to use a solid background color. Please empty the background image URL field ( if already placed) and choose any color from the color picker. The default color is set to transparent, so be sure to slide the transparency bar up to adjust or the color will not display.
- LINKS COLOR: You can customize the color of the links on this login form. Choose any color from the color picker.
- FORM BACKGROUND COLOR: Customize the background color of the form using the color picker.
- BACKGROUND IMAGE TINT: If you add a background image and need to standout your login form, you can add tint to that image. Use the color picker and choose anything. Use the opacity option to make it a tint.
- SUBMIT BUTTON COLOR: Yup, you guessed it! You can also customize the background color of the submit button using the color picker.
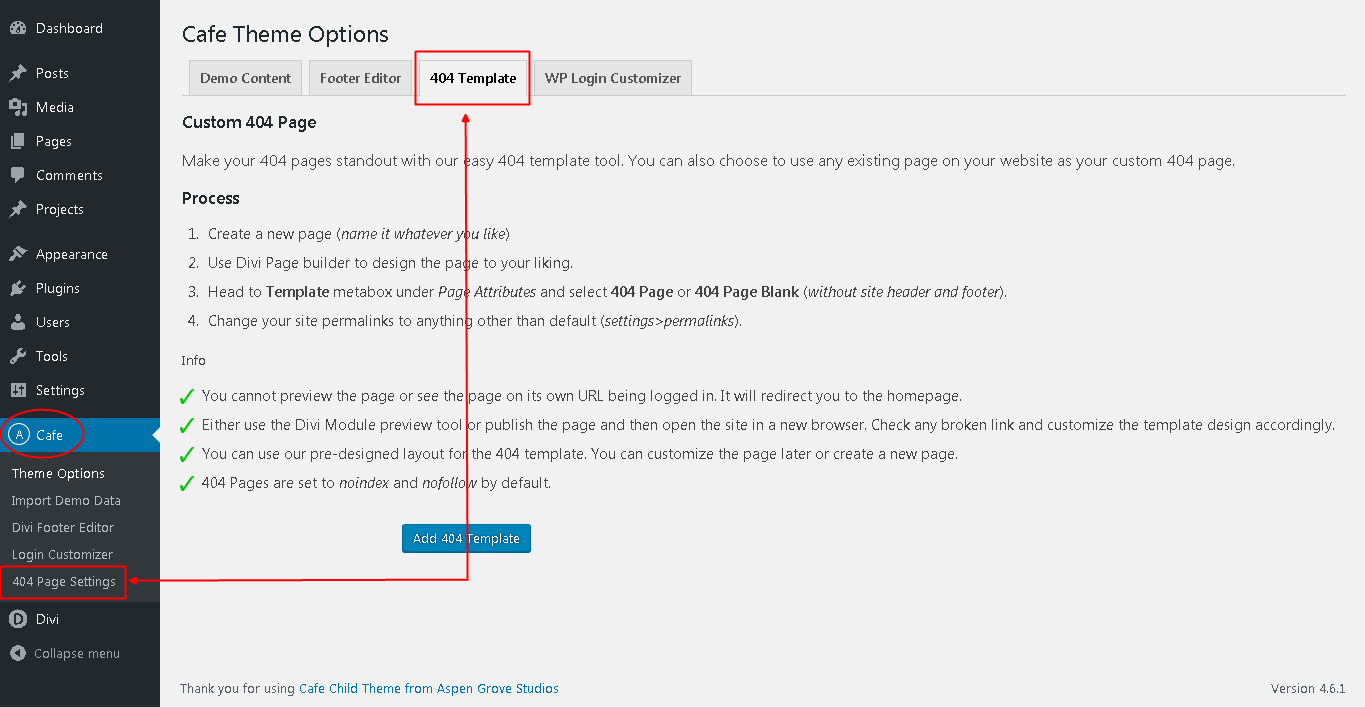
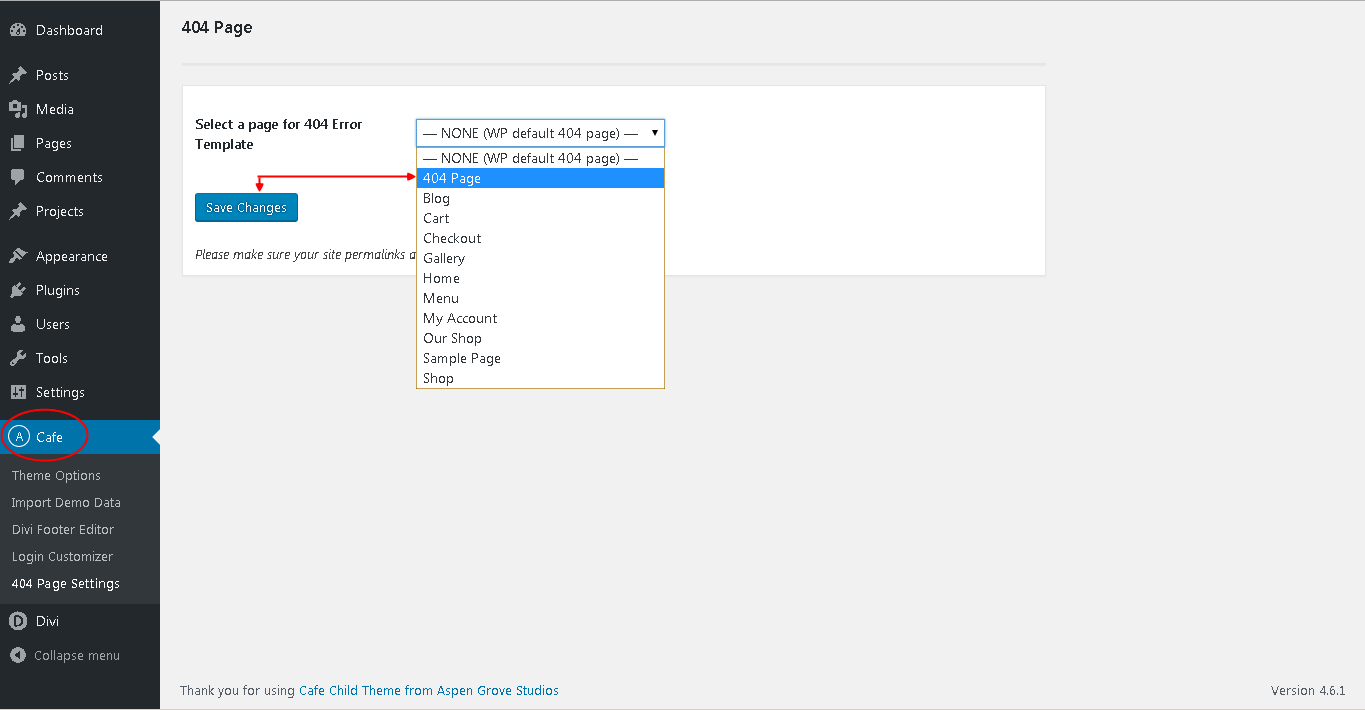
The 404 Page Settings
The 404 Page Template allows you to assign a custom 404 page from any Divi or Extra page that you have created. If you are not familiar with what a 404 page is, it is the page that displays when no such page on your website exists. Let’s say a person is visiting a certain page of your website, and they have a typo, or you have deleted that particular page. A 404 page will let the visitor know that the page no longer exists and will redirect them to the desired area of your website (home, contact, etc.)
Build your 404-Page: Here is the fun part… designing the 404-page. The beautiful part of this is that you can do it using the Divi Builder just as if you were building any other page. Take advantage of the Divi Builder modules and create your 404-page.
Assign Your 404 Page: After you are finished designing, publish the page and navigate from your dashboard to ‘Cafe’ >> ‘404 Template’. On the 404 Page dashboard, select your desired 404-page from the dropdown list, and click ‘Save Changes’. You can now test and view your 404 Page, but make sure you are logged out of your WordPress account when doing so.
Need additional information or support?
For general WordPress information – WordPress.org For additional help with using Divi, Elegant Themes offers free technical support to all its members. – http://www.elegantthemes.com
Need help with customization or want to buy similar product?
If you feel you need to give your website a completely professional finish, or you simply don’t have time to do it yourself, contact us at wpzone.co or send us an email to [email protected], to get our current rates. If you like our products and would like to purchase similar child themes, please visit https://wpzone.co/shop