Divi Nonprofit
Aesthetically striking and functionally flawless, the Divi Nonprofit child theme offers organizations the chance to communicate effectively and present a truly engaging website to their audience. Satisfying a range of possible marketing strategies, the Divi Nonprofit child theme’s got it all. From events to e-commerce, donations, custom project templates to showcase your great deeds, content publishing and more, Divi Nonprofit comes complete with a plethora of advanced features, each carefully crafted and beautifully styled, to help organizations pursue varying marketing avenues with ease. While not limited exclusively to nonprofits, the Divi Nonprofit child theme can be used by just about any brand or business looking to create a beautiful and highly-functional website.
Quick Links
FAQ
- What are the child theme server requirements?
- What is demo data and how it works?
- Where to find help?
- What is a child theme and why should I use one?
- What is the difference between Divi Space's premium child themes and a standard (blank) child theme?
- What do I get when I buy a child theme?
- How do I choose the right child theme for my website?
- Do your child themes only work for one industry?
- I don’t know how to code. Will I be able to customize my child theme?
- I’m looking for a standard, blank Divi child theme. How can I make one of those?
- What about support, licensing, and updates?
- Are child themes included in your membership?
Whenever you update child theme, all of the files are updated so if you have made any changes to these files, those changes will be erased. We don't recommend making any changes to the child theme files.
Requirements
Before you can install and use our child theme, you need to ensure that you have the proper environment setup. The requirements are provided here
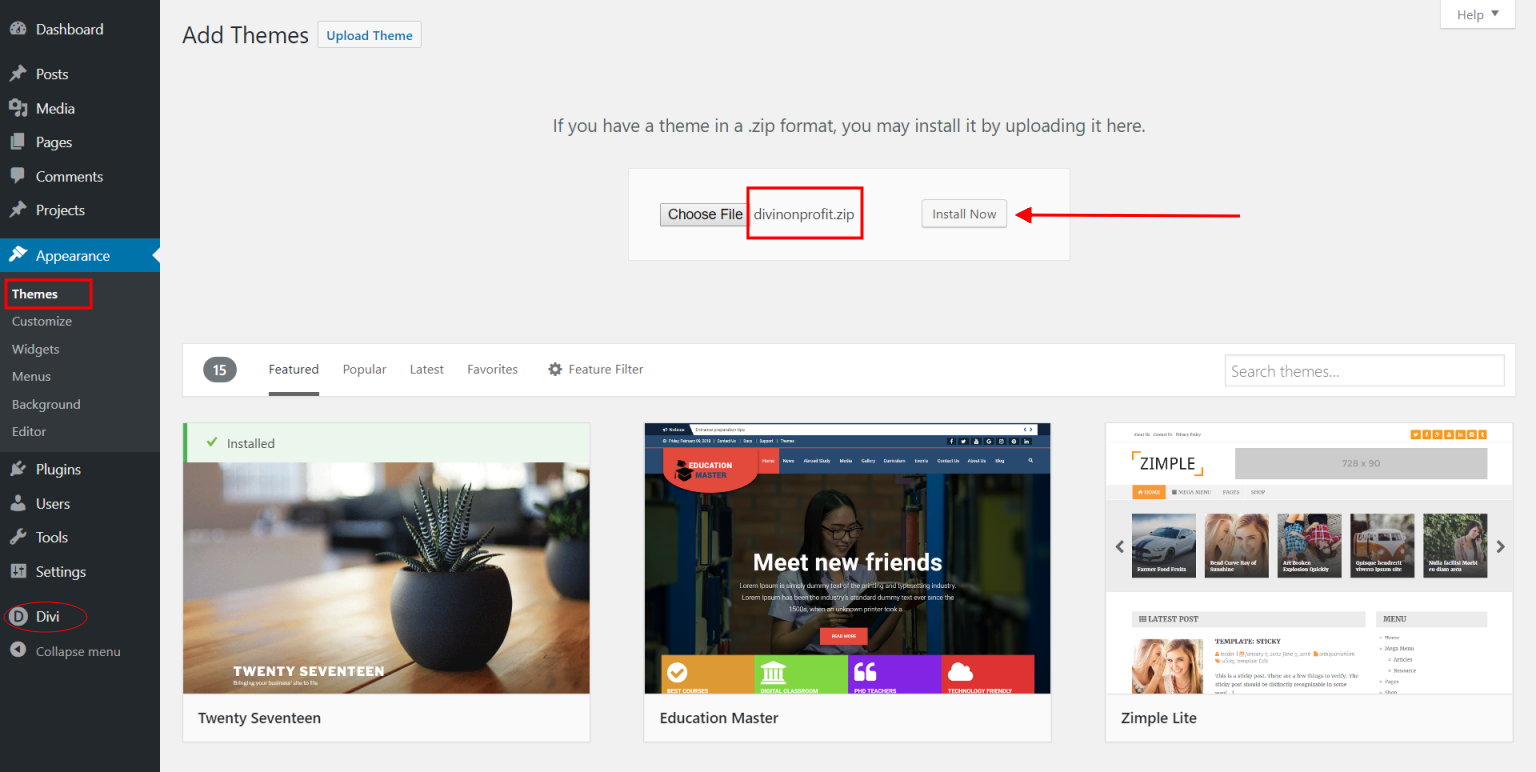
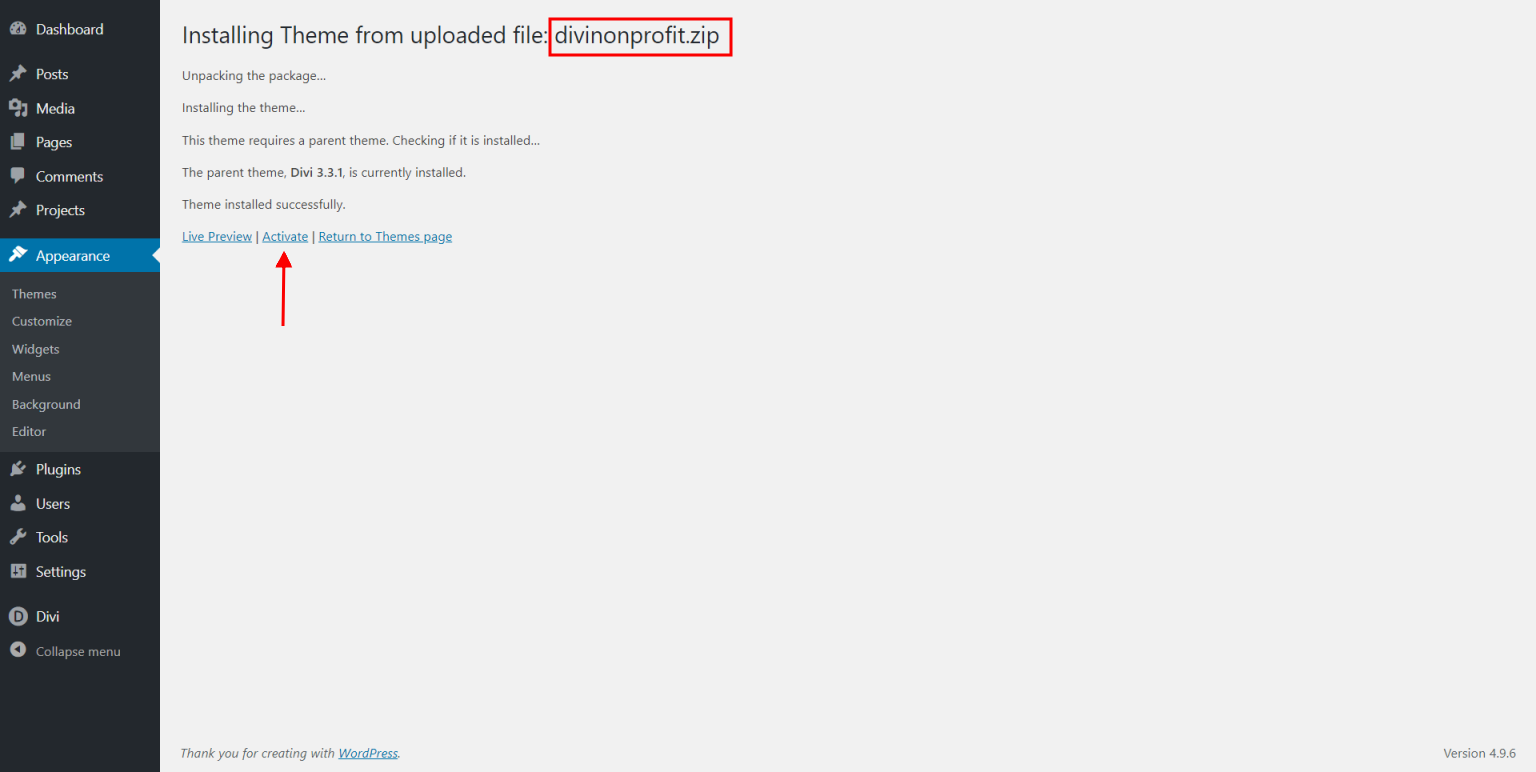
Installing the child theme
Please upload the Divi Nonprofit Child Theme to you your self-hosted WordPress website. Make sure the Divi theme is already installed and activated.
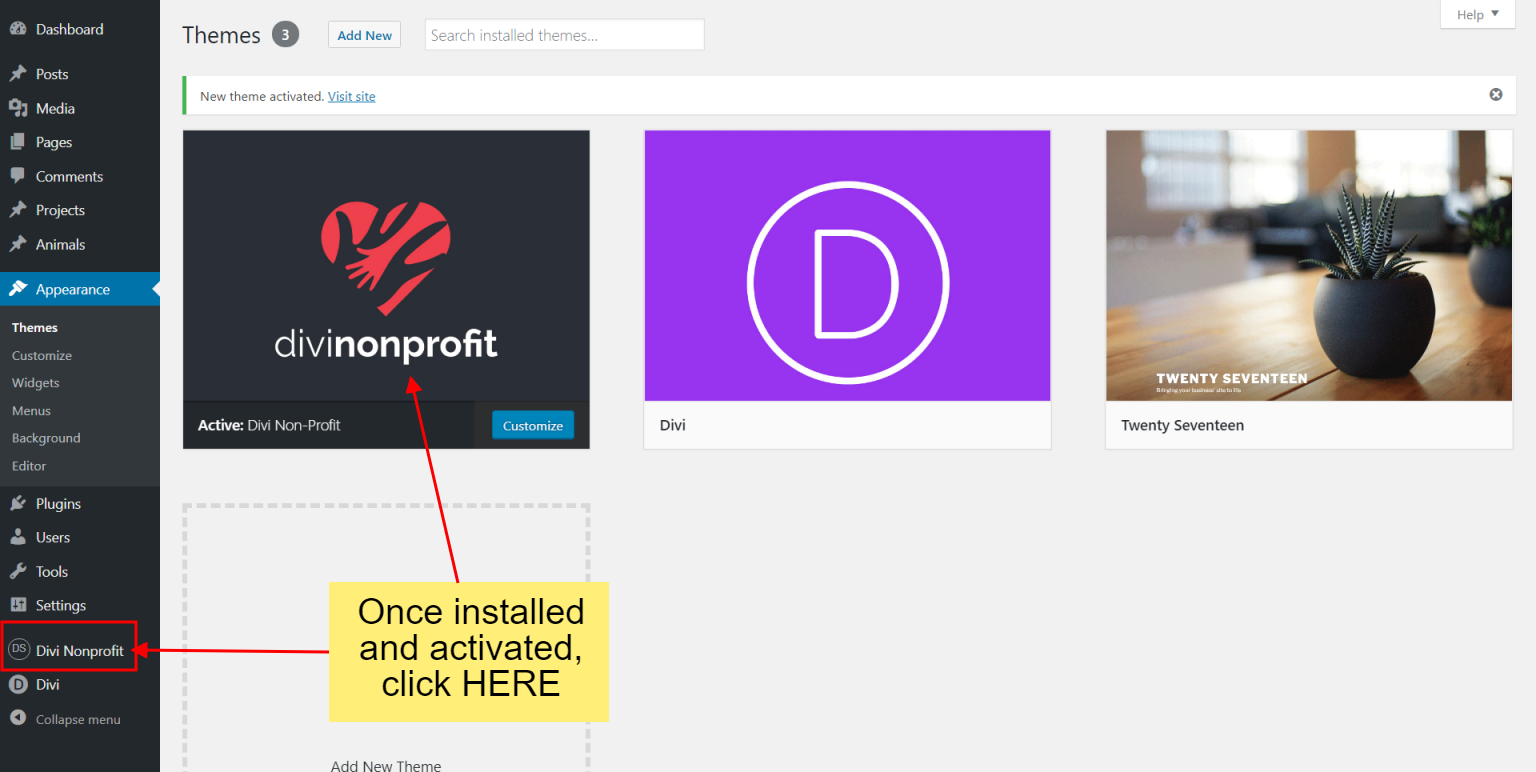
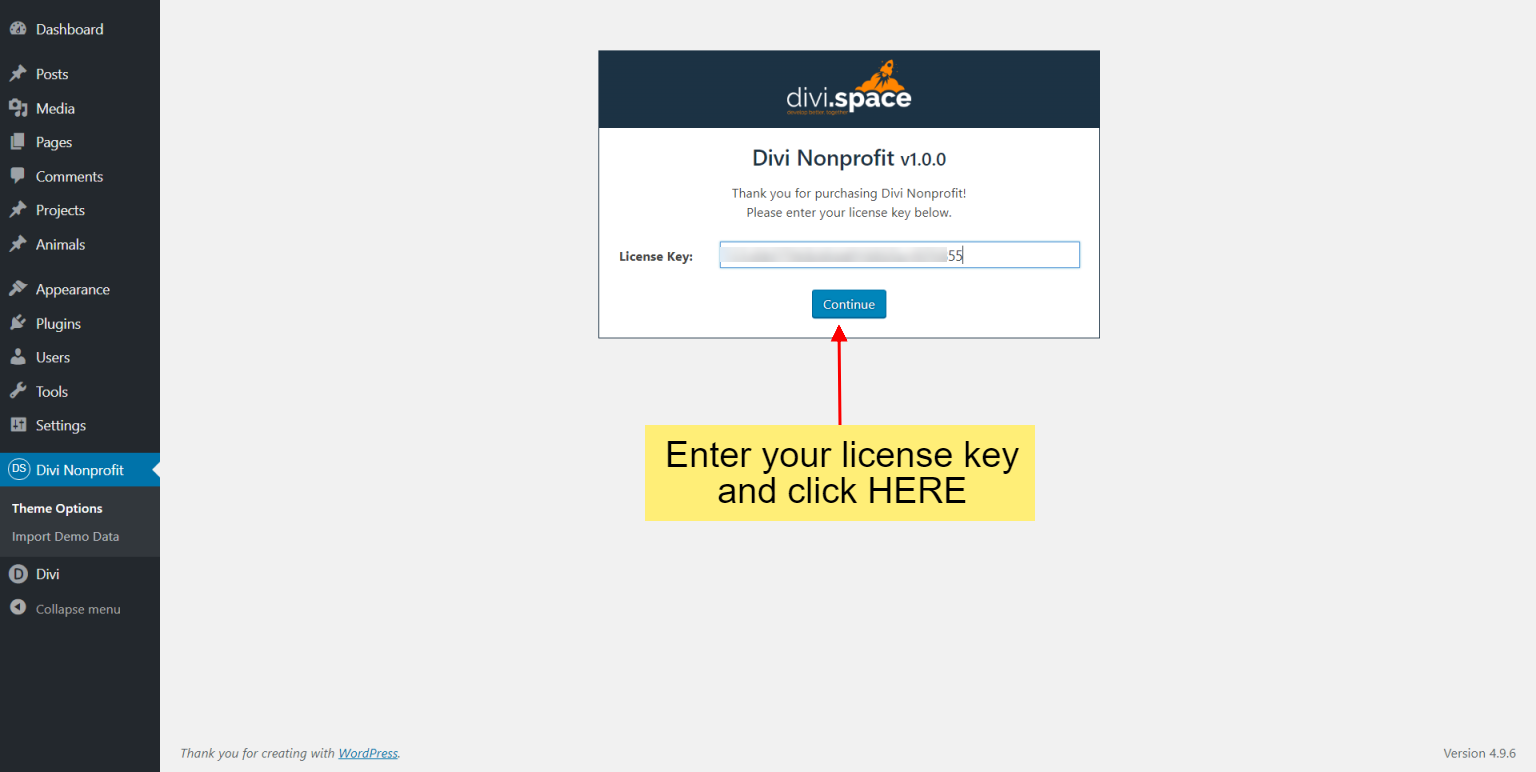
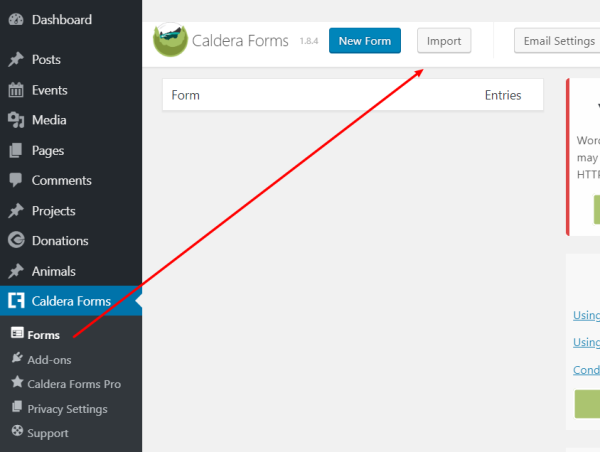
Enter license key
After you have activated the child theme, click on the 'Divi Nonprofit' menu item on your left Admin panel and register your license key in the input field provided in the dialogue box that pops up; then click 'Continue'.
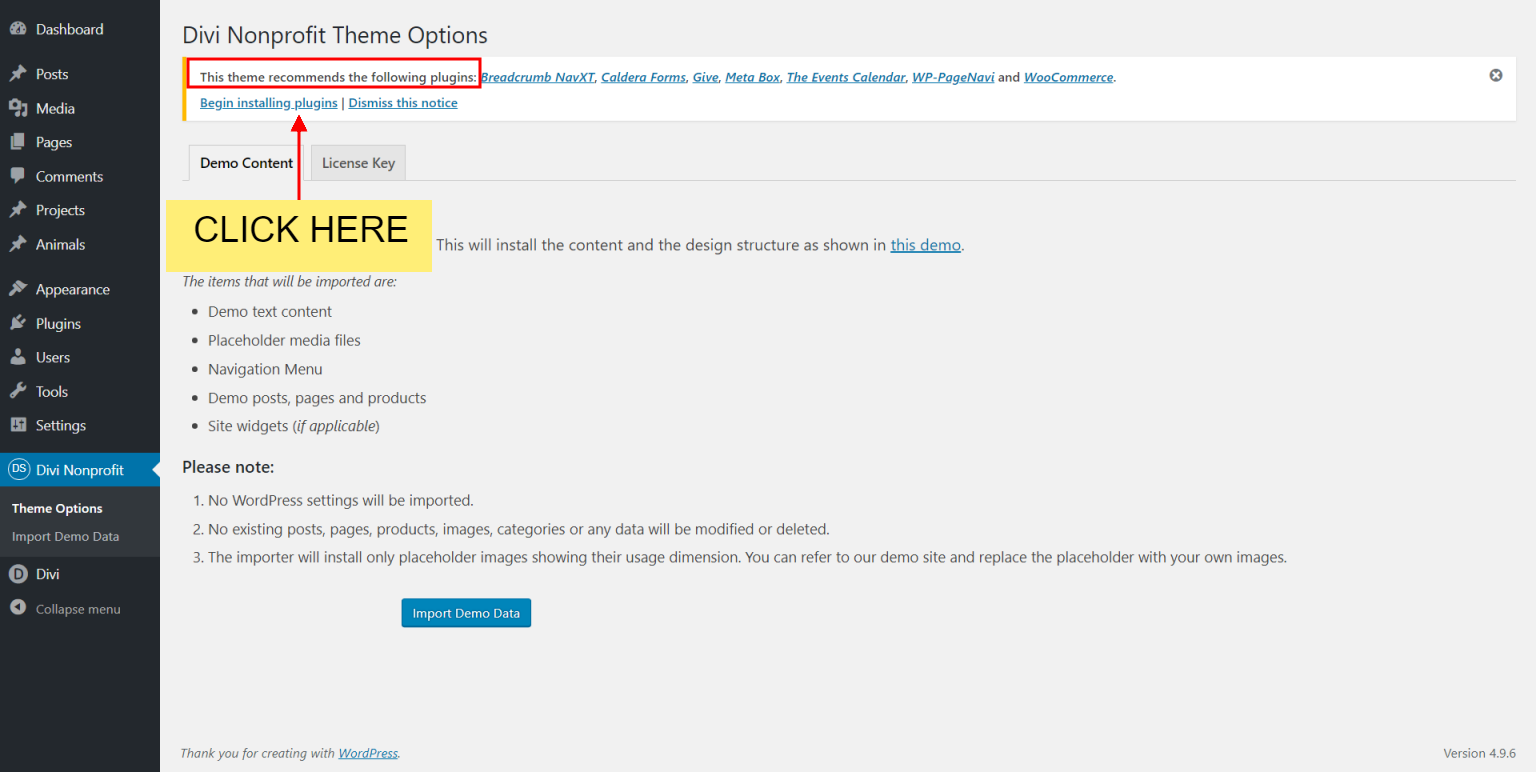
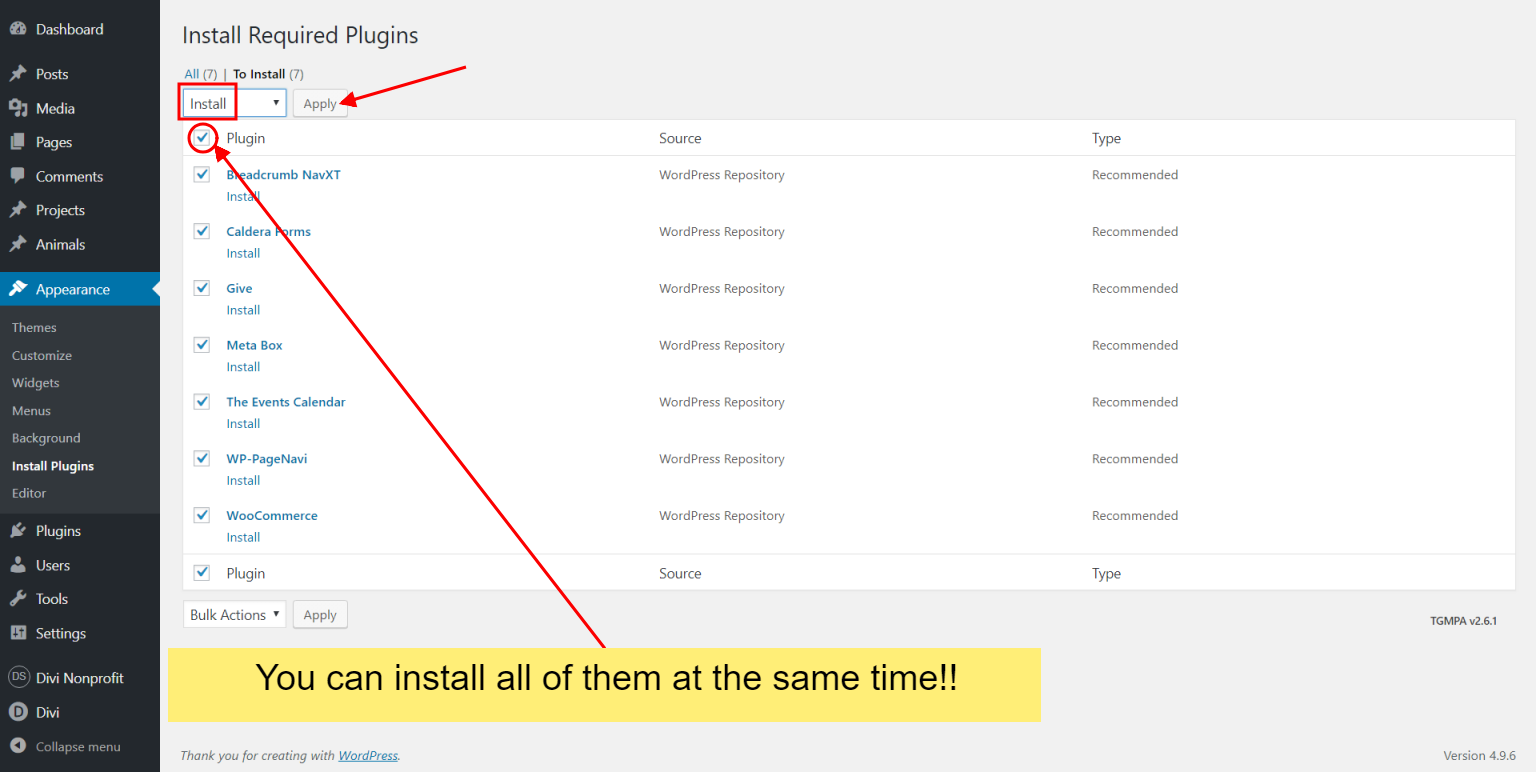
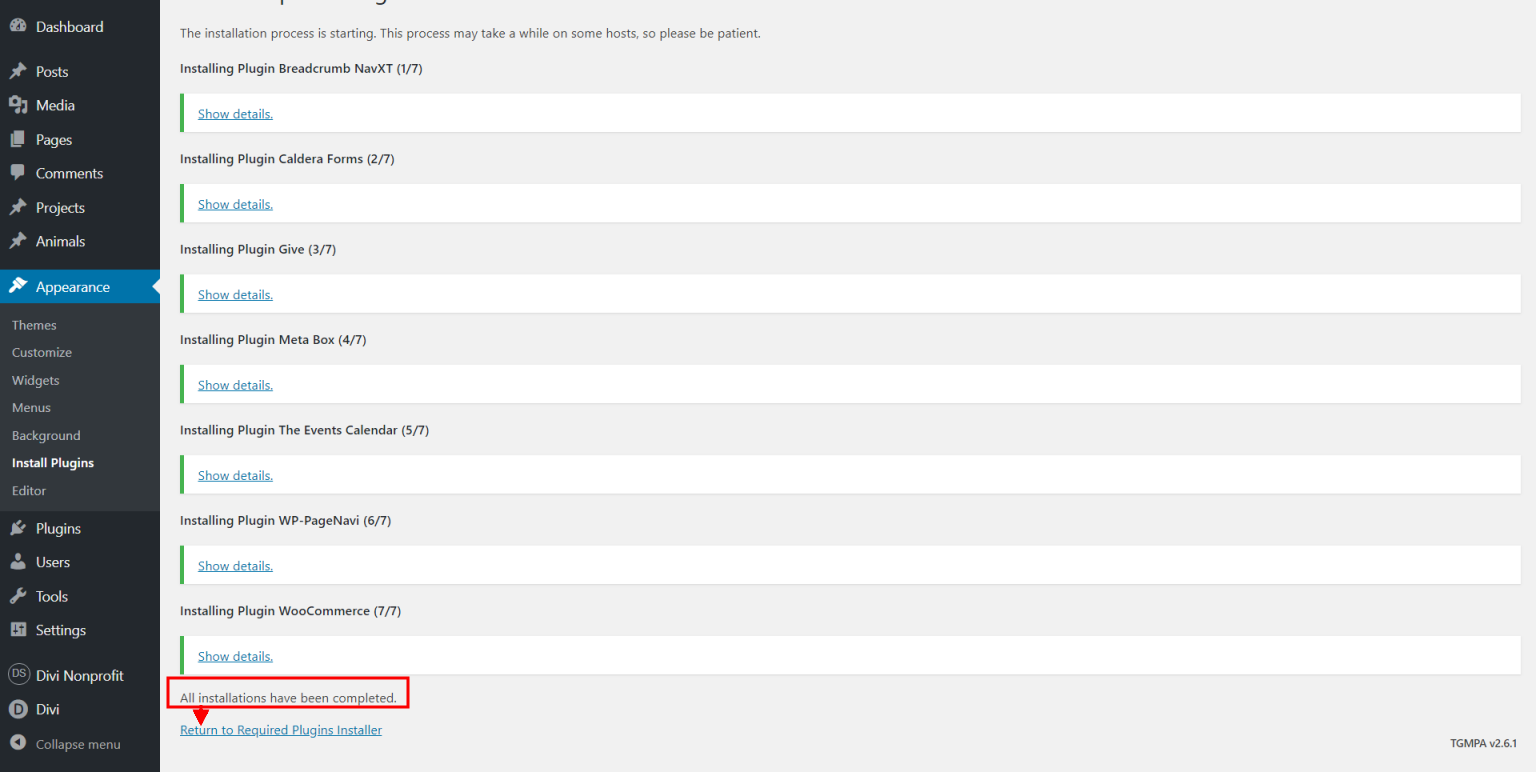
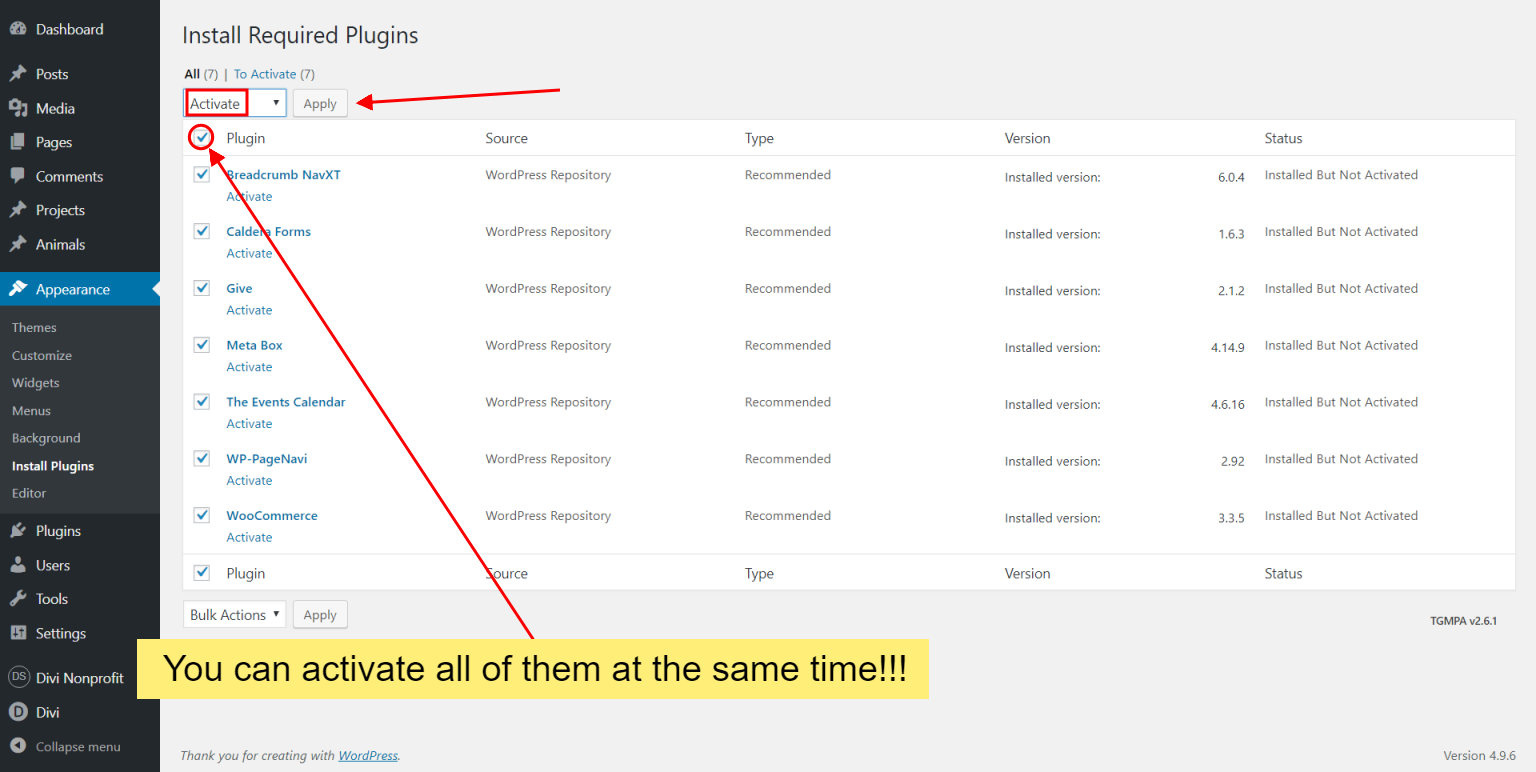
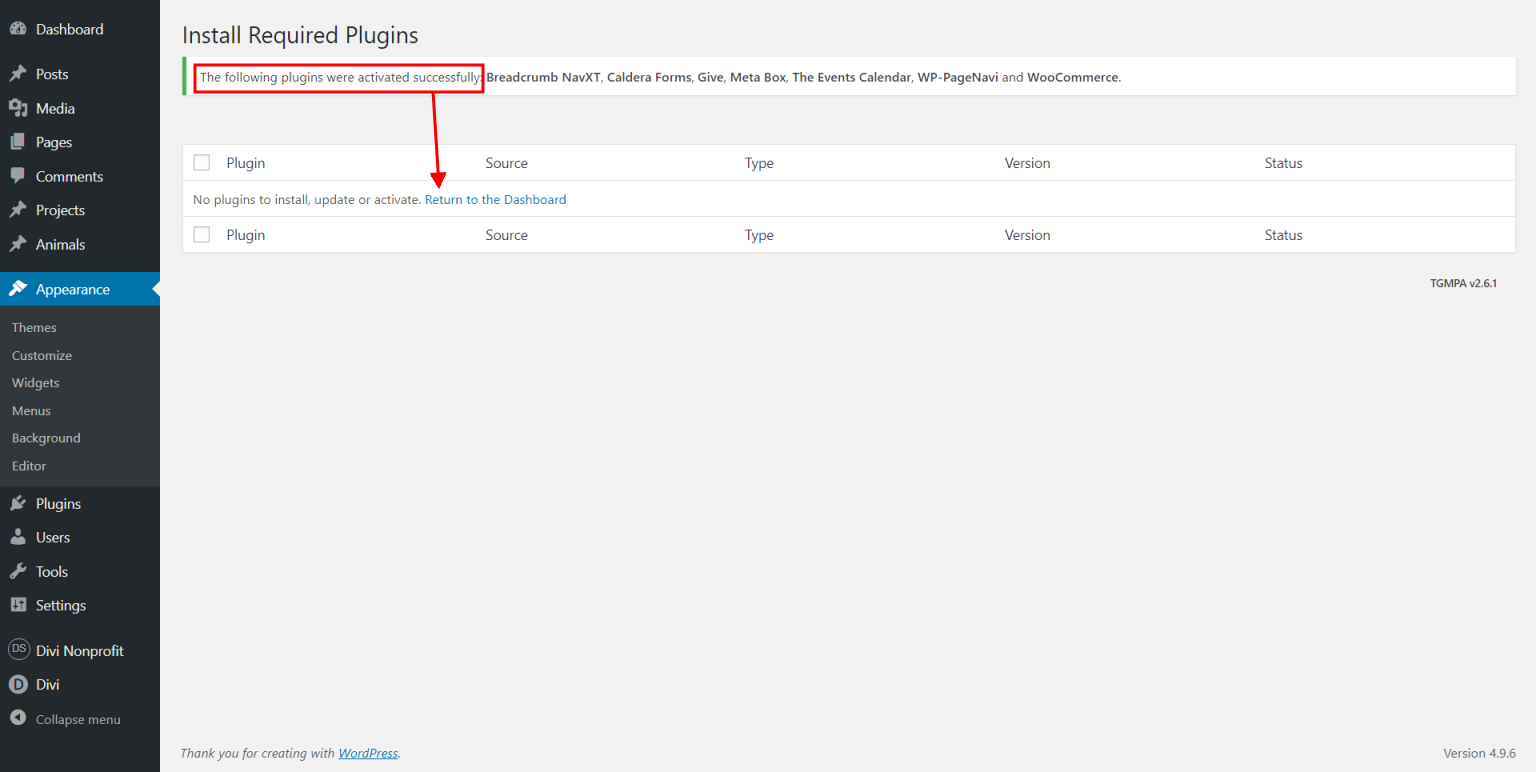
Install recommended plugins
Once the theme is installed on your site, the system will suggest you install & activate some Plugins. Please click the Plugin Names or Begin Installing Plugins link on the dashboard screen and start the process. This function is, however, optional.
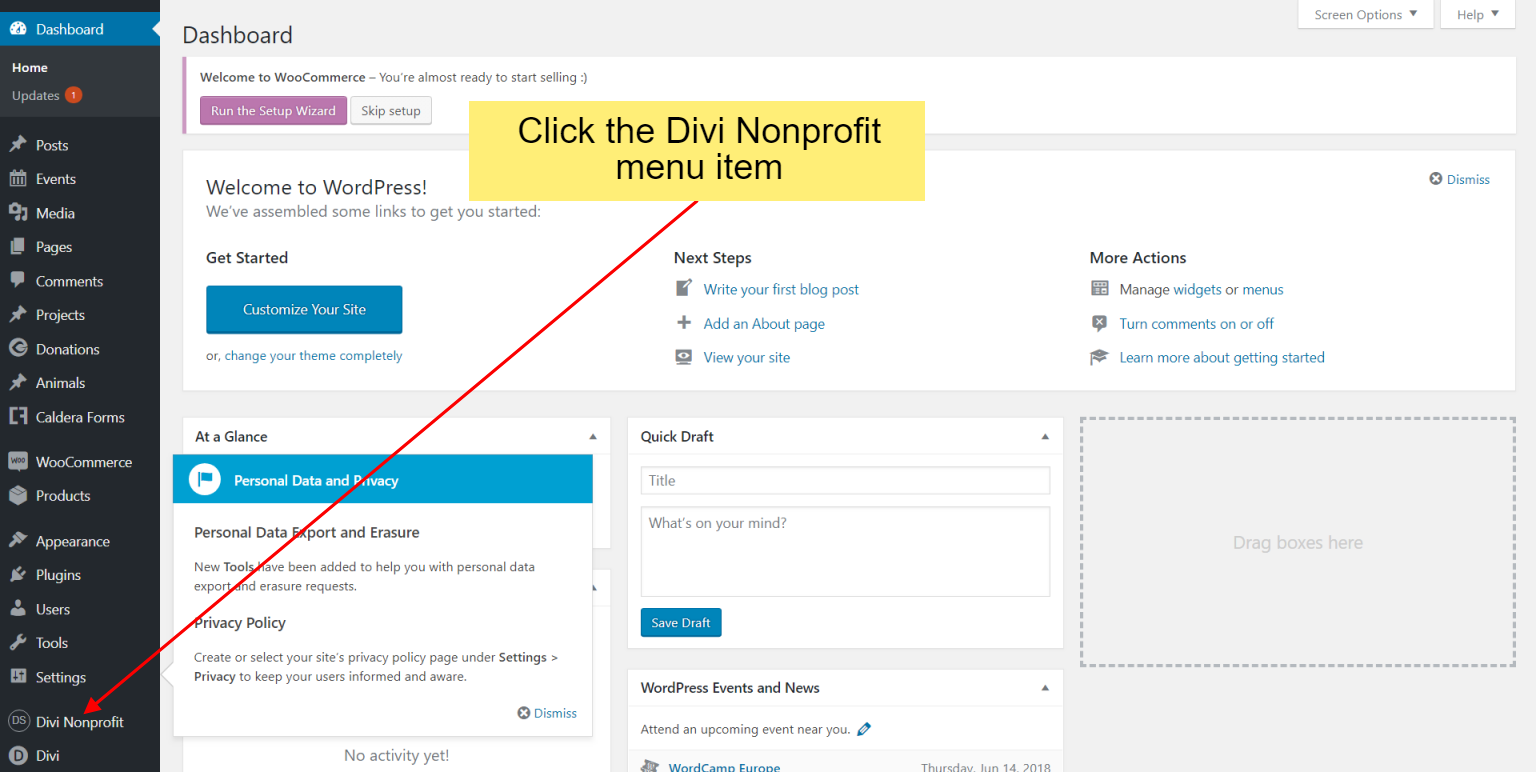
For the next step, click on the 'Divi Nonprofit' menu item on the left panel.
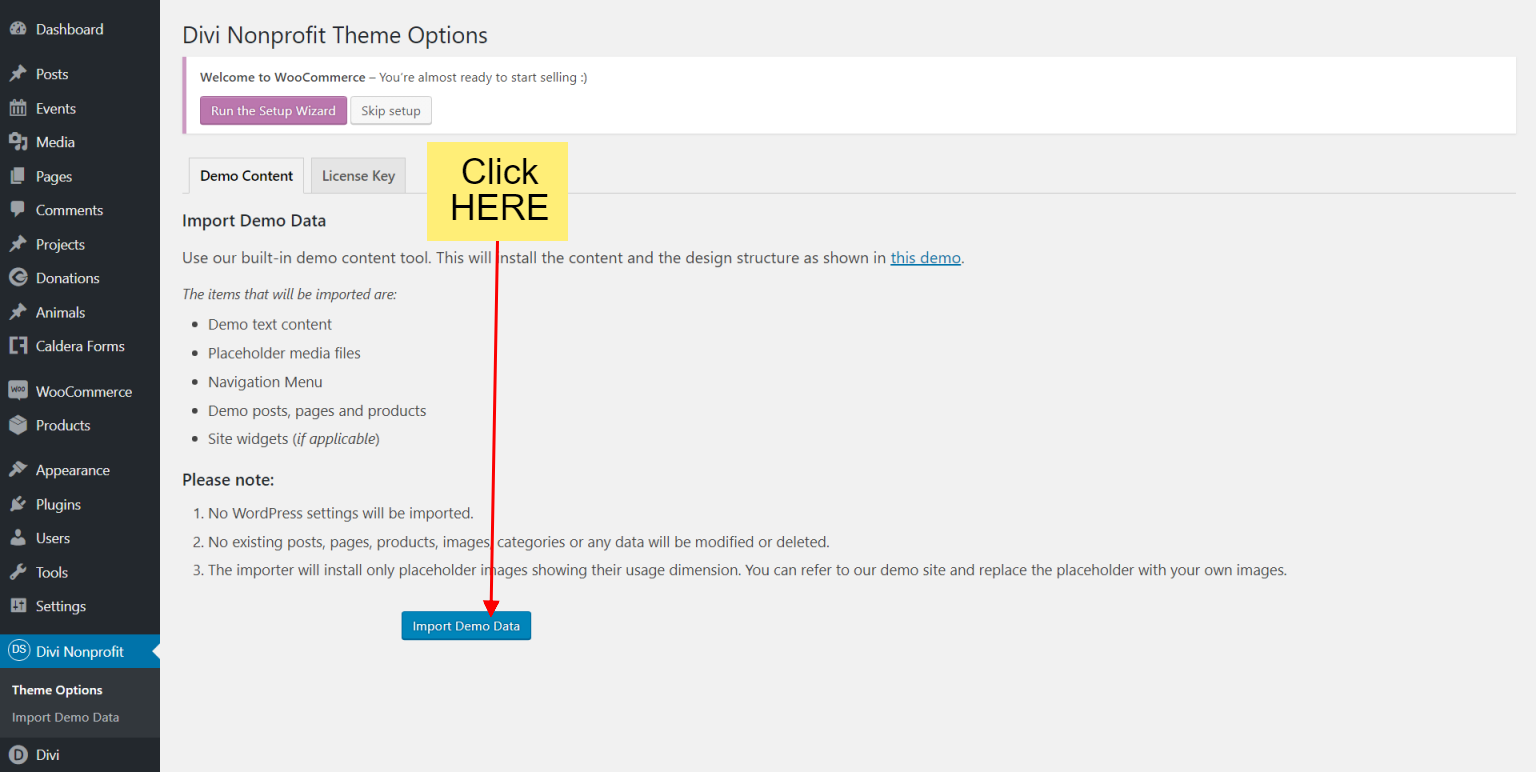
Import Demo Data
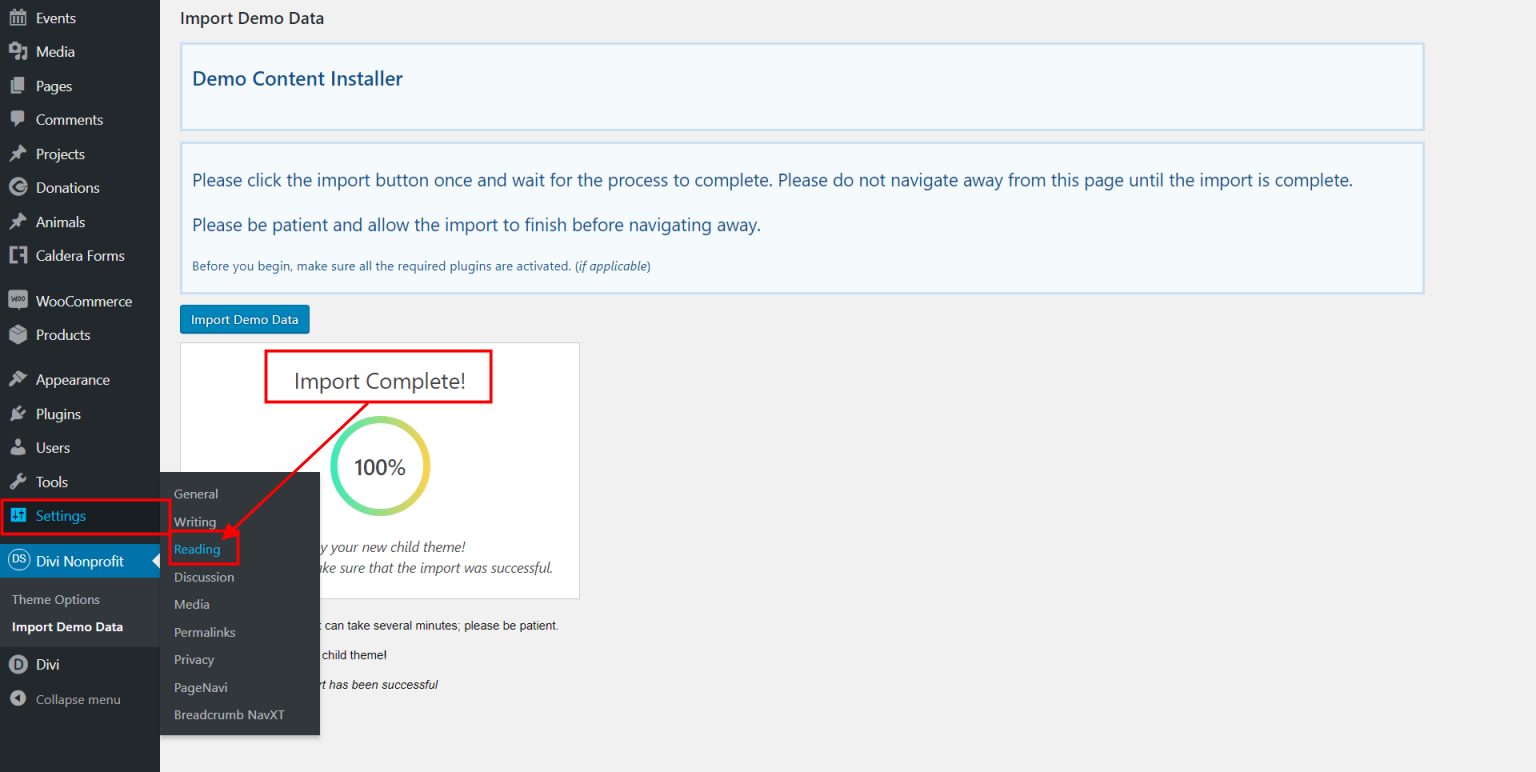
From the WordPress Dashboard, go to the newly added tab bearing the name of your "Divi Nonprofit" child theme on the left admin panel. Under that menu, please click on ‘Import Demo Data’ and then follow the instructions provided on the page. Please be patient while the demo data of the Divi Nonprofit child theme is imported into your site.
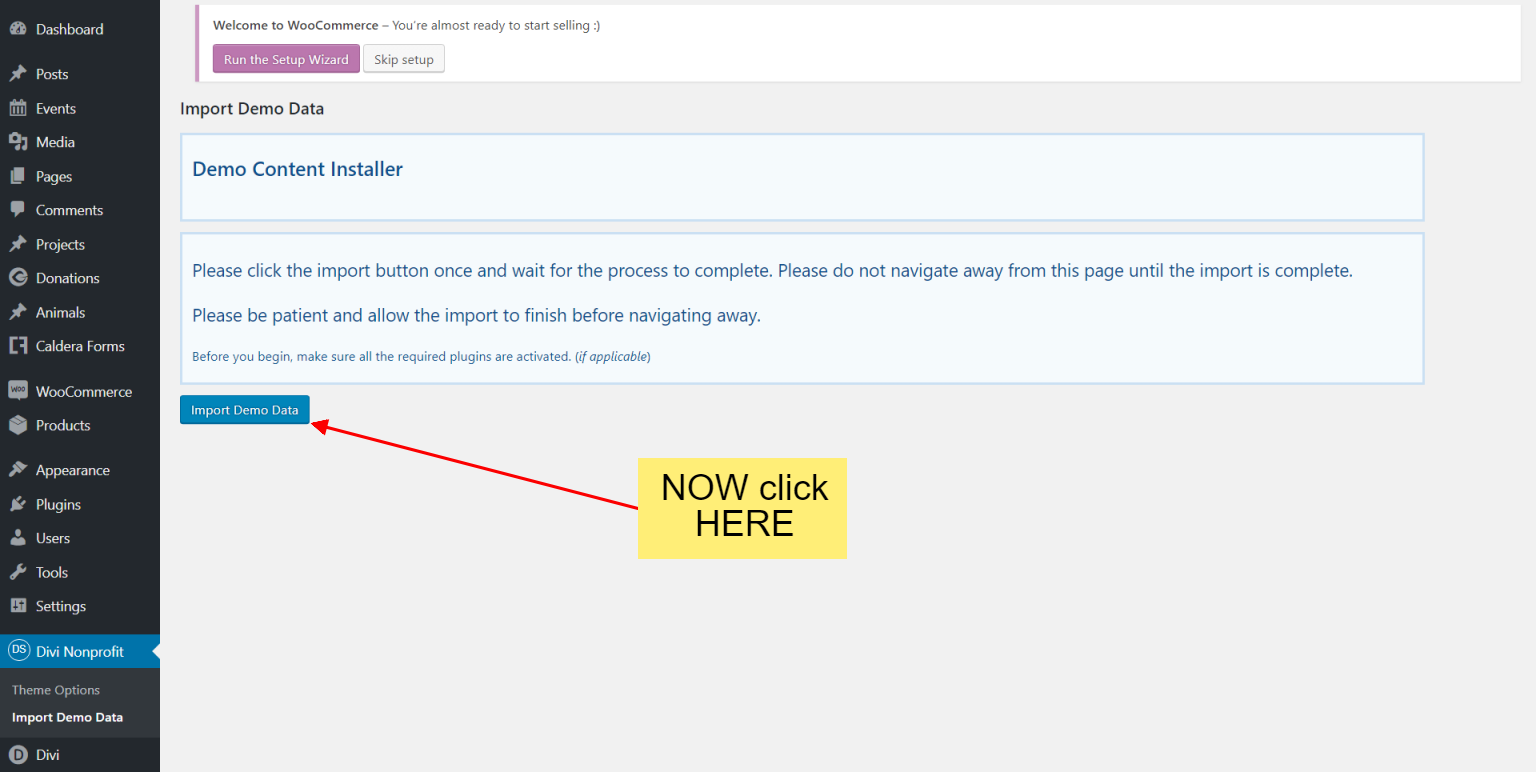
Wait for the circle counter to hit 100% and for the "Import Complete!" message.
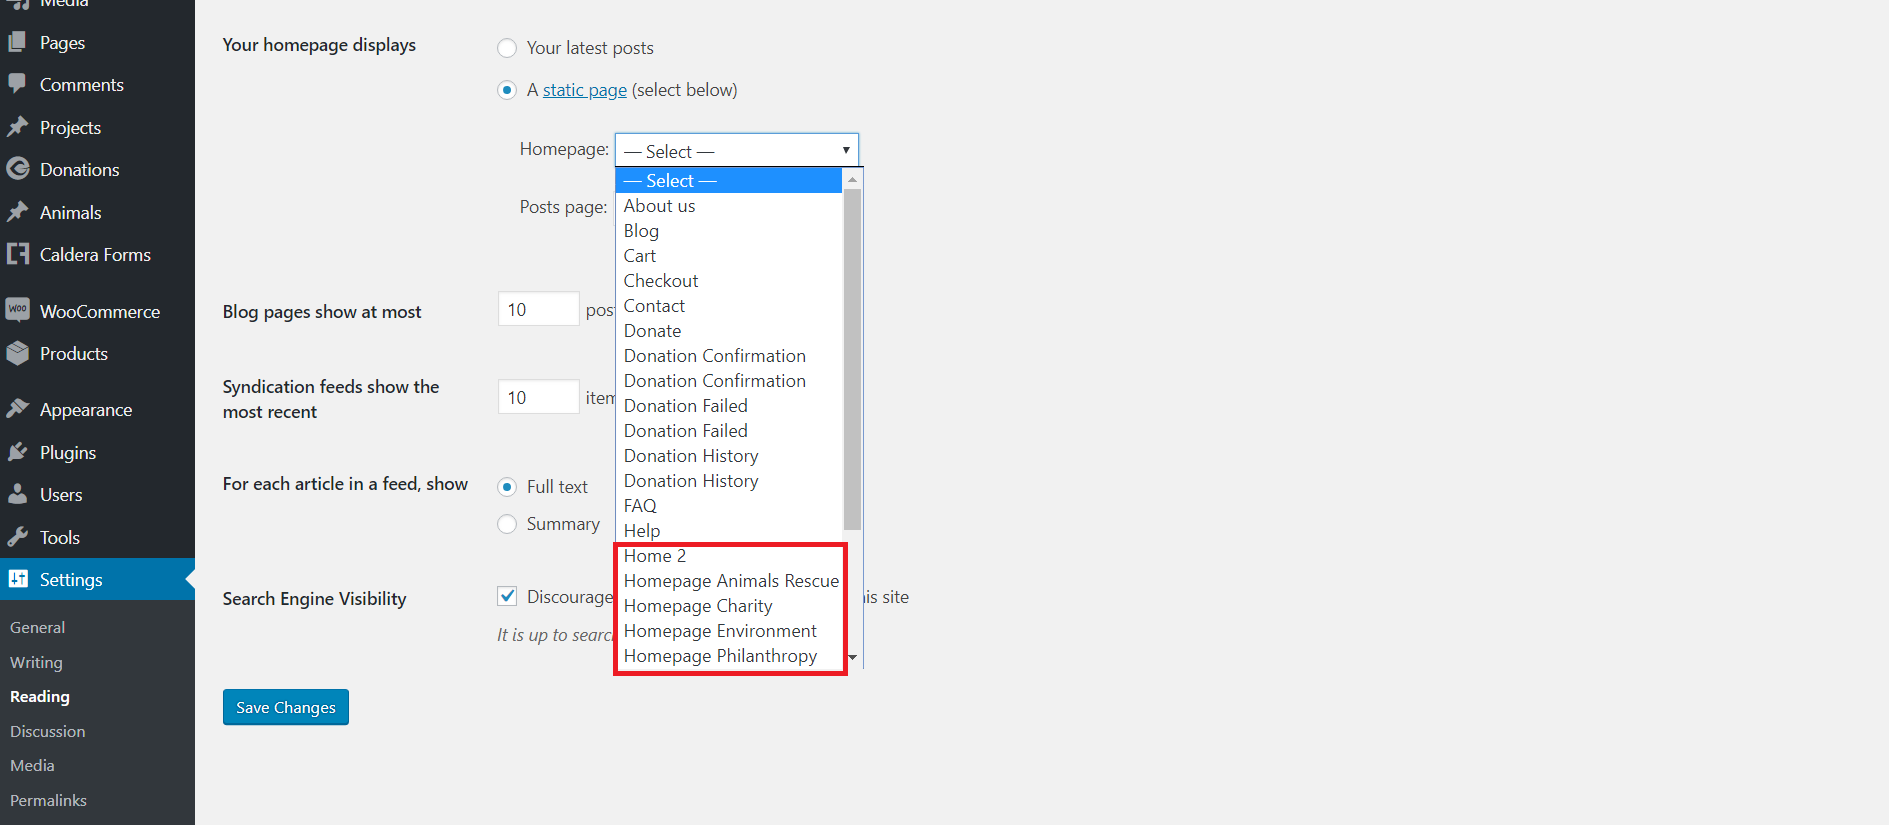
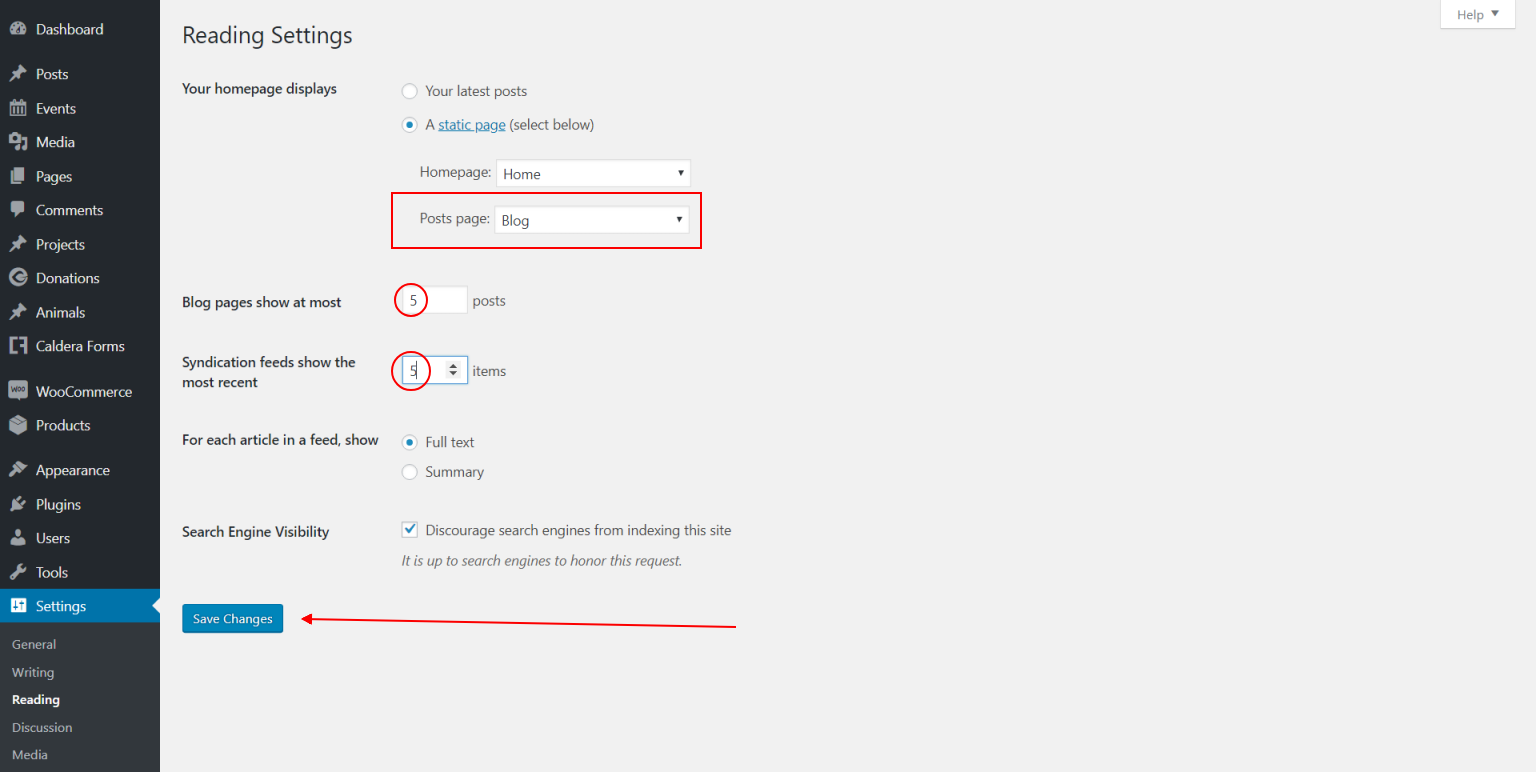
Set homepage and posts page
Move to the settings area in your left Admin panel. Click ‘Reading’, under ‘Your homepage displays’ select ‘A static page’ and for the Homepage drop-down menu select either ‘Home’ or any of the 4 other homepage options provided.
While still on the Reading Settings, choose 'Blog' for your posts page and also set both, the 'Blog pages show at most' and the 'Syndication feeds show the most recent' Settings to '5' as well.
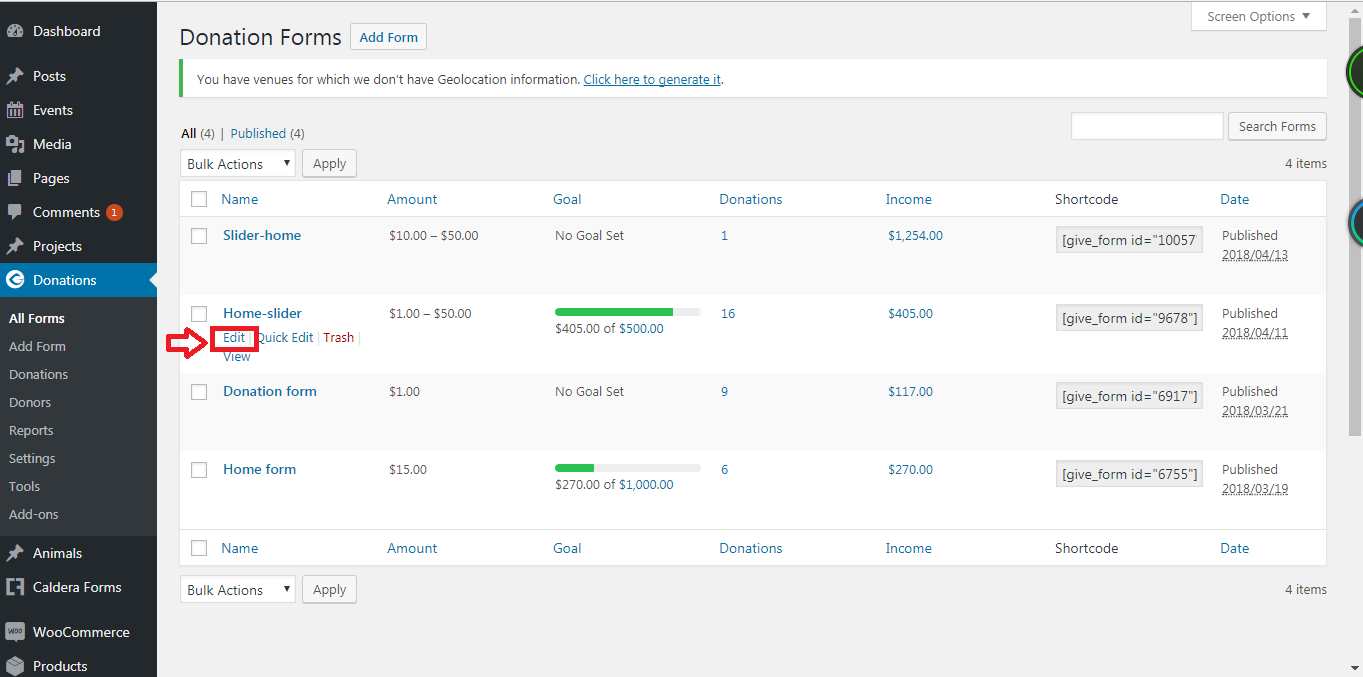
Settings the donations form for the home slider
Navigate to 'Donations' >> 'All Forms' and click on the 'Edit' link under the Home-slider form item.
The page will open on the 'Donation options' tab where there will be only one Donation Level set by default to $1.00. Click the blue 'Add Level' button.
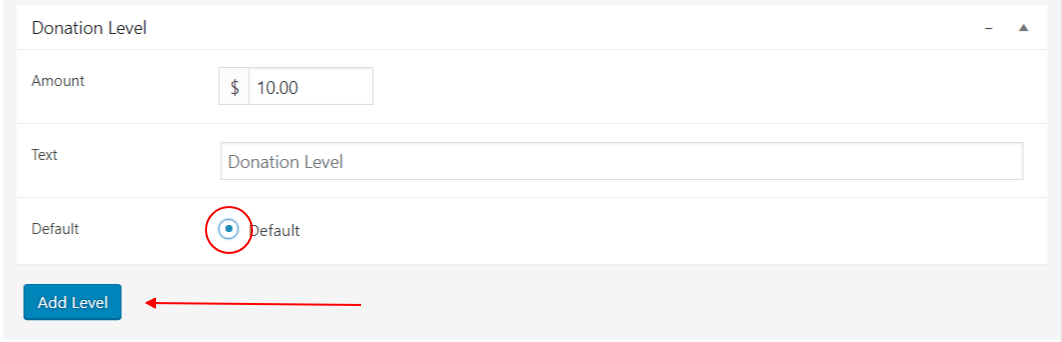
Set the amount to $10.00, tick the 'Default' radio button and click the 'Add Level' button one more time.
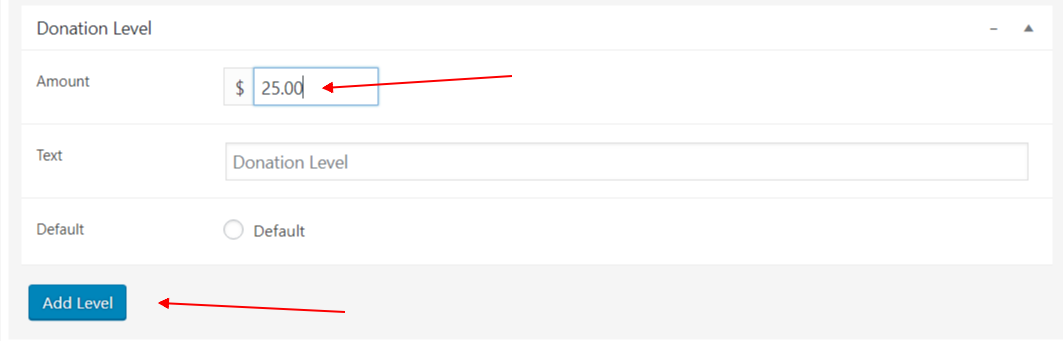
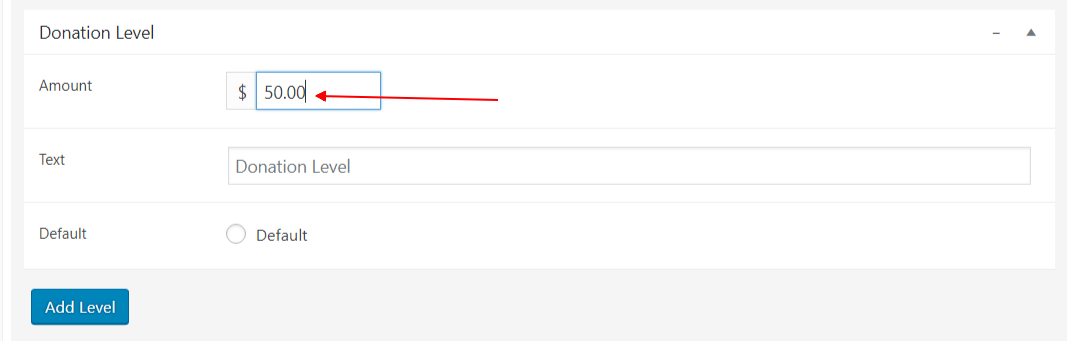
Repeat the above step to add levels of $25.00 and 50.00
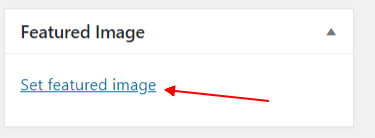
After setting the Donation Levels, click the 'Set featured image' link on the right-hand sidebar.
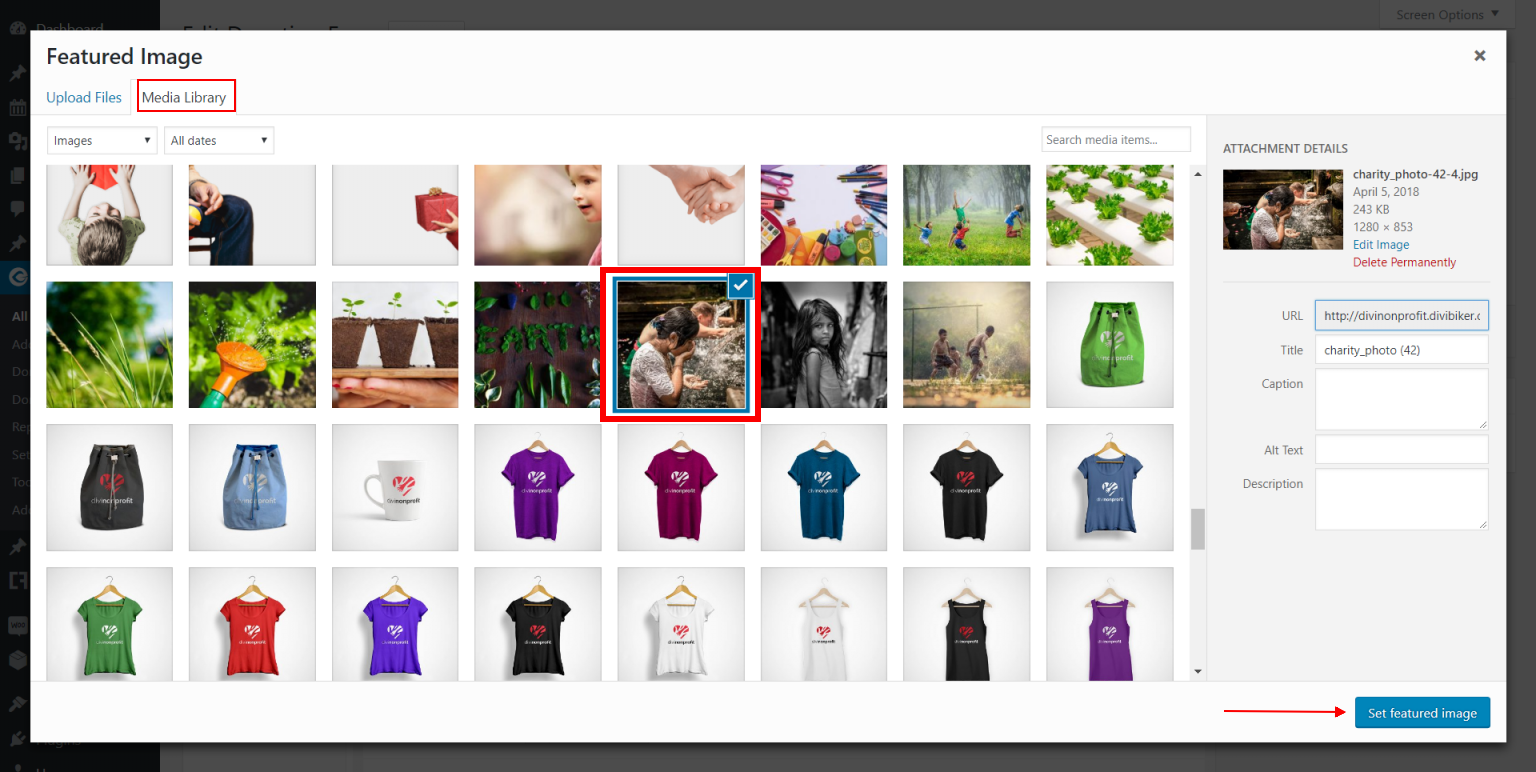
When the Featured Image modal opens, click on 'Media Library', select your image and then click the 'Set featured image' button.
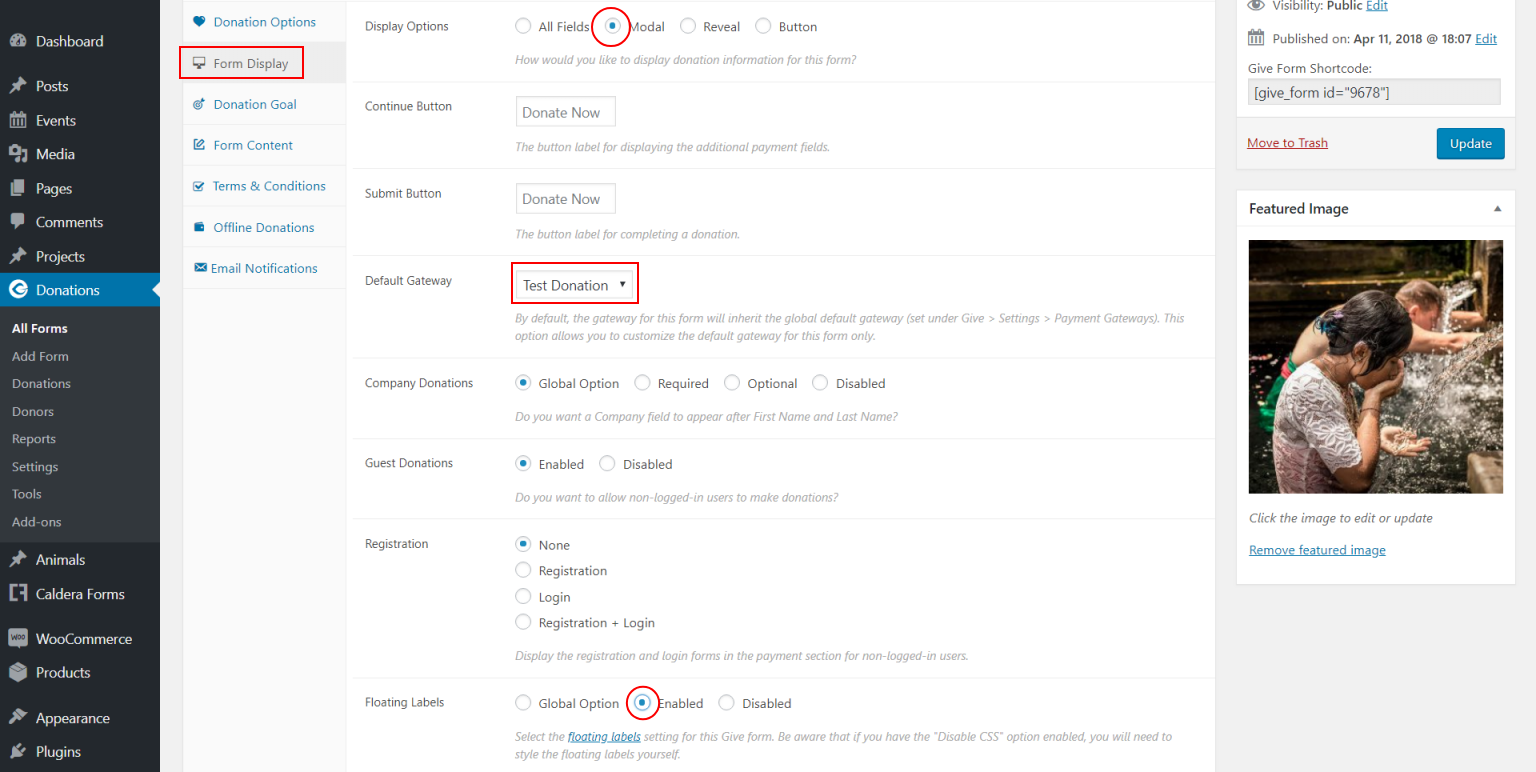
Next, click the 'Form Display' tab and:
- set the Display Options by enabling the 'Modal' radio button.
- set the Default Gateway to 'Test Donation'.
- set the Floating Labels to 'Enabled'
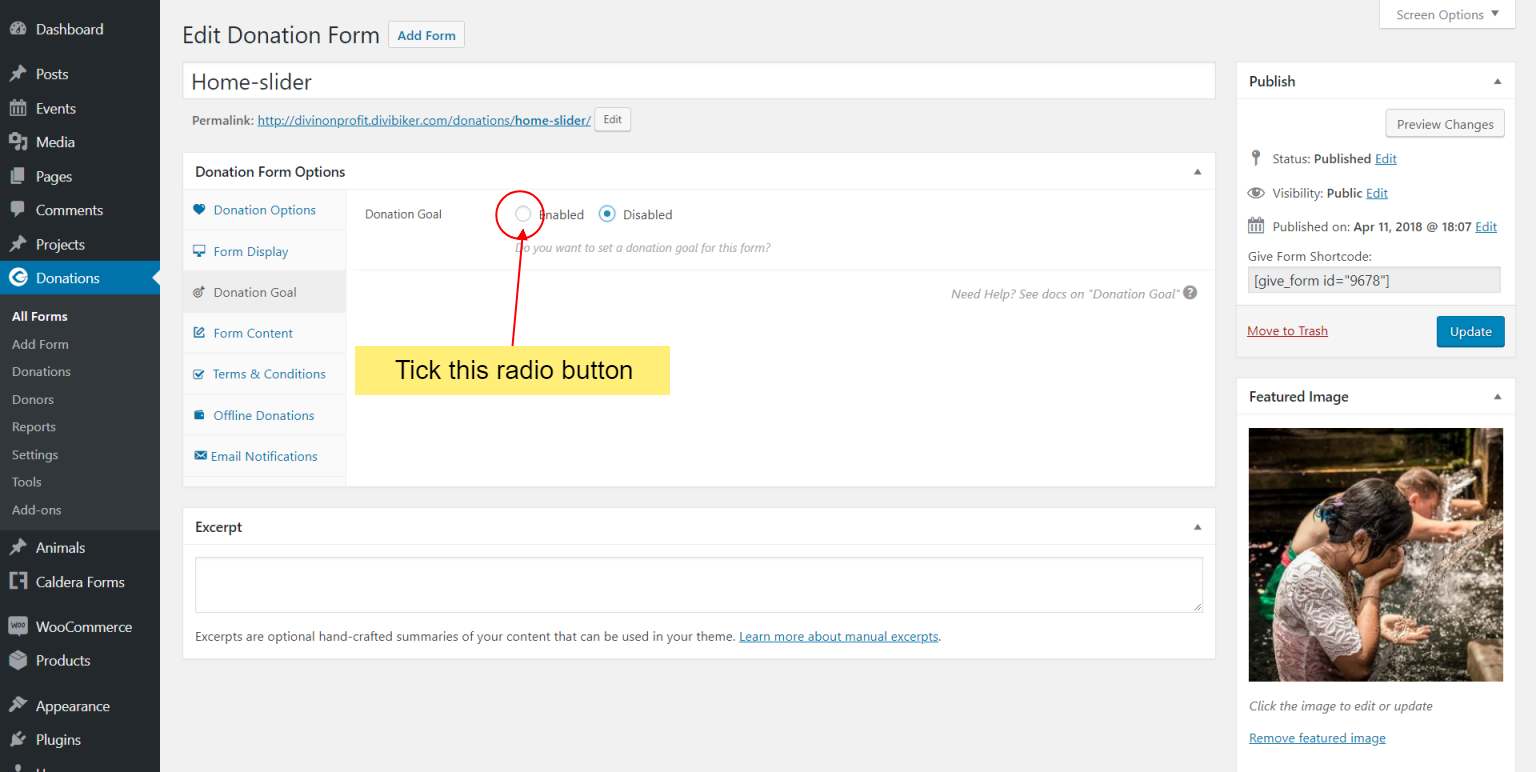
Next, click on the Donation Goal tab and choose the 'Enabled' radio button.
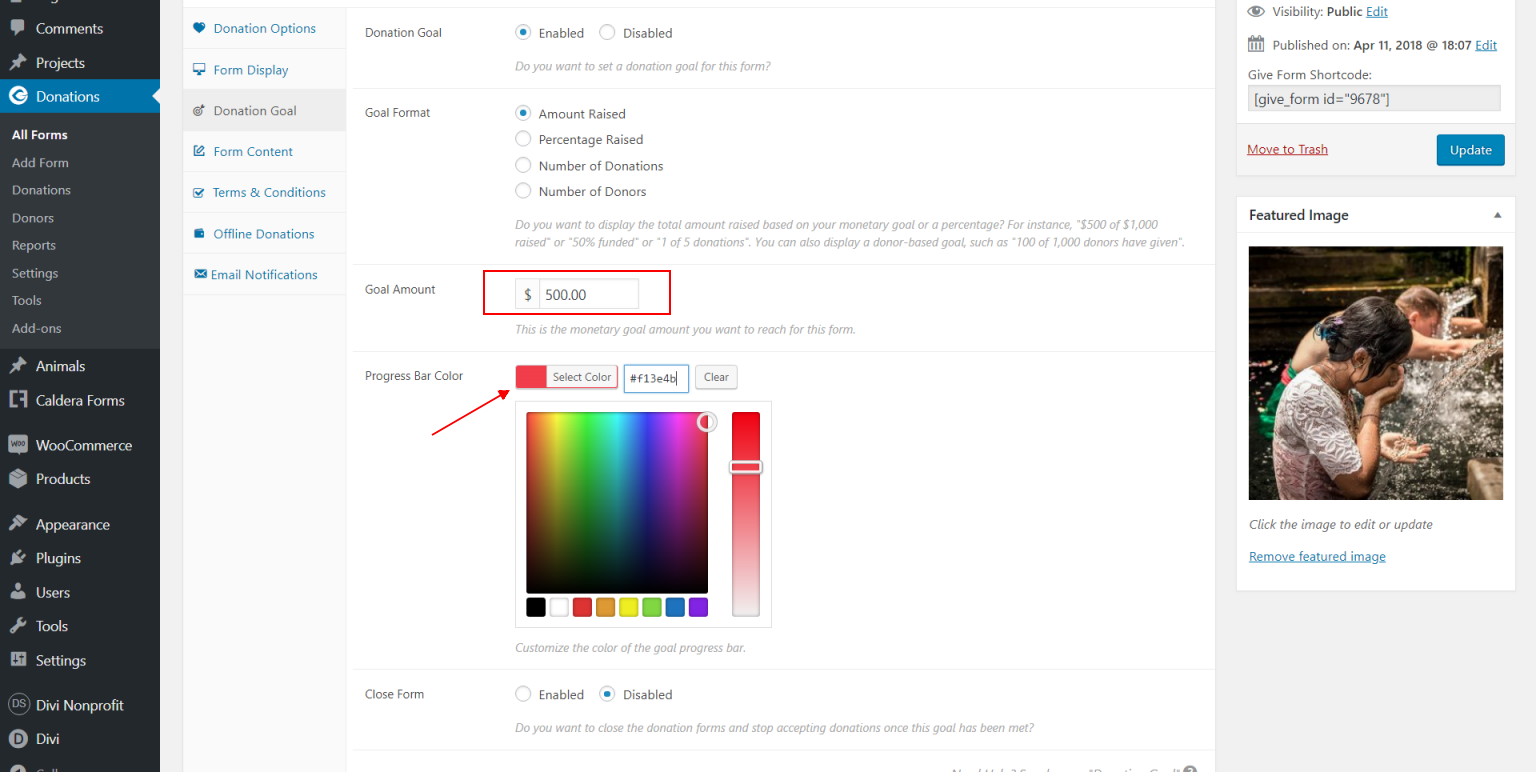 The previous action will open up new options:
- Set the Goal Amount to $500.00
- Set the Progress Bar Color to #f13e4b
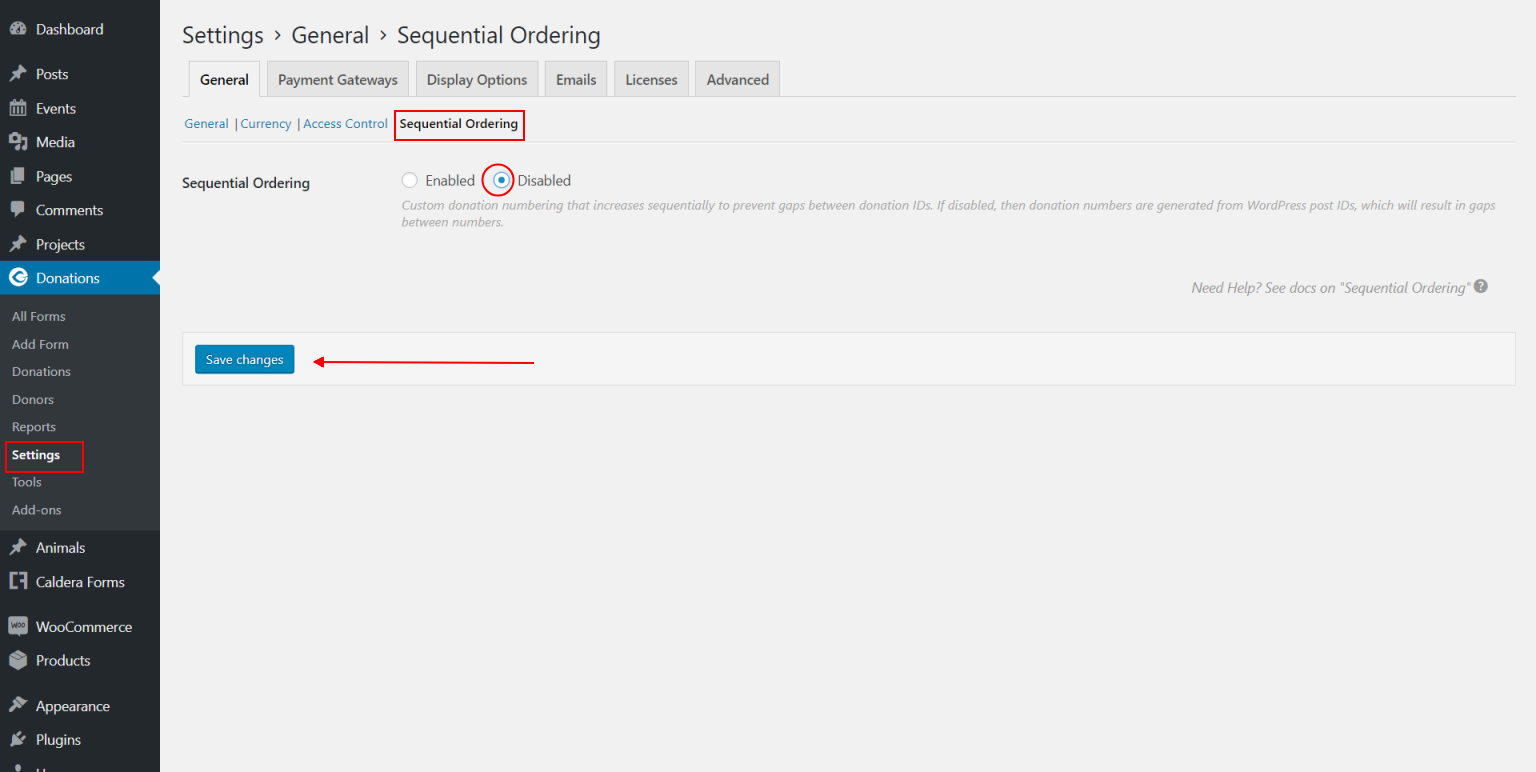
When finished, please remember to click on the blue 'Update' button in the right sidebar. Next click the 'Settings'link under the Donations Admin Menu Item and pick the 'Sequential Ordering' link under the 'General' tab. Disable by ticking the appropriate radio button and 'Save Changes'.
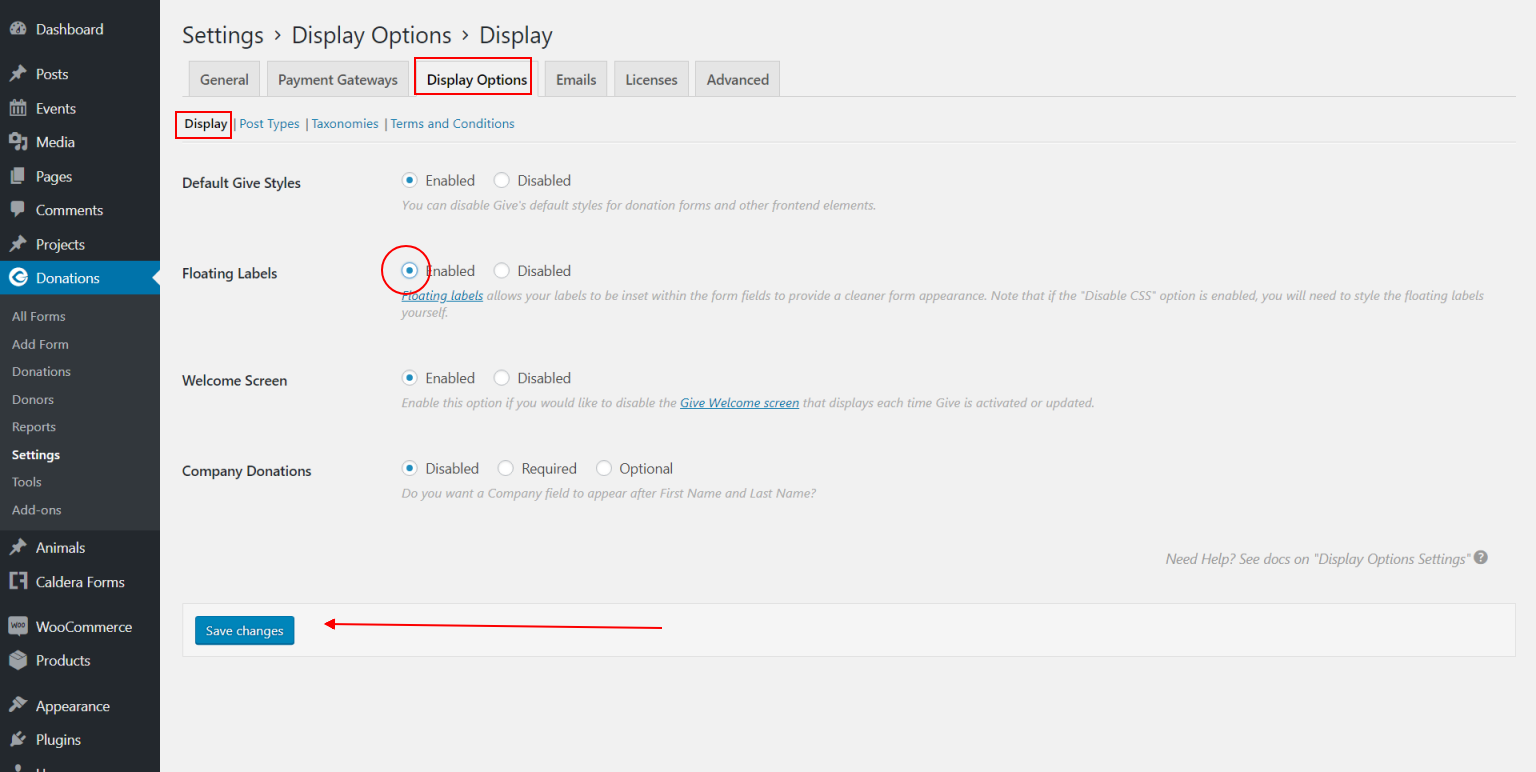
Next, click on the 'Display Options' tab and enable the Floating Labels.

Using the customizer to modify default colors
On the left Admin Menu, navigate to 'Appearance' >> 'Customize'.
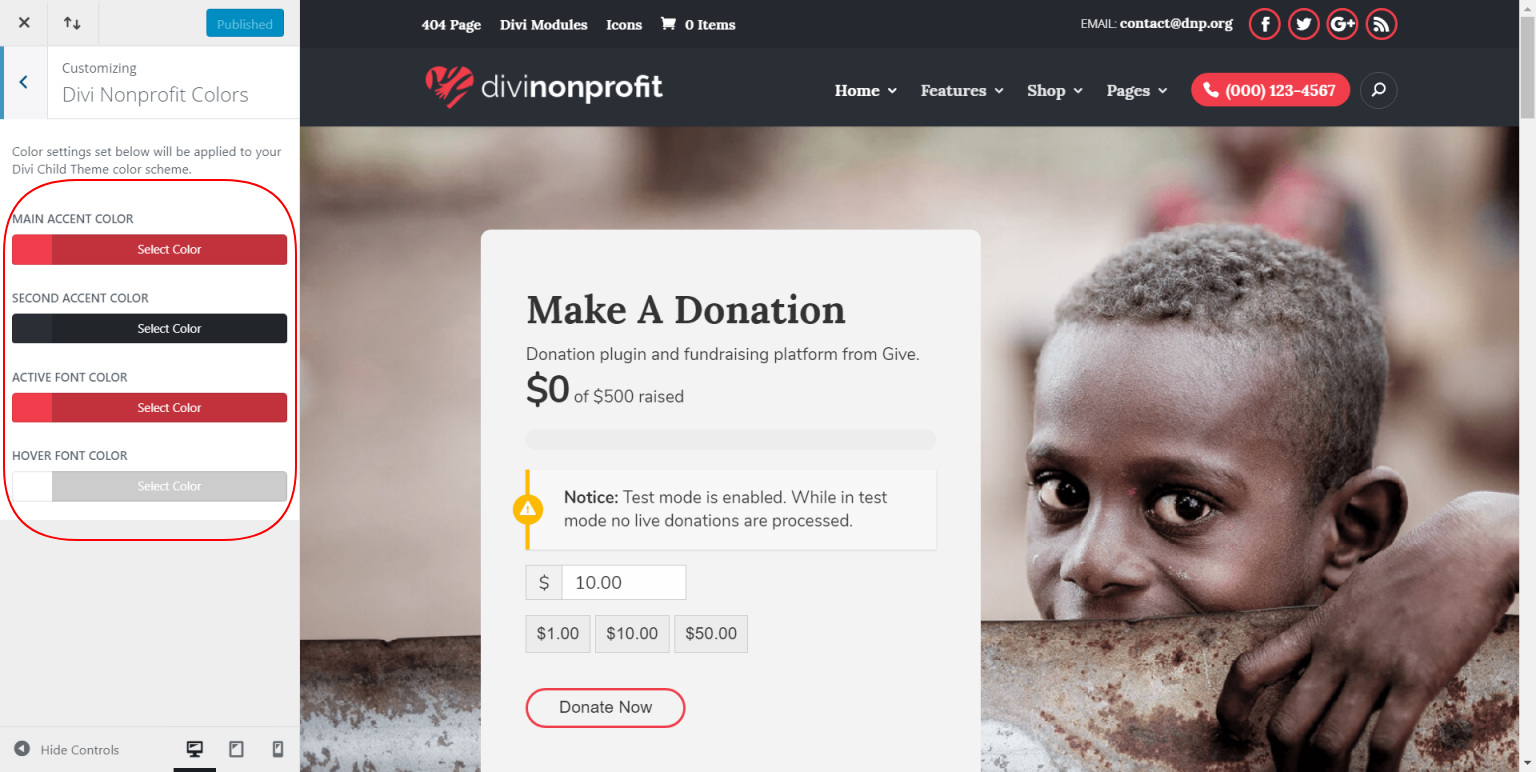
Click on the 'Divi Nonprofit Colors' to display this:
FAQ
To remove the "Animals" post type from the Divi Nonprofit child theme:
- Navigate to Appearance >> Editor
- Find functions.php in the right sidebar and click on the link to populate that layout in the text editor
- Scroll down to line 45
- Remove sections 2 & 3:
- Update Page.
Making a mistake while editing PHP files could crash your site, BACKUP BEFORE ATTEMPTING THIS!
Changelog
See the Changelog text for this plugin by following this link: https://wpzone.co/product/divi-nonprofit/changelog/