Divi Photography
Designed to help photographers showcase their creative work with style, the Divi Photography Child Theme comes complete with every feature needed to run a successful photography business online. With a beautiful aesthetic, plenty of premium features and extremely powerful additions, the Divi Photography Child Theme will help photographers catapult their careers.
Quick Links
FAQ
- What are the child theme server requirements?
- What is demo data and how it works?
- Where to find help?
- What is a child theme and why should I use one?
- What is the difference between WP Zone's premium child themes and a standard (blank) child theme?
- What do I get when I buy a child theme?
- How do I choose the right child theme for my website?
- Do your child themes only work for one industry?
- I don’t know how to code. Will I be able to customize my child theme?
- I’m looking for a standard, blank Divi child theme. How can I make one of those?
- What about support, licensing, and updates?
- Are child themes included in your membership?
Whenever you update child theme, all of the files are updated so if you have made any changes to these files, those changes will be erased. We don't recommend making any changes to the child theme files.
Requirements
Before you can install and use our child theme, you need to ensure that you have the proper environment setup. The requirements are provided here
Installing
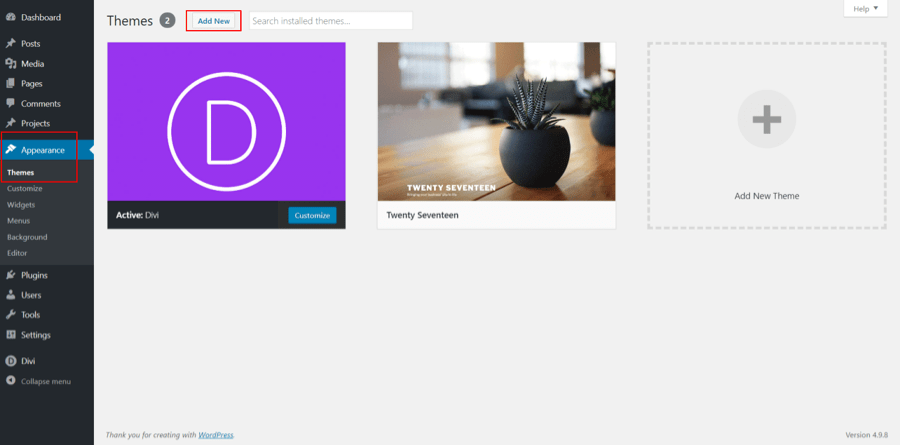
Please upload the Divi Photography Child Theme to you your self-hosted WordPress website. Make sure the Divi theme is already installed and activated. Navigate to Appearance >> Themes and click the "Add New" button.
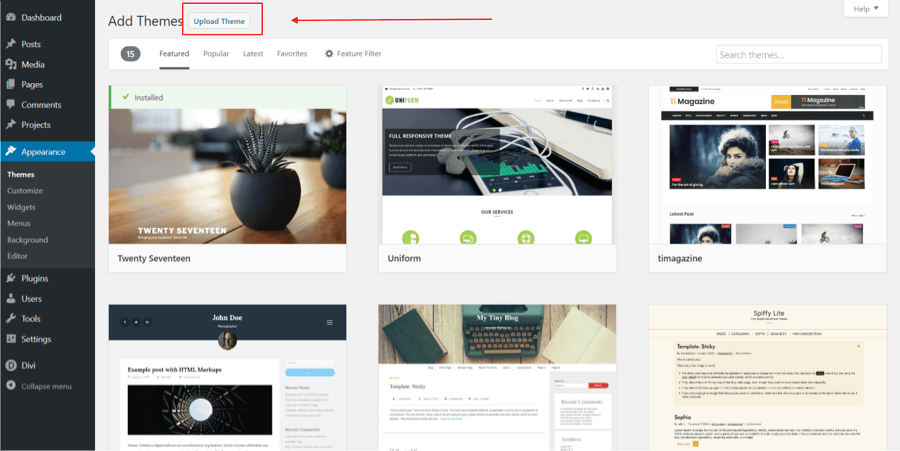
When the Add Themes page loads, click on the "Upload Theme" button.
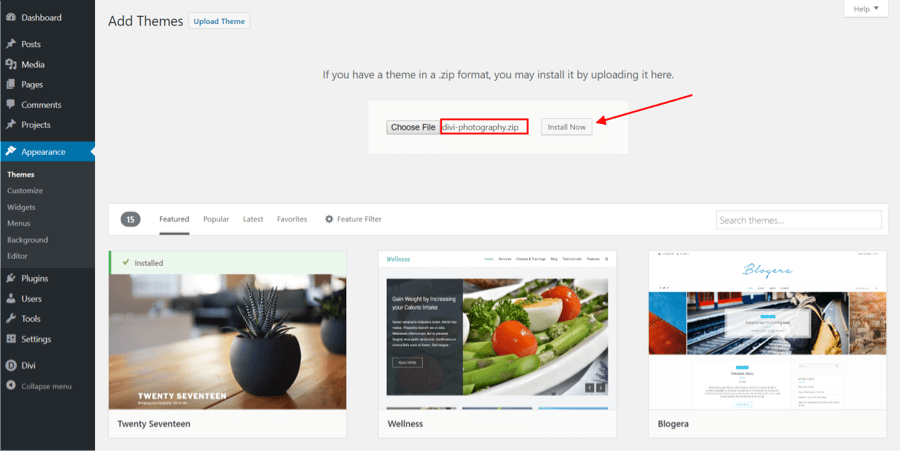
Choose the .zip archive you downloaded and then click the "Install Now" button.
When the success page loads, click the "Activate" link.
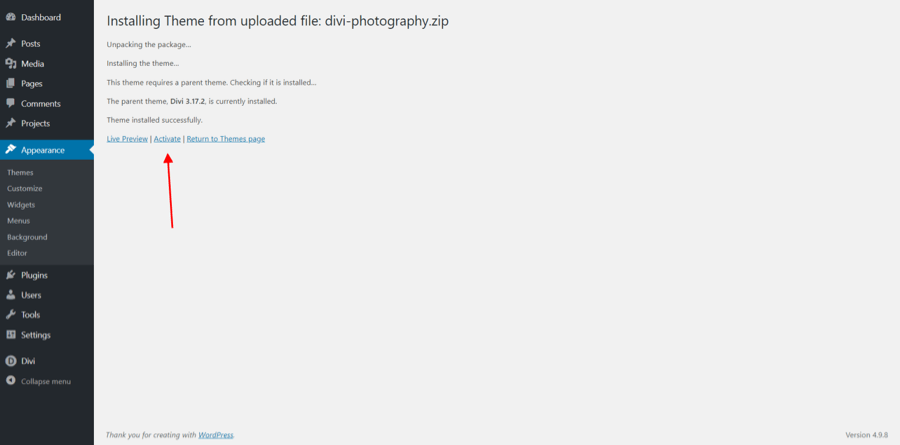
The child theme is loaded and active, the last step for installation is to register the License key.
Enter license key
Tip: Skip this section if you purchased Divi Photography on Elegant Themes Market Place
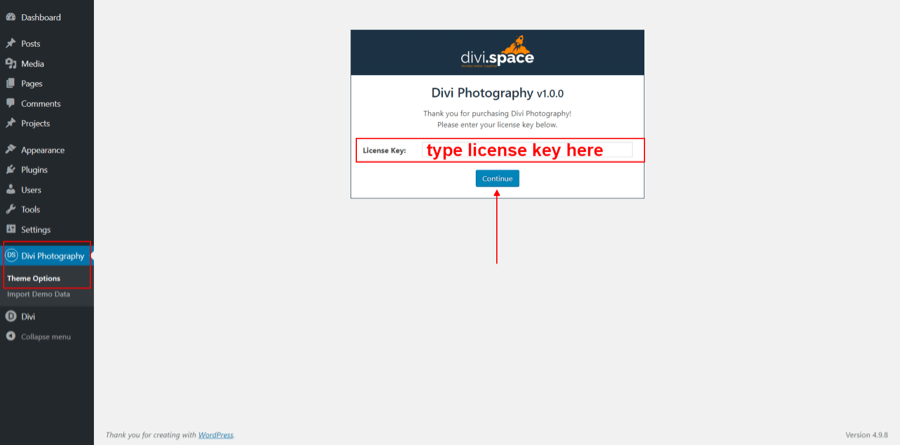
After you've activated the theme you need to click on the "Divi Photography" menu item to display the licensing dialogue box. Enter your License Key and then hit "Continue".
Install recommended plugins
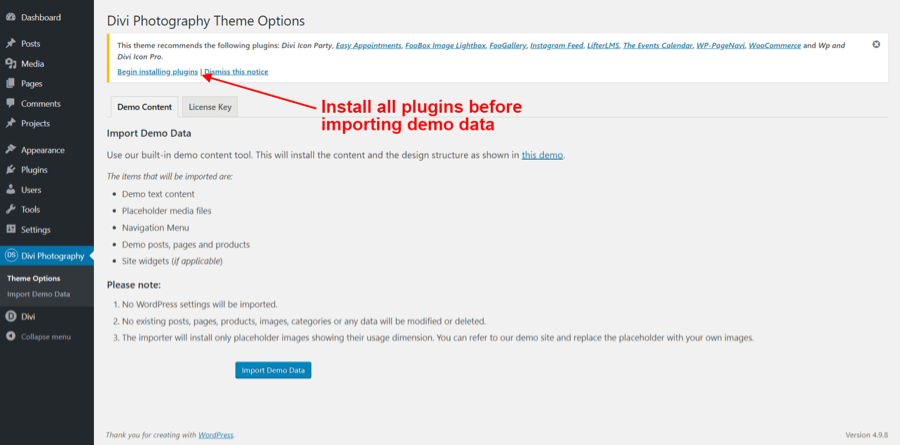
After you have successfully licensed your product you will see this screen. Click on "Begin installing plugins" for the next step of the configuration process.
Tip: Recommended plugins may be different if you purchased Divi Photography on Elegant Themes Marketpace
Once the theme is installed on your site, the system will suggest you install & activate 10 Plugins. Please click the Plugin Names or Begin Installing Plugins link on the dashboard screen and start the process. This function is, however, optional. Please be advised that this Child Theme comes with a WooCommerce shop as one of its layouts. If you choose not to install the suggested Plugin(s), the shop section along with the related images and content will not be imported and you may see a message on the import page that some images have not been imported successfully. Please ignore the message.
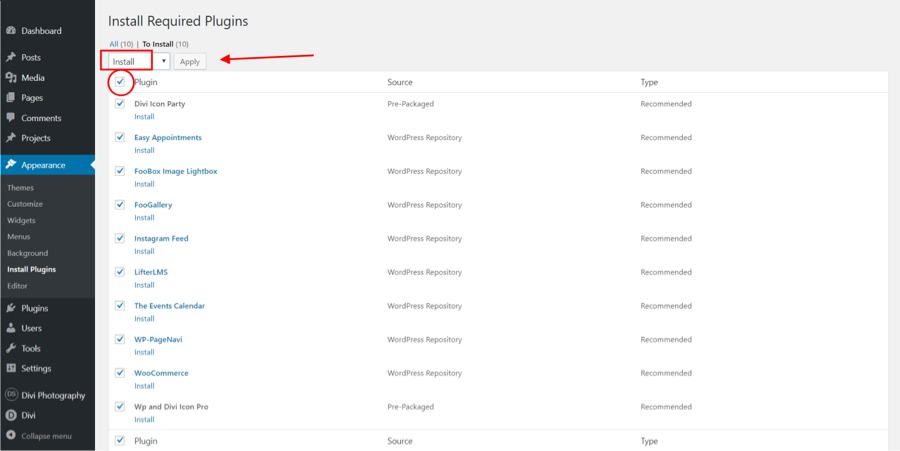
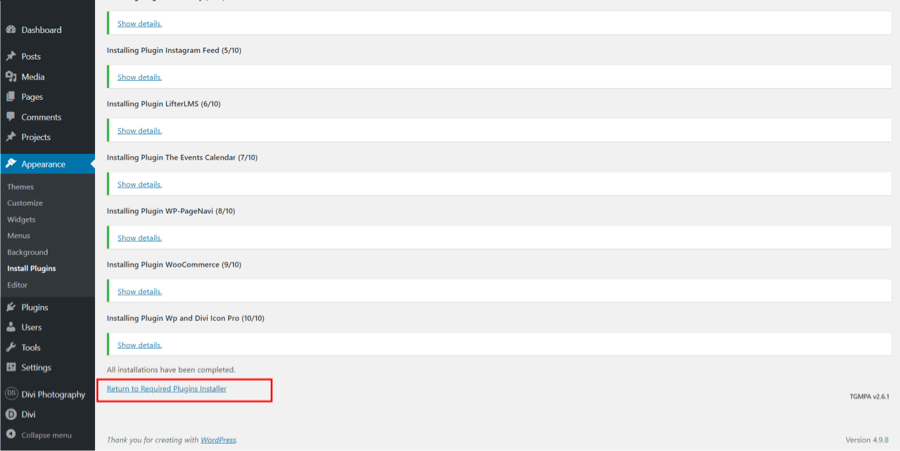
Once all plugins have been installed, Return to the Installer to activate.

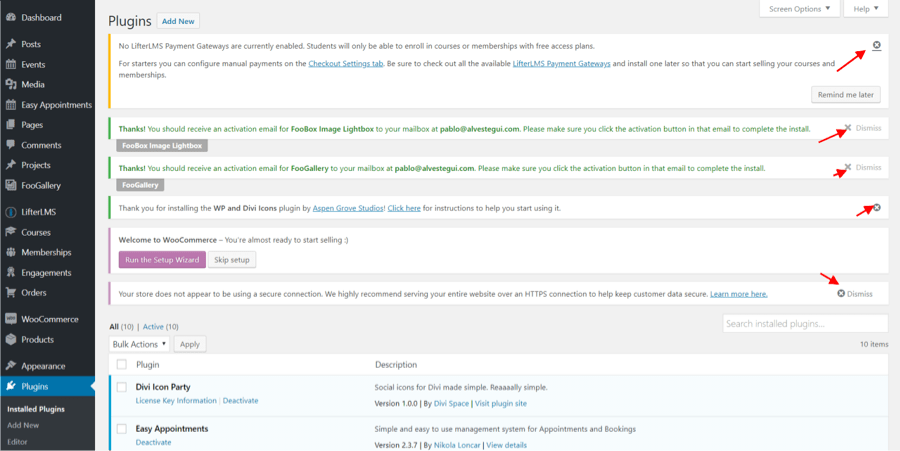
After Activation, Click on the "Return to the Dashboard" link. You will see that there are notifications to activate licenses for some plugins. You must activate the licenses in this step before importing the Demo Data.
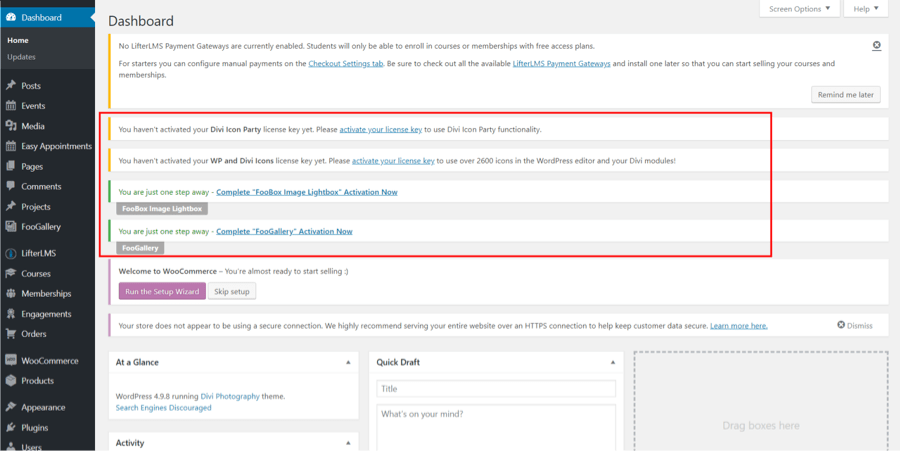
Registering the Divi Icon Party Plugin License

Skip this step if you purchased Divi Photography on Elegant Themes Marketplace
Registering the WP and Divi Icons Plugin License
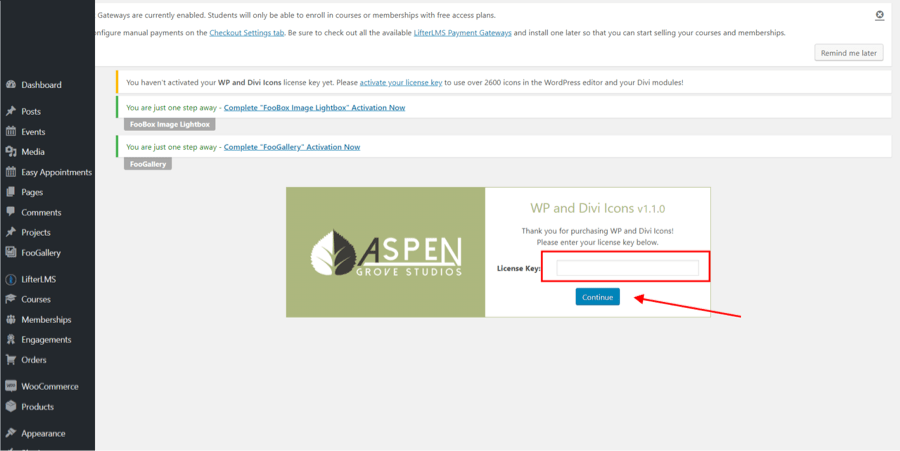
Skip this step if you purchased Divi Photography on Elegant Themes Marketplace
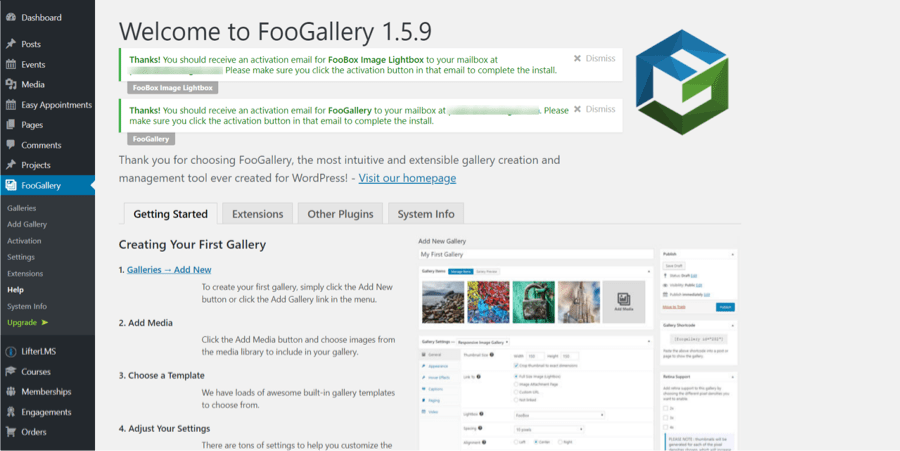
Activating FooBox
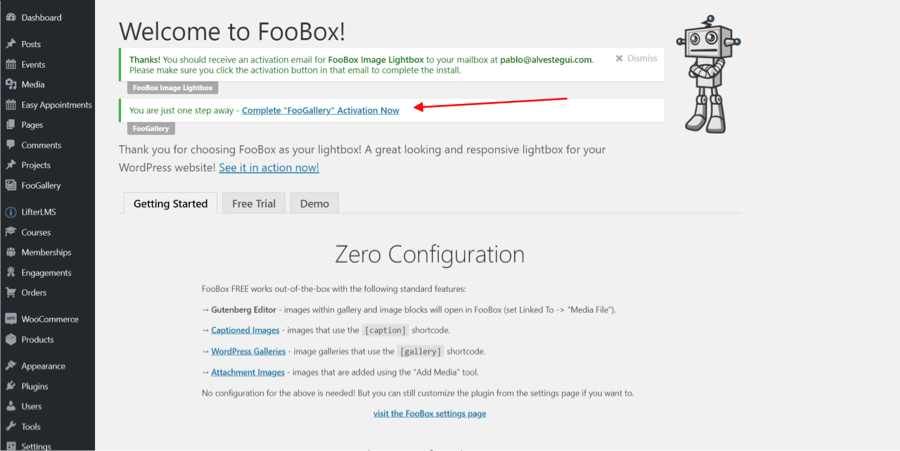
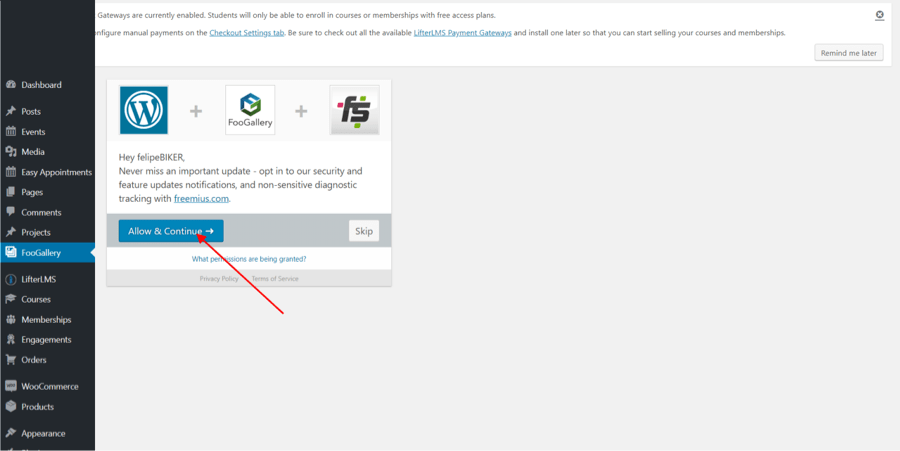
Activating FooGallery
Go ahead and dismiss the remaining notification messages.
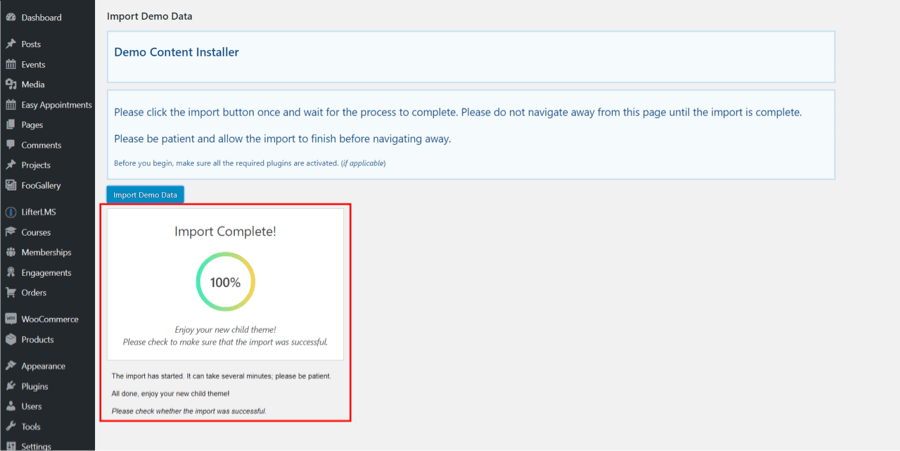
Import Demo Data
From the WordPress Dashboard, go to the newly added ‘Divi Photography’ tab on the left admin panel. Under the ‘Divi Photography’ menu, please click on ‘Import Demo Data’ only once. Please be patient while the demo data of the Divi Photography child theme is imported into your site.

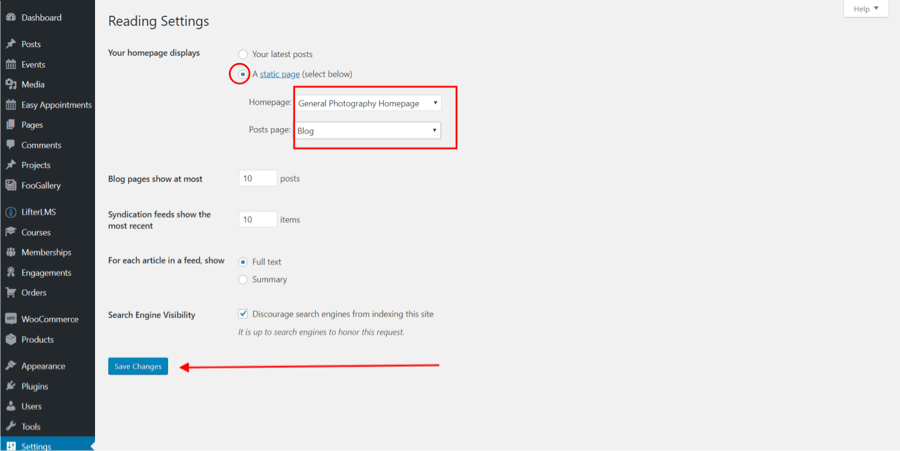
Set homepage and posts page
Navigate to Settings >> Reading and set the homepage to display a static page, then choose General Photography Homepage as your new Homepage and Blog as your new Posts page.
Configure Instagram Feed
Navigate to the Instagram Feed page:
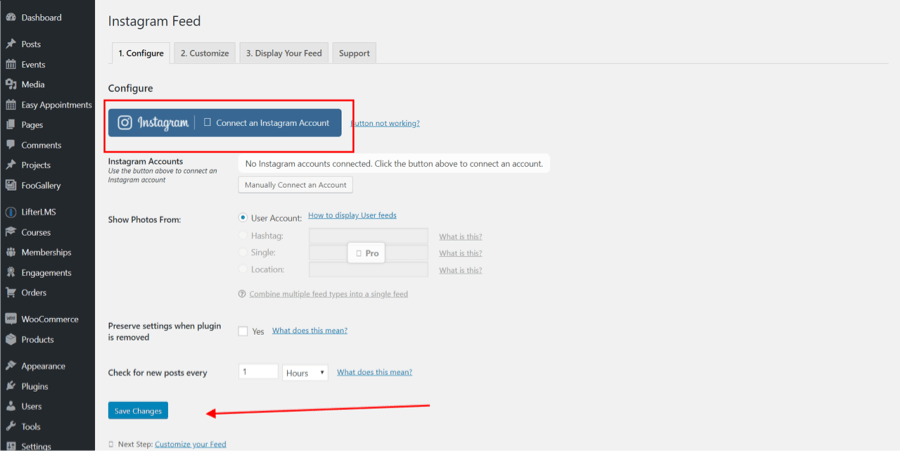
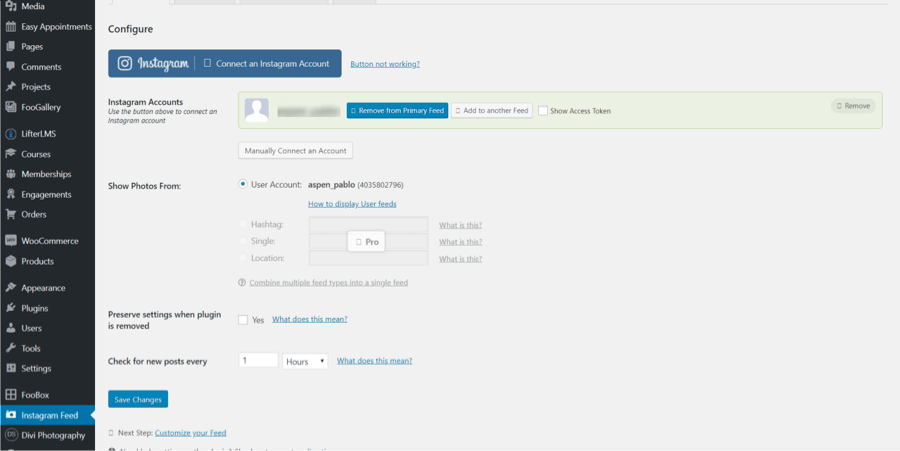
Click the Blue button. If you are not already logged in to Instagram, it will take you to Instagram’s Login Page where you must log in and authorize. If you’re already logged in to Instagram, you will automatically see the following page:
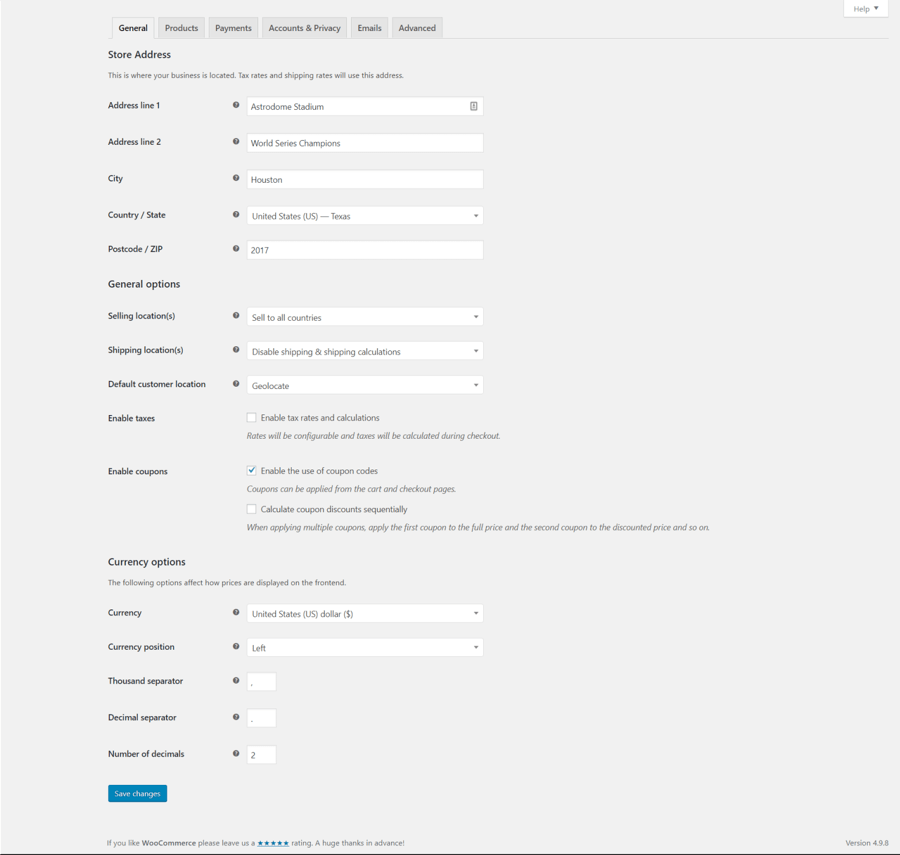
WooCommerce Settings
Navigate to WooCommerce >> Settings and in the General Tab fill in the usual information for your business and save your changes:
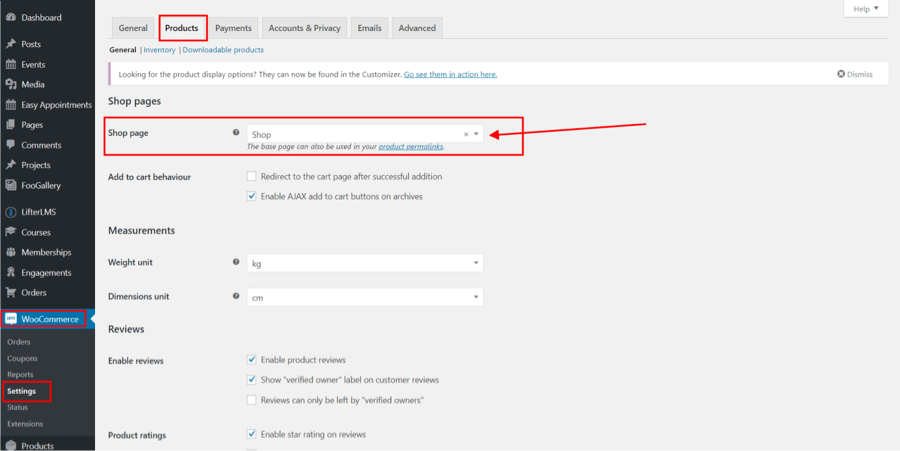
Next, click on the Products tab and set the Shop page to "Shop" by selecting it from the drop-down menu. Save Changes.
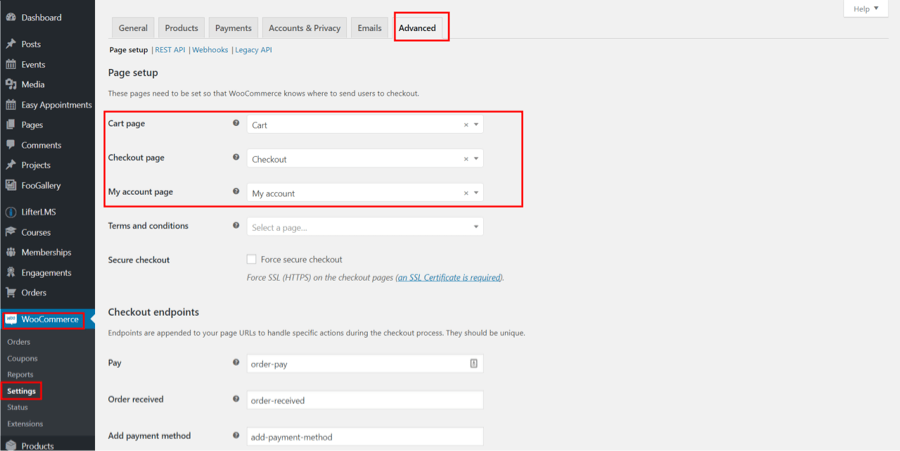
Click on the Advanced tab and set the Cart, Checkout and My Account pages to "Cart", "Checkout" and "My account" respectively. Save your changes.

Lifter Settings
Navigate to LifterLMS >> Settings and click on the "COURSES" tab. Tick the "Retake Lessons" checkbox and choose "Course Catalog" as your site's Course Catalog page. Save changes.
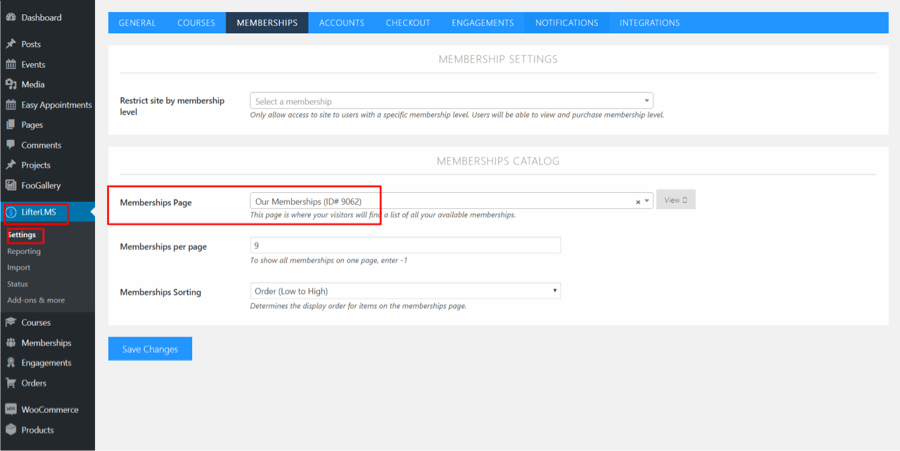
Click on the "MEMBERSHIPS" tab and then choose "Our Memberships" as your site's Memberships page. Save changes.
Click on the "ACCOUNTS" tab and choose "My Courses" as your site's Dashboard page. Save changes.

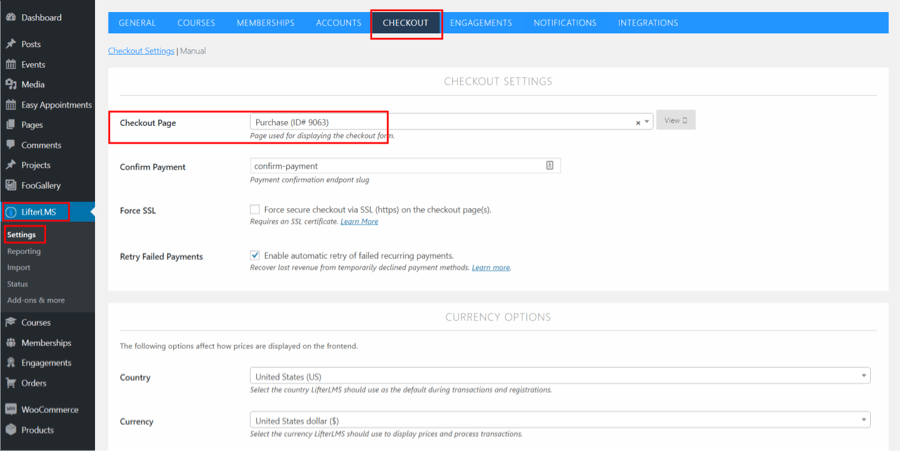
Click on the "CHECKOUT" tab and choose "Purchase" as your site's Checkout Page. Save changes.
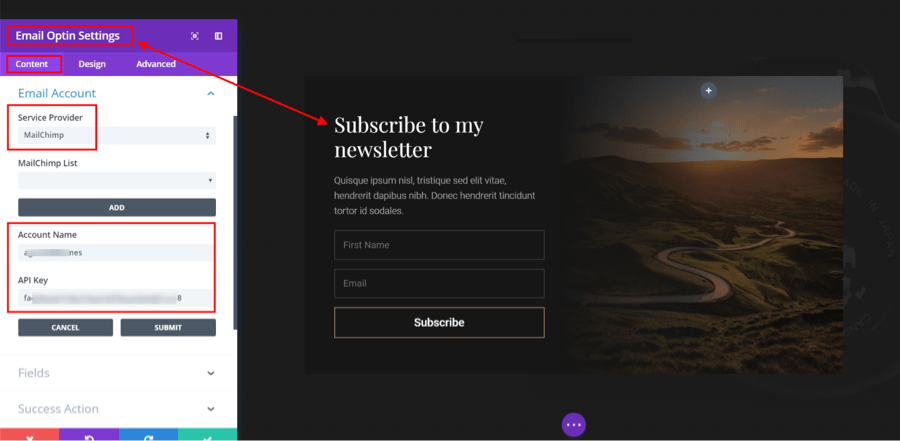
Opt-in Form Settings
Visit your website's homepage (front end), enable the Visual Builder and then scroll down to the Opt-In form. Select the Email Optin Module Settings, Content Tab, Email Account sub-settings: choose your Service Provider and fill out the appropriate account settings and/or API key.
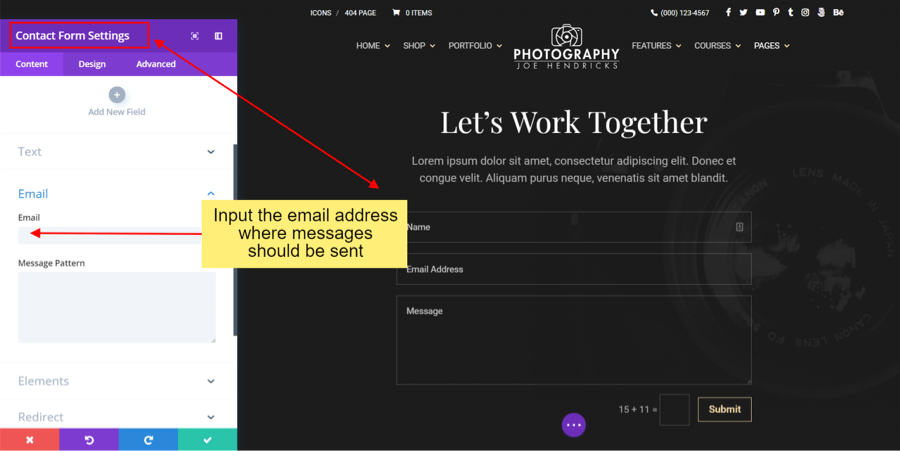
Contact Form Settings
Navigate to the Contact Page and enable the Visual Builder. On the Content tab, under the Email Sub Setting, enter your email
Register Google Maps API
Navigate to Divi >> Theme Options. Scroll down to the Google API key field and register your key before saving your changes.

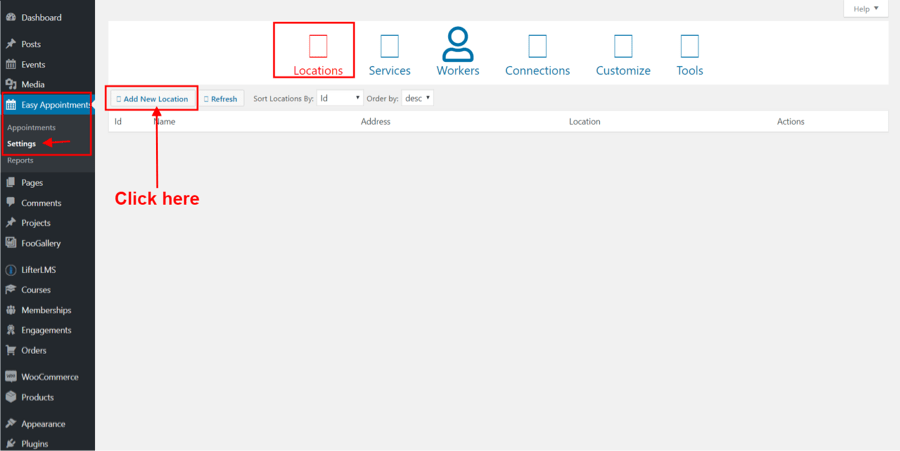
Easy Appointments Set Up
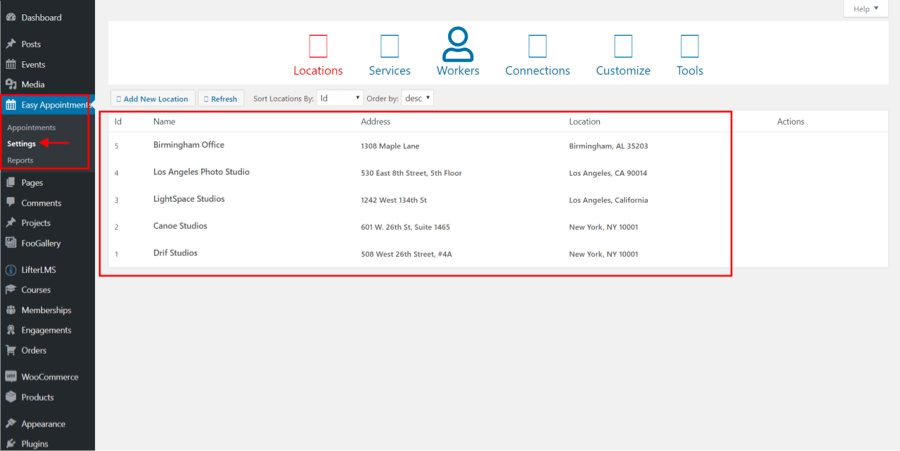
Navigate to Easy Appointments >> Settings. The "Locations" tab loads by default. Click on the "Add New Location" button.
A form will open showing 3 fields, Name, Address and Location. Add content to these fields; you can use the examples below for dummy content, provisionally.
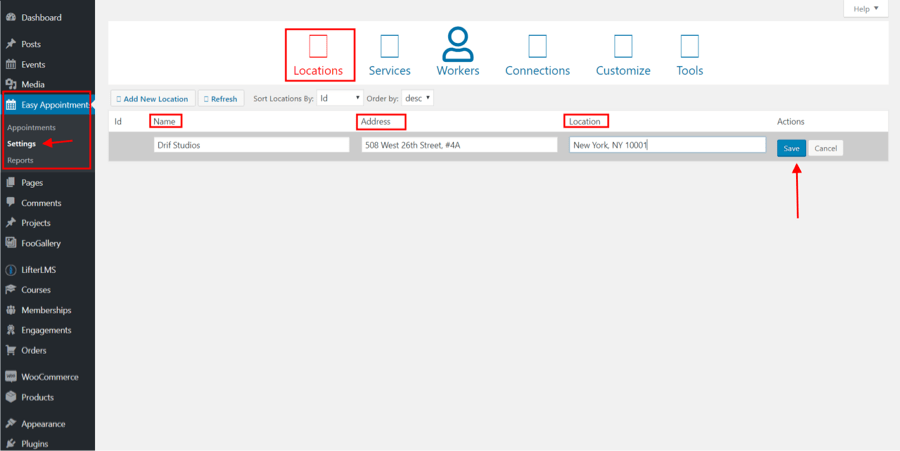
Additional Location examples:

In the end, you will end up with a list similar to this one:
Click on the "Services" tab and then on the Add New Service button.
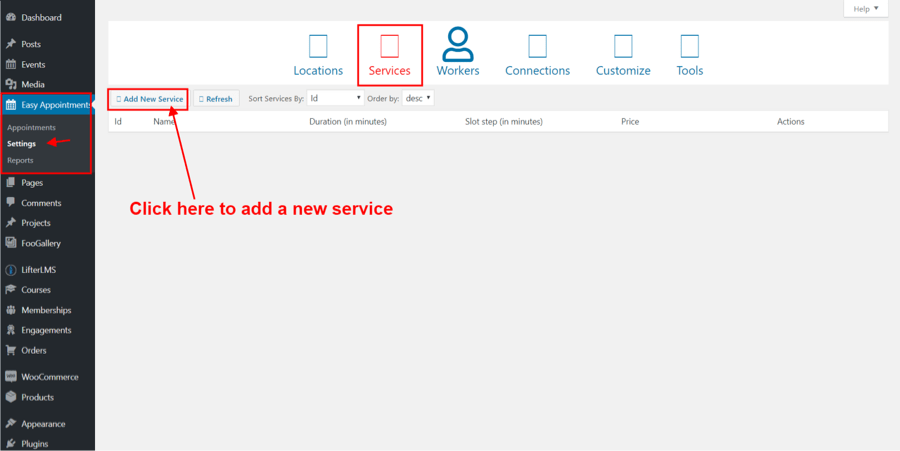
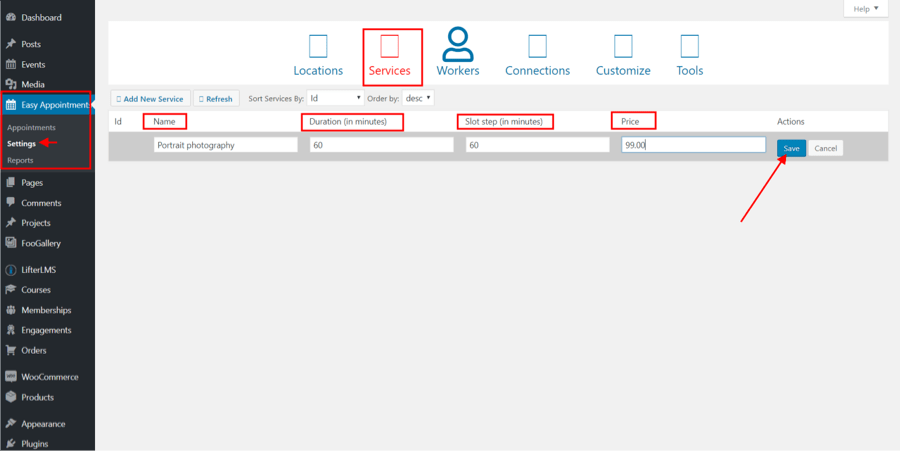
A form will open showing 4 fields, Name, Duration, Slot step, and Price. Add content to these fields; you can use the examples below for dummy content, provisionally.
Additional Service examples:
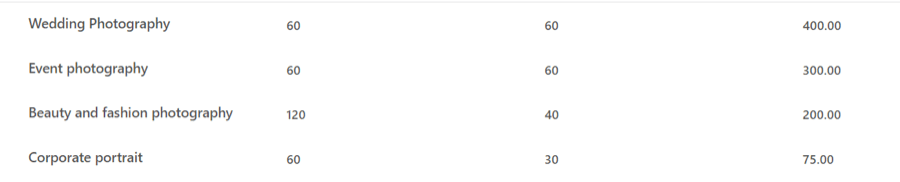
In the end, you will end up with a list similar to this one:

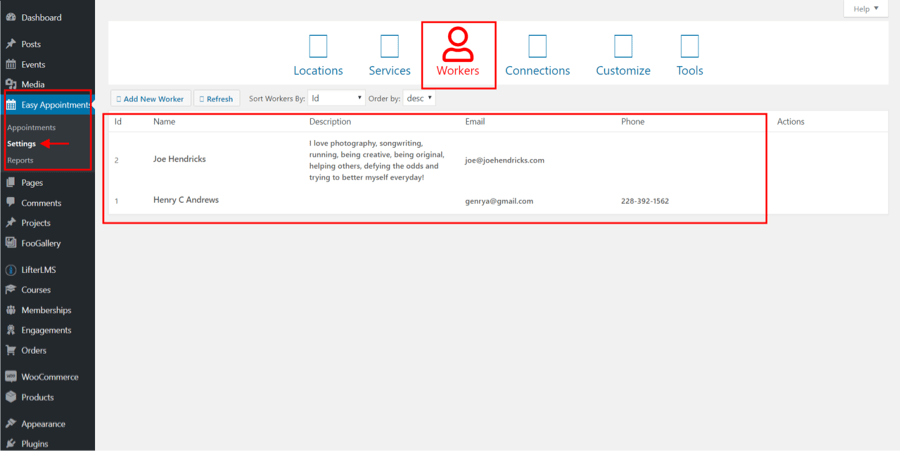
Click on the "Workers" tab and then on the Add New Worker button.

A form will open showing 4 fields, Name, Description, Email, and Phone. Add content to these fields; you can use the examples below for dummy content, provisionally.

Additional Worker examples:

In the end, you will end up with a list similar to this one:
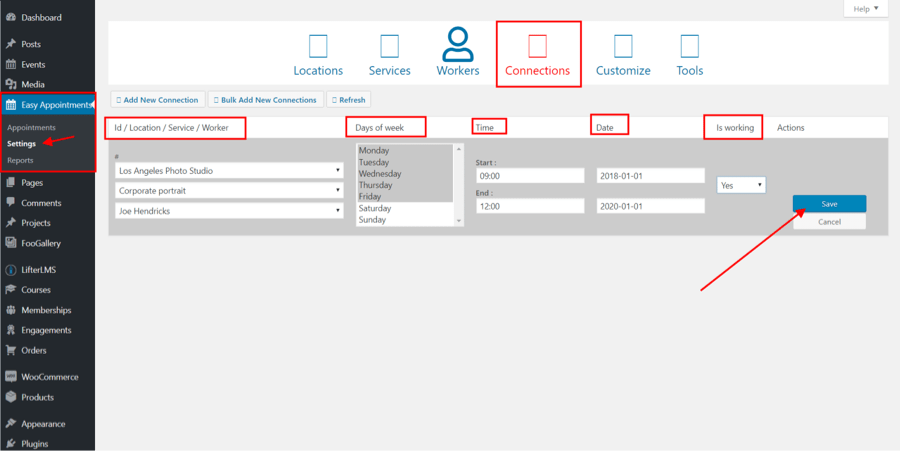
Click on the "Connections" tab and then on the Add New Connection button.

A form will open showing 5 columns, Id/Location/Service/Worker, "Days of week", Time, Date and Is working. Add content to these fields; you can use the examples below for dummy content, provisionally.
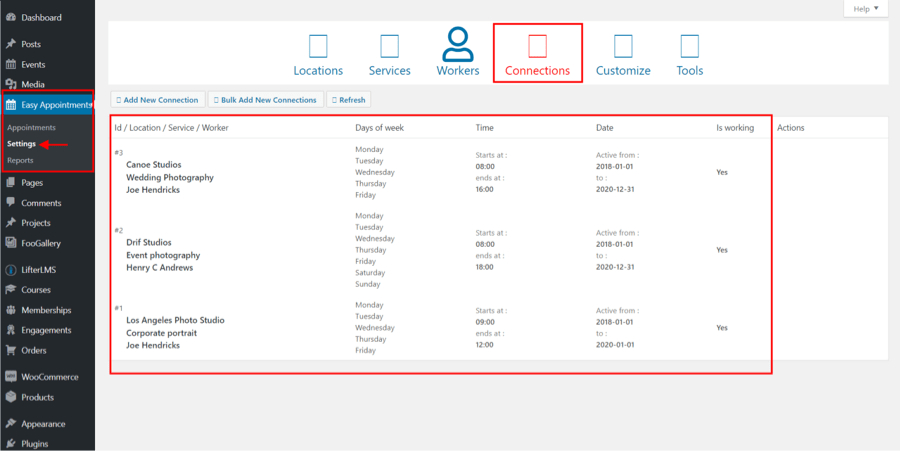
Additional Connections examples:
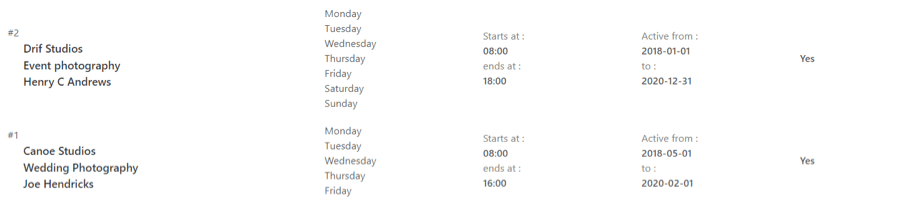
In the end, you will end up with a list similar to this one:
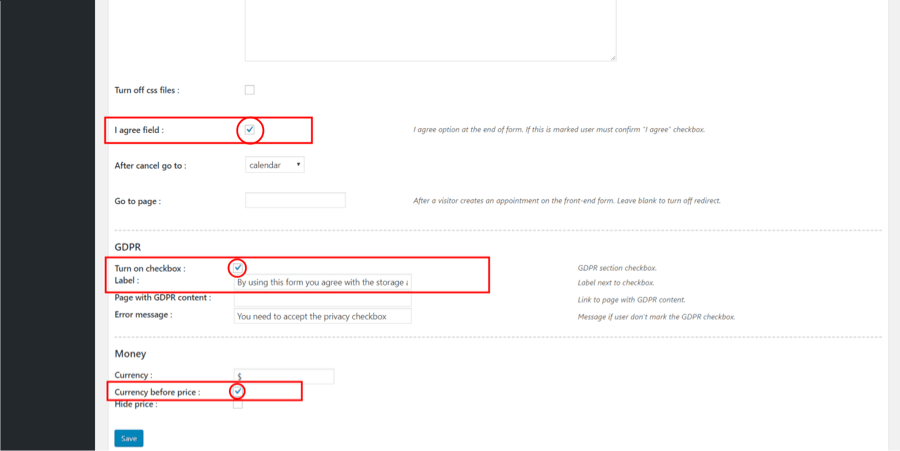
Click on the "Customize" tab and scroll down to the bottom until you find the "I agree" field".
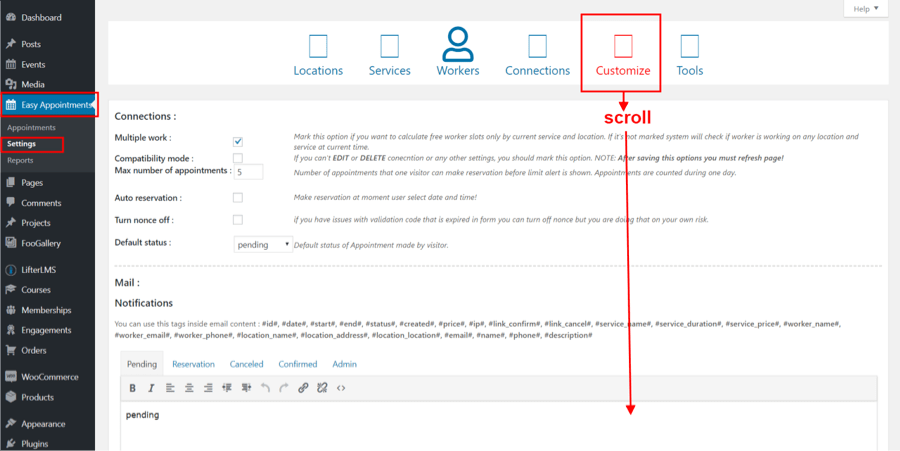
Tick the 3 boxes as shown below and save: