WooCommerce And Zoho CRM Connector Pro
Requirements
- Self-Hosted WordPress Installation
- WooCommerce 3.4.2 or newer
- A valid Zoho CRM account
The "WooCommerce and Zoho CRM Connector Pro plugin" automatically transfers customer and order data from WooCommerce to Zoho CRM.
Visit the WooCommerce and Zoho CRM Connector Pro Plugin Page Here
Installation
- Login to your WordPress Admin and select "Plugins" > "Add New" in the left sidebar menu.
- Click "Upload Plugin" at the top of the page.
- Select the plugin ZIP file and click "Install Now".
- Click "Activate Plugin".
- Select "WooCommerce" > "Zoho CRM Connector" from the left sidebar menu.
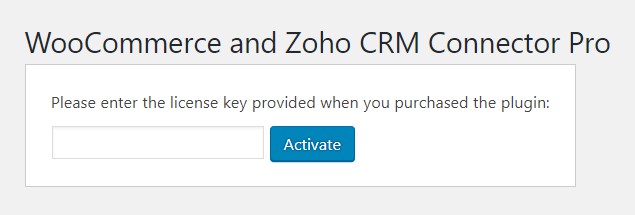
- Enter your license key, which was displayed after checkout, and sent to you by email.
- Click "Activate".
The plugin is now installed and ready for use.
Please note that you must also have WooCommerce installed and activated for the WooCommerce and Zoho CRM Connector plugin to function.
Configuring the Zoho CRM Connector
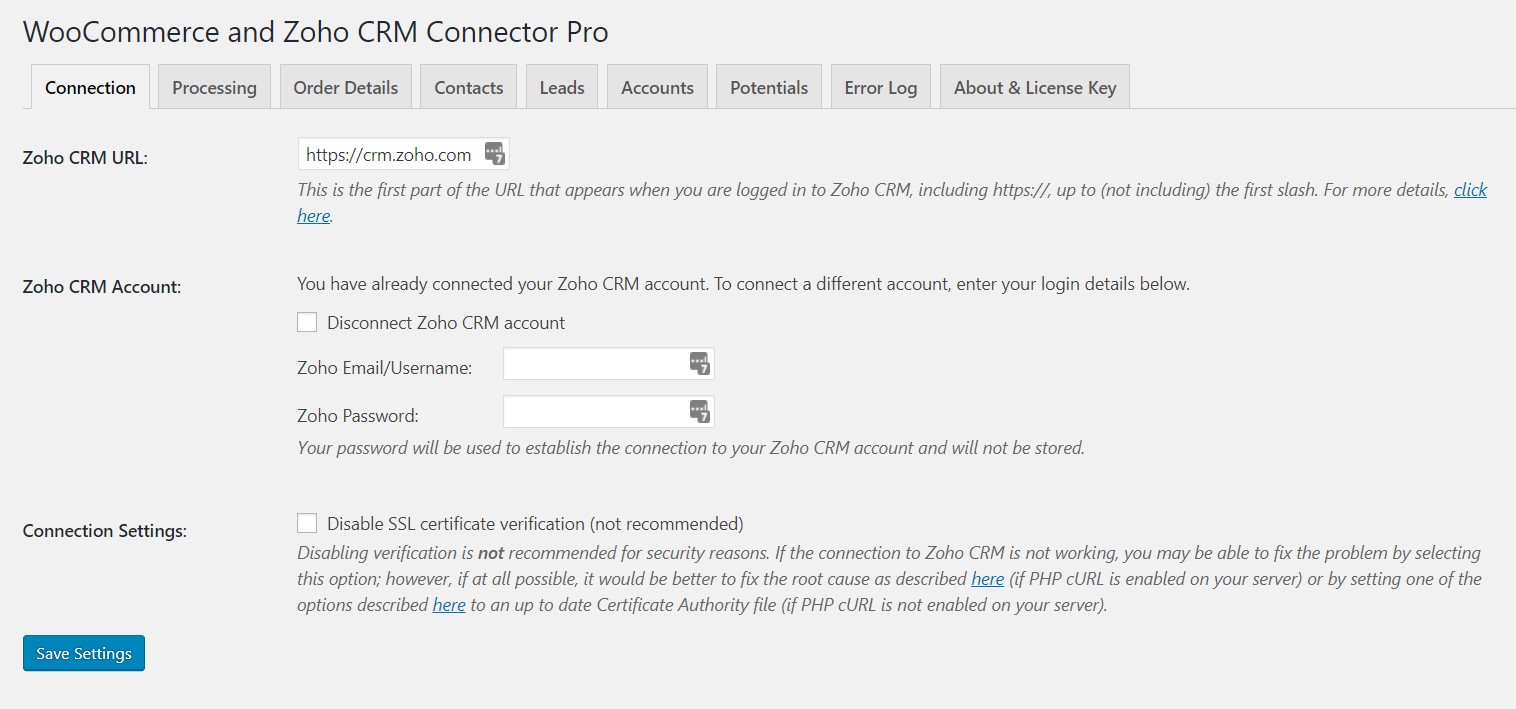
- In your WordPress Admin, select "WooCommerce" > "Zoho CRM Connector" from the left sidebar menu. This should bring you to the Connection tab of the plugin’s Settings page.
- Ensure that the correct URL is specified in the Zoho CRM URL field. If you make a change to the URL, click the Save Settings button near the end of the page before proceeding.
- Follow the on-screen instructions for adding a client ID to your Zoho CRM account.
- Enter your Zoho account email address along with the client ID and client secret that you generated, then click the Save Settings button.
- Click the Connect to Zoho CRM button to attempt to establish the connection to Zoho CRM. This should redirect you to a page on Zoho Accounts that asks you to confirm whether you wish to allow the plugin to access your account. Click the Accept button to grant access. You should be redirected back to the Connection tab in the plugin once your request is processed.
- Select your integration options in the following tabs:
Zoho CRM Connector Pro Tabs
Processing
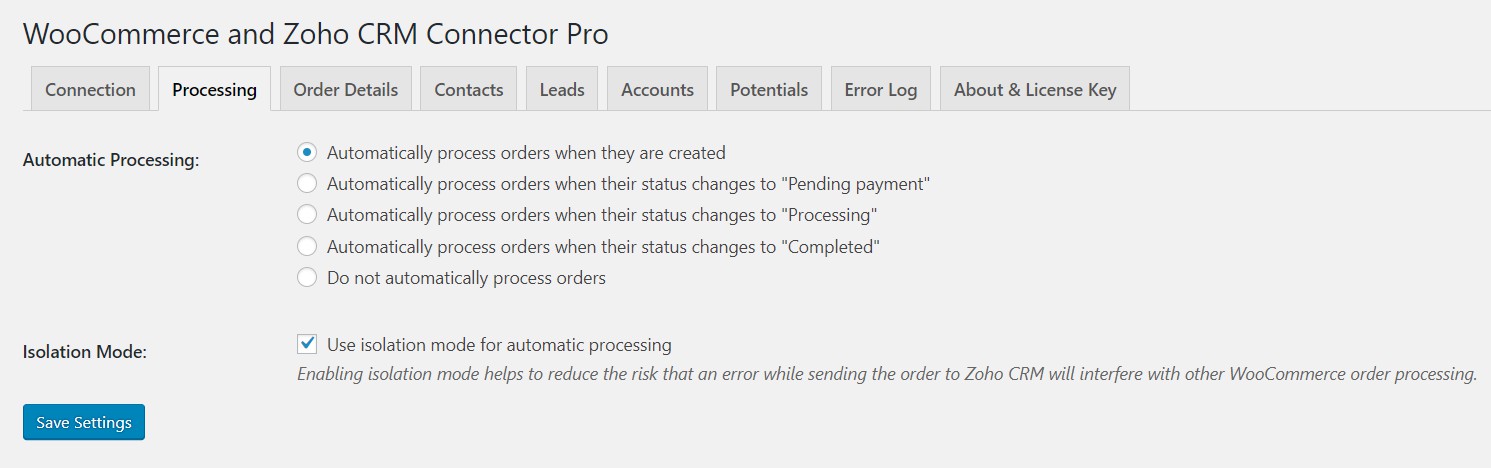
Automatic Processing
| Option | Description |
|---|---|
| Automatically process orders when they are created | If selected, order data will be sent to Zoho CRM when WooCommerce first creates the order. |
| Automatically process orders when their status changes to "..." | If selected, order data will be sent to Zoho CRM when the order status transitions to. For example, you may wish to send order data when the order status changes to "Processing" (typically indicating that payment has been received), or "Completed". If you have defined custom order statuses, they should appear in the list as well. If order transitions to the same status multiple times, the order will be processed each time. |
| Do not automatically process orders | If selected, the plugin will not send any order data to Zoho CRM automatically. |
Isolation Mode
- If you have automatic processing enabled, enabling this setting is recommended since it helps to reduce the risk that an error while sending the order to Zoho CRM will interfere with other WooCommerce order processing. The process of sending orders to Zoho CRM will be slower if this setting is enabled. If you are experiencing errors during automatic processing for unknown reasons, try disabling this setting.
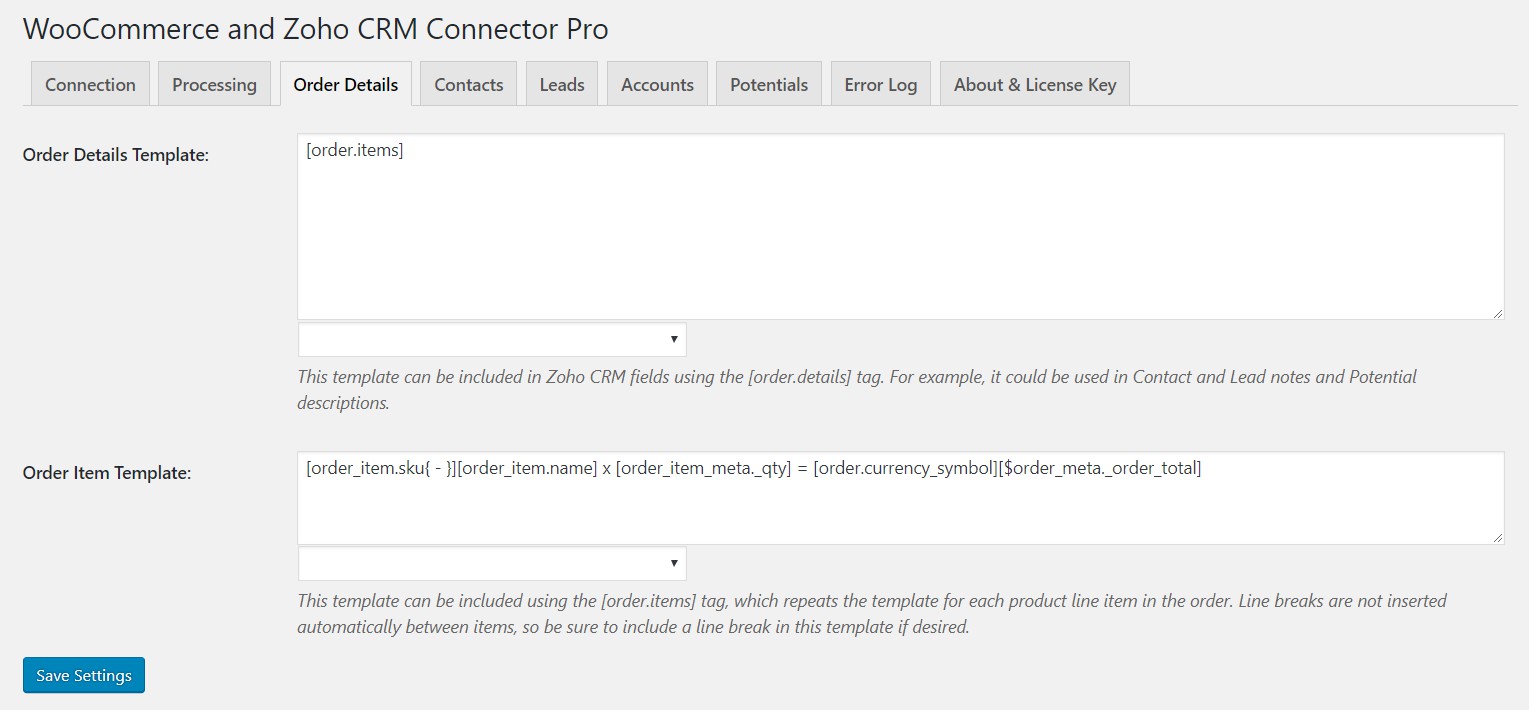
Order Details
| Option | Description |
|---|---|
| Order Details Template | This template can be included in Zoho CRM fields using the [order.details] tag. For example, it could be used in Contact and Lead notes and Potential descriptions. Use the drop-down below the text box to add merge fields (for more details on merge fields, see the section of this manual titled "Using Merge Fields"). |
| Order Item Template | This template can be included in Zoho CRM fields and the Order Details Template using the [order.items] tag, which repeats the template for each product line item in the order. Line breaks are not inserted automatically between items, so be sure to include a line break in this template if desired. Use the drop-down below the text box to add merge fields (for more details on merge fields, see the section of this manual titled "Using Merge Fields"). |
Contacts
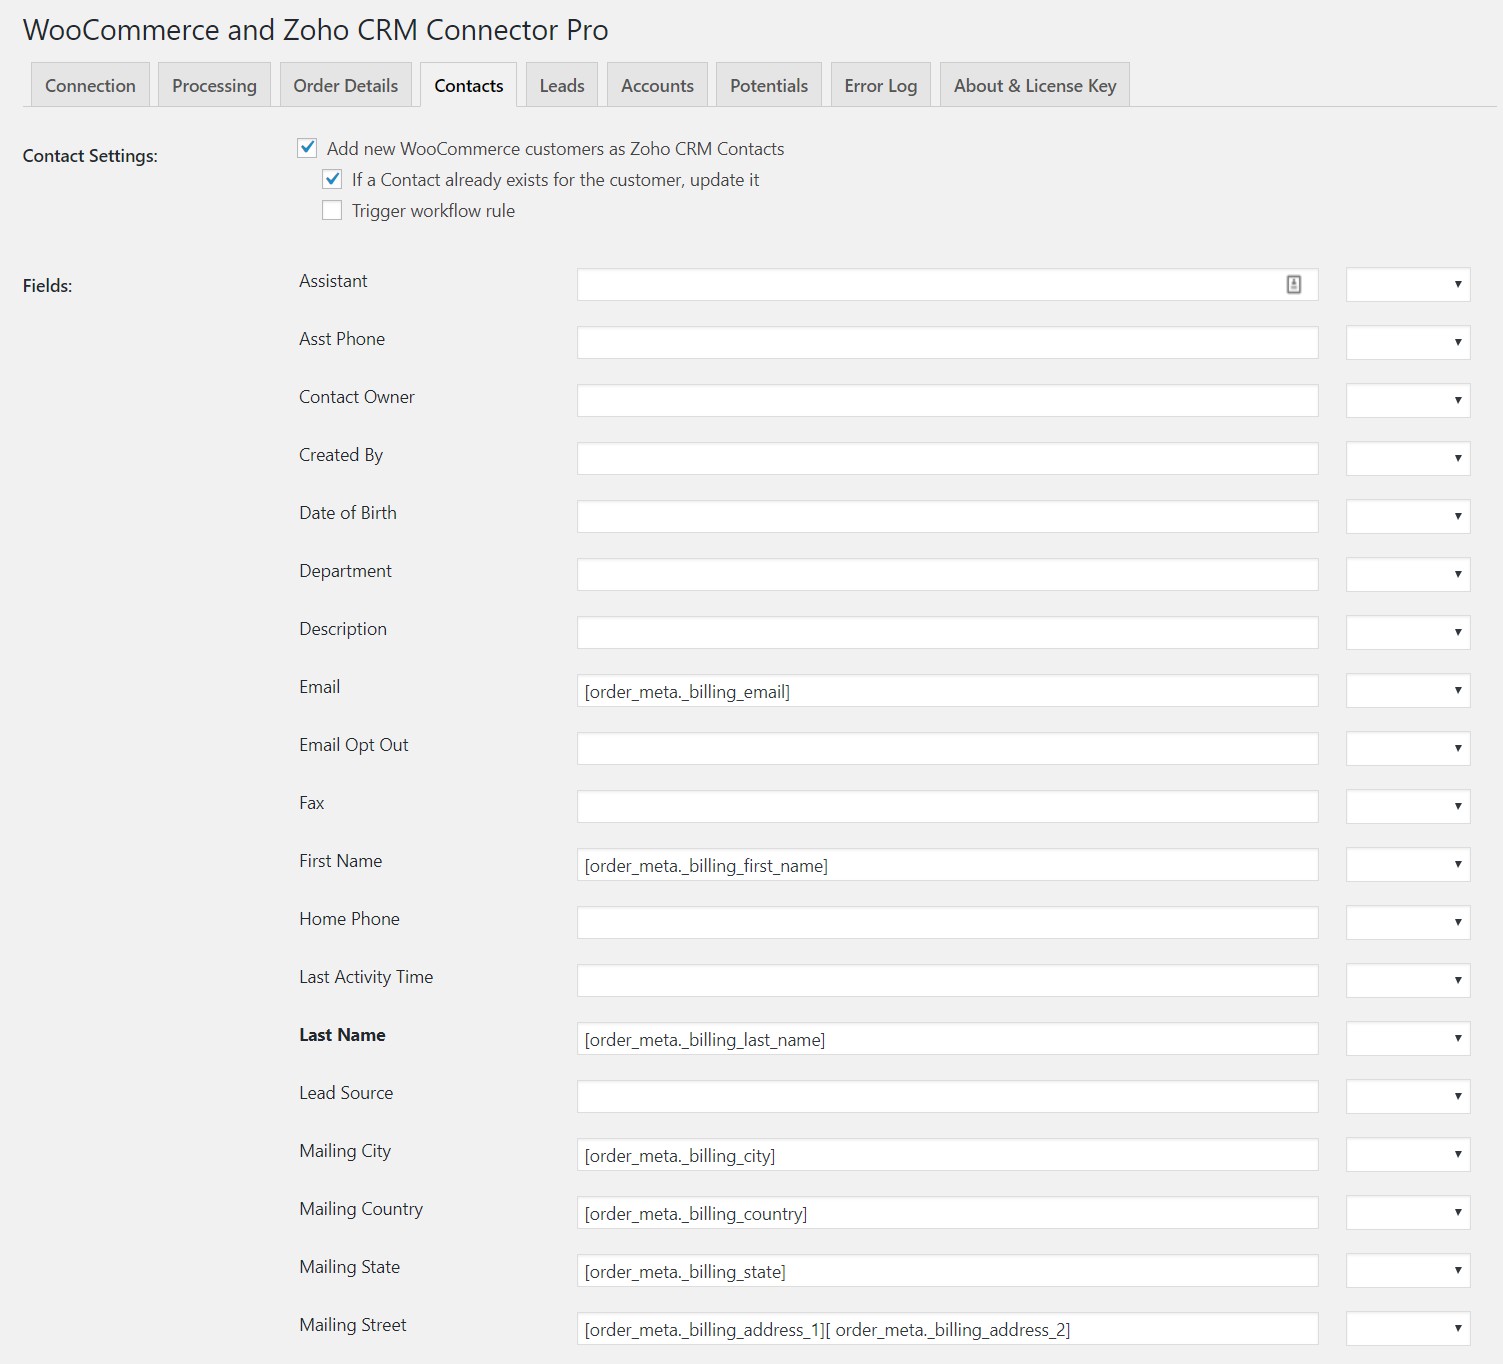
Contact Settings:
| Option | Description |
|---|---|
| Add new WooCommerce customers as Zoho CRM Contacts | If checked, a Contact will be created in Zoho CRM based on the order. |
| Trigger workflow rule | If checked, the plugin will tell Zoho CRM to trigger the workflow rule for Contact record insertion. |
| If a Contact already exists for the customer | skip it: No action will be taken for existing Contacts. update it: The existing Contact will be updated. add it anyway / use Zoho CRM’s duplicate check: Attempt to insert the Contact without any duplicate checking in this plugin. If any fields in Zoho CRM are set to not allow duplicates, those fields will still be checked by Zoho CRM. Choosing this option will save on API usage since duplicate checking will be left up to Zoho CRM. |
Fields: Use the textbox for each field to specify the content (text and/or merge fields) that should be inserted into that Contact field in Zoho CRM when the order is sent to Zoho CRM. Field names in bold indicate fields that are required by Zoho CRM. Required fields that are empty after the merge process will be inserted as "None". Click the "Refresh Fields" button to reload the list of available fields from Zoho CRM.
For more details on merge fields, see the section of this manual titled "Using Merge Fields".
Enable this option to add a note to the Contact with the specified title and content. Use the drop-down fields next to the title field and below the content text box to add merge fields (for more details on merge fields, see the section of this manual titled "Using Merge Fields").
Leads
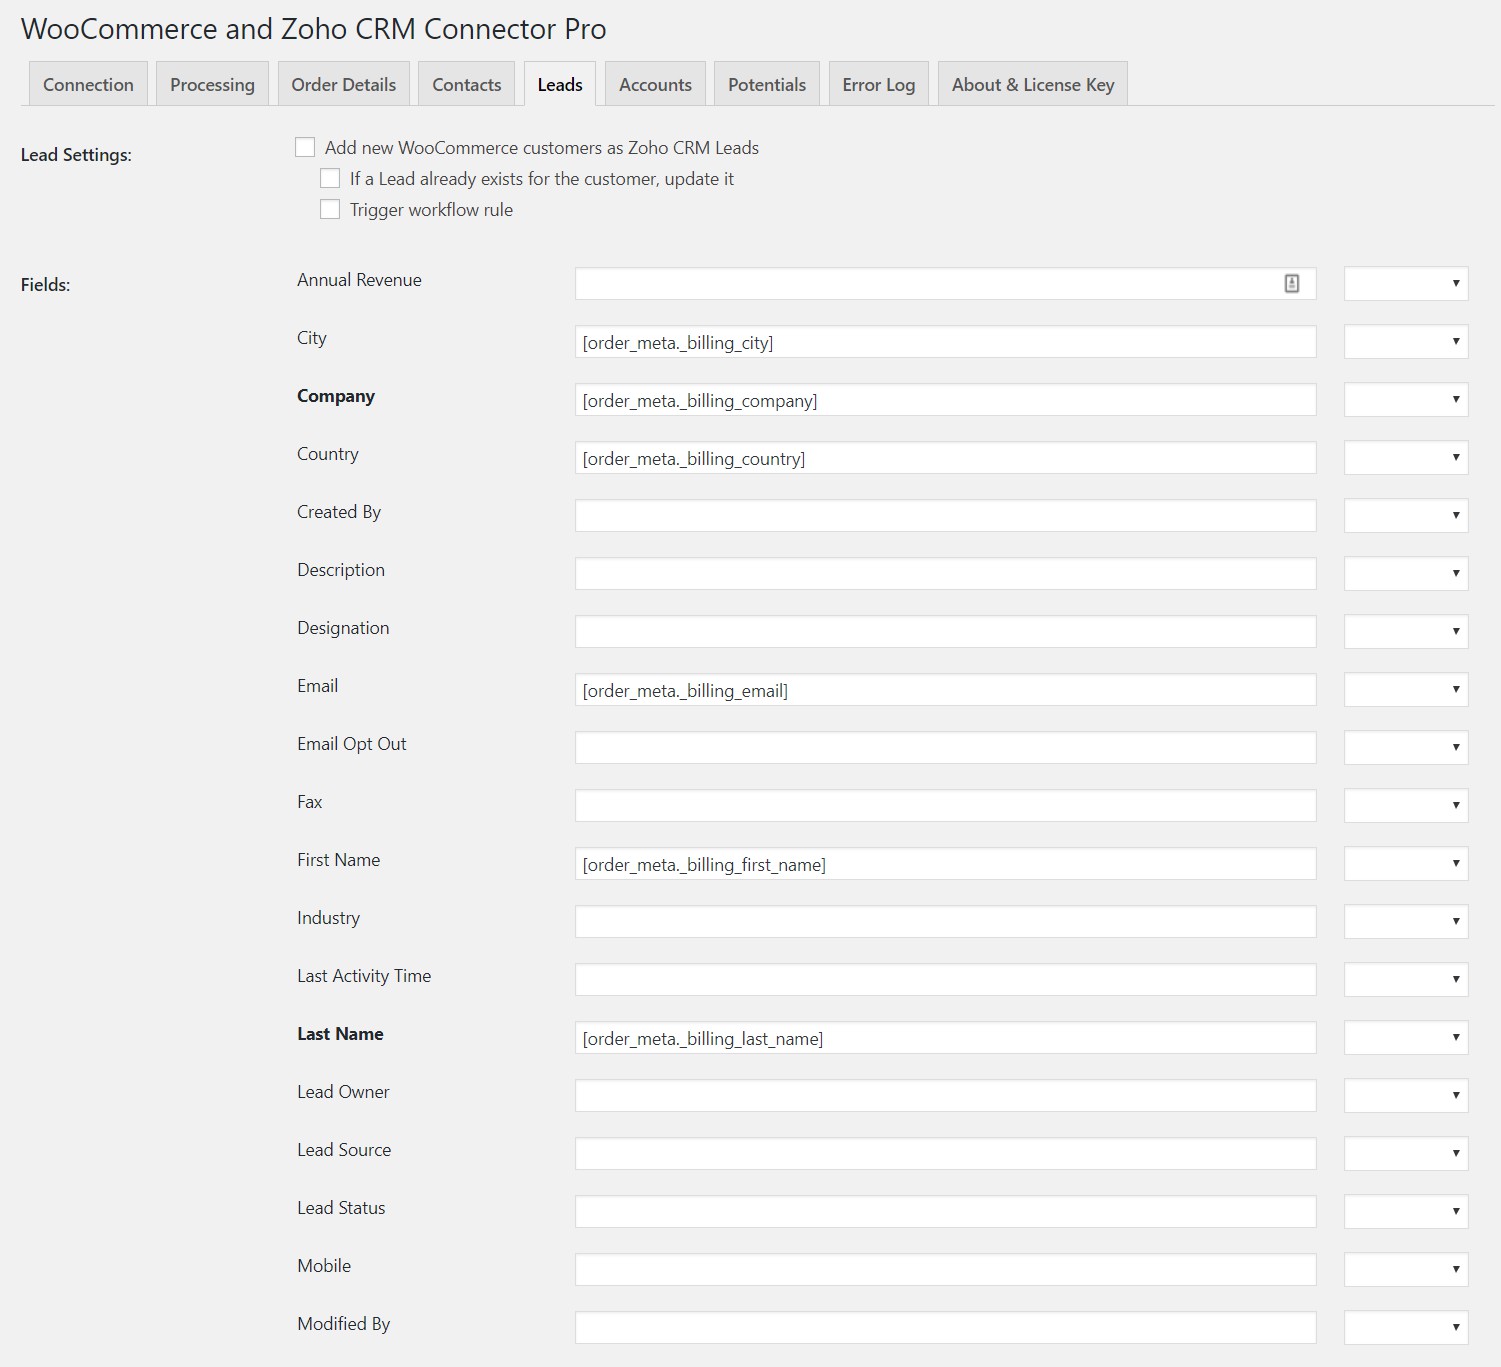
Lead Settings:
| Option | Description |
|---|---|
| Add new WooCommerce customers as Zoho CRM Leads | If checked, a Lead will be created in Zoho CRM based on the order. |
| Trigger workflow rule | If checked, the plugin will tell Zoho CRM to trigger the workflow rule for Lead record insertion. |
| If a Lead already exists for the customer | Skip it: No action will be taken for existing Leads. Update it: The existing Lead will be updated. Add it anyway / use Zoho CRM’s duplicate check: Attempt to insert the Lead without any duplicate checking in this plugin. If any fields in Zoho CRM are set to not allow duplicates, those fields will still be checked by Zoho CRM. Choosing this option will save on API usage since duplicate checking will be left up to Zoho CRM. |
Fields:
Use the textbox for each field to specify the content (text and/or merge fields) that should be inserted into that Lead field in Zoho CRM when the order is sent to Zoho CRM. Field names in bold indicate fields that are required by Zoho CRM. Required fields that are empty after the merge process will be inserted as "None". Click the "Refresh Fields" button to reload the list of available fields from Zoho CRM.
For more details on merge fields, see the section of this manual titled "Using Merge Fields".
Enable this option to add a note to the Lead with the specified title and content. Use the drop-down fields next to the title field and below the content text box to add merge fields (for more details on merge fields, see the section of this manual titled "Using Merge Fields).
Accounts
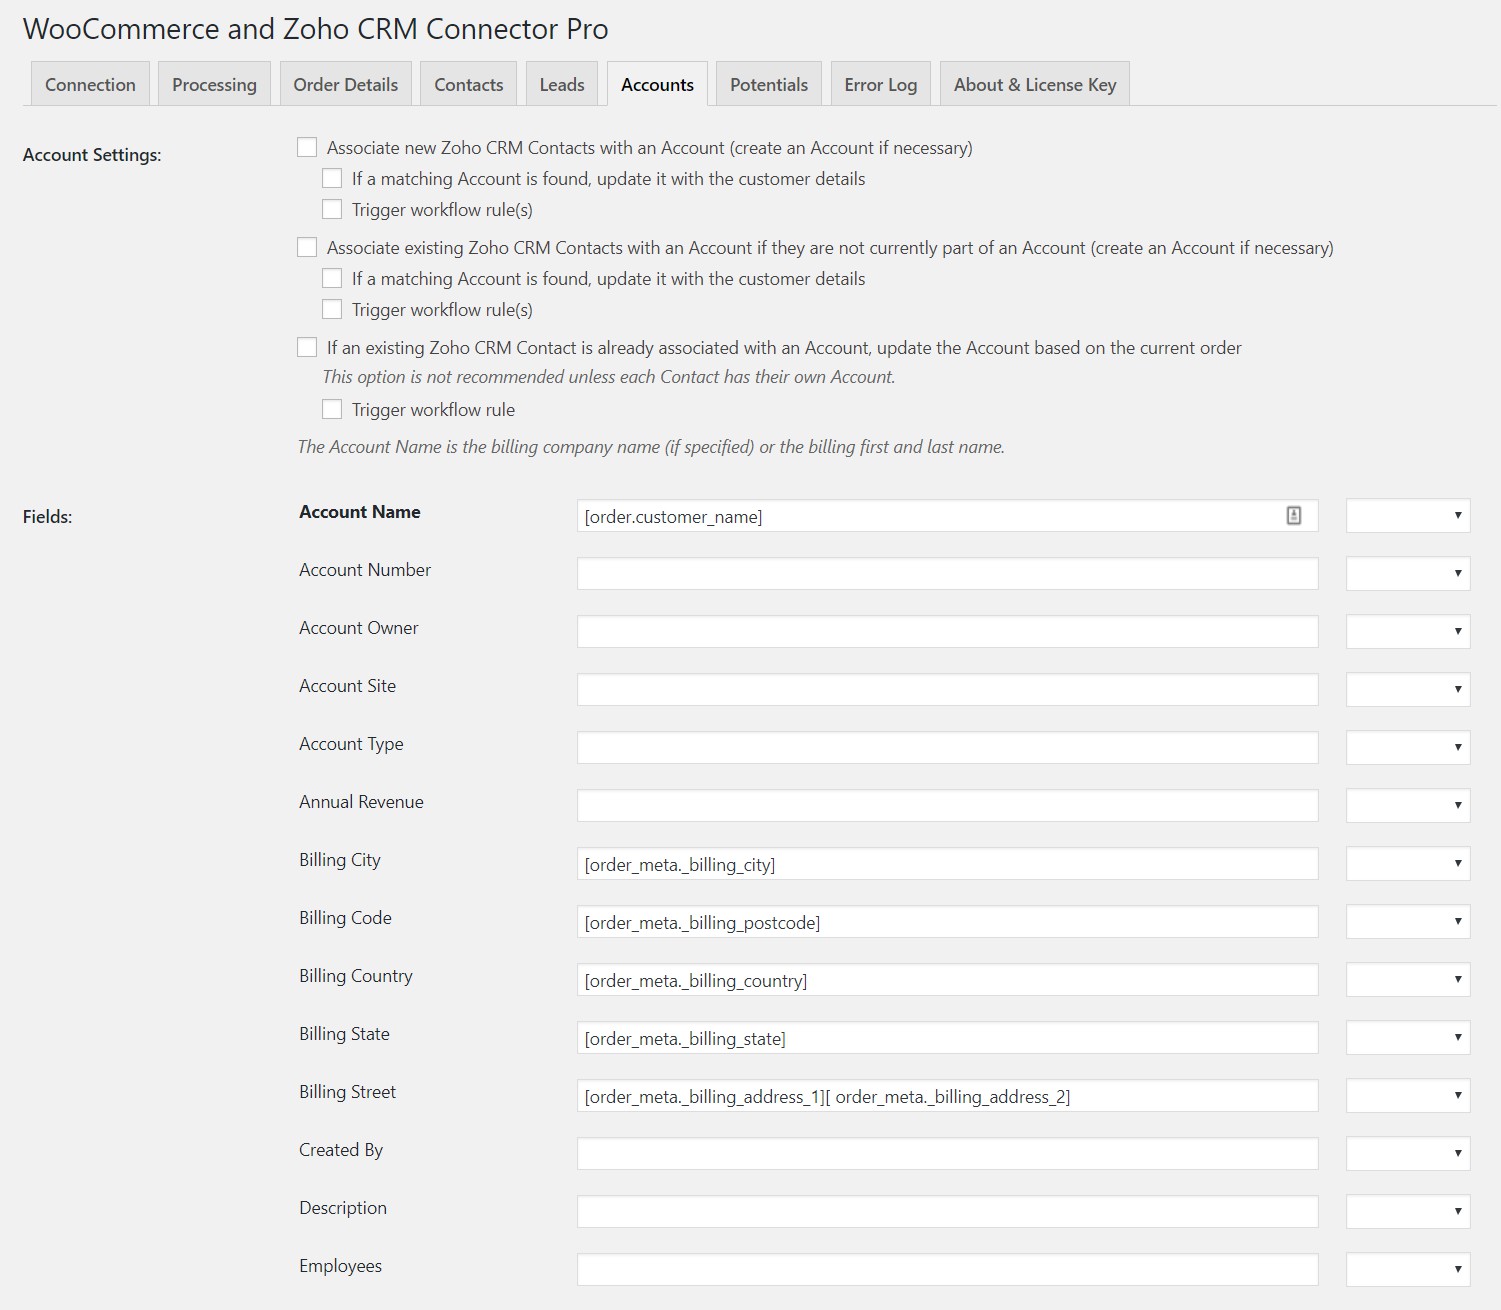
Account Settings:
| Option | Description | |
|---|---|---|
| Associate new Zoho CRM Contacts with an Account (create an Account if necessary) | If checked, new Contacts created by the plugin will be associated with a new or existing Account. | |
| Trigger workflow rule(s) | If checked, the plugin will tell Zoho CRM to trigger the workflow rule for Account record insertion or update, as applicable. If a Contact record is updated (to associate it with an Account), the workflow rule for Contact record update will be triggered as well. | |
| If a matching account is found | use it for the Contact without updating it: A new Account will be created if there is no existing Account. If there is an existing Account, it will be linked to the Contact "as-is". update it: The existing Lead will be updated. add it anyway / use Zoho CRM’s duplicate check: Attempt to insert the Lead without any duplicate checking in this plugin. If any fields in Zoho CRM are set to not allow duplicates, those fields will still be checked by Zoho CRM. Choosing this option will save on API usage since duplicate checking will be left up to Zoho CRM. | |
| Associate existing Zoho CRM Contacts with an Account if they are not currently part of an Account (create an Account if necessary): | If checked, the plugin will associate the Contact matching the order's billing email address with a new or existing Account, provided that the Contact is not currently associated with an Account. | |
| Trigger workflow rule(s): | If checked, the plugin will tell Zoho CRM to trigger the workflow rule for Account record insertion or update, as applicable. If a Contact record is updated (to associate it with an Account), the workflow rule for Contact record update will be triggered as well. | |
| If an existing Zoho CRM Contact is already associated with an account, update the Account based on the current order: | If checked, the plugin will update the Account associated with the Contact matching the order's billing email address. This may include changing the Account's name. This option is not recommended unless each Contact has their own Account (i.e. one Contact per Account). |
Fields:
Use the textbox for each field to specify the content (text and/or merge fields) that should be inserted into that Account field in Zoho CRM when the order is sent to Zoho CRM. Field names in bold indicate fields that are required by Zoho CRM. Required fields that are empty after the merge process will be inserted as "None". Click the "Refresh Fields" button to reload the list of available fields from Zoho CRM.
For more details on merge fields, see the section of this manual titled "Using Merge Fields".
Potentials
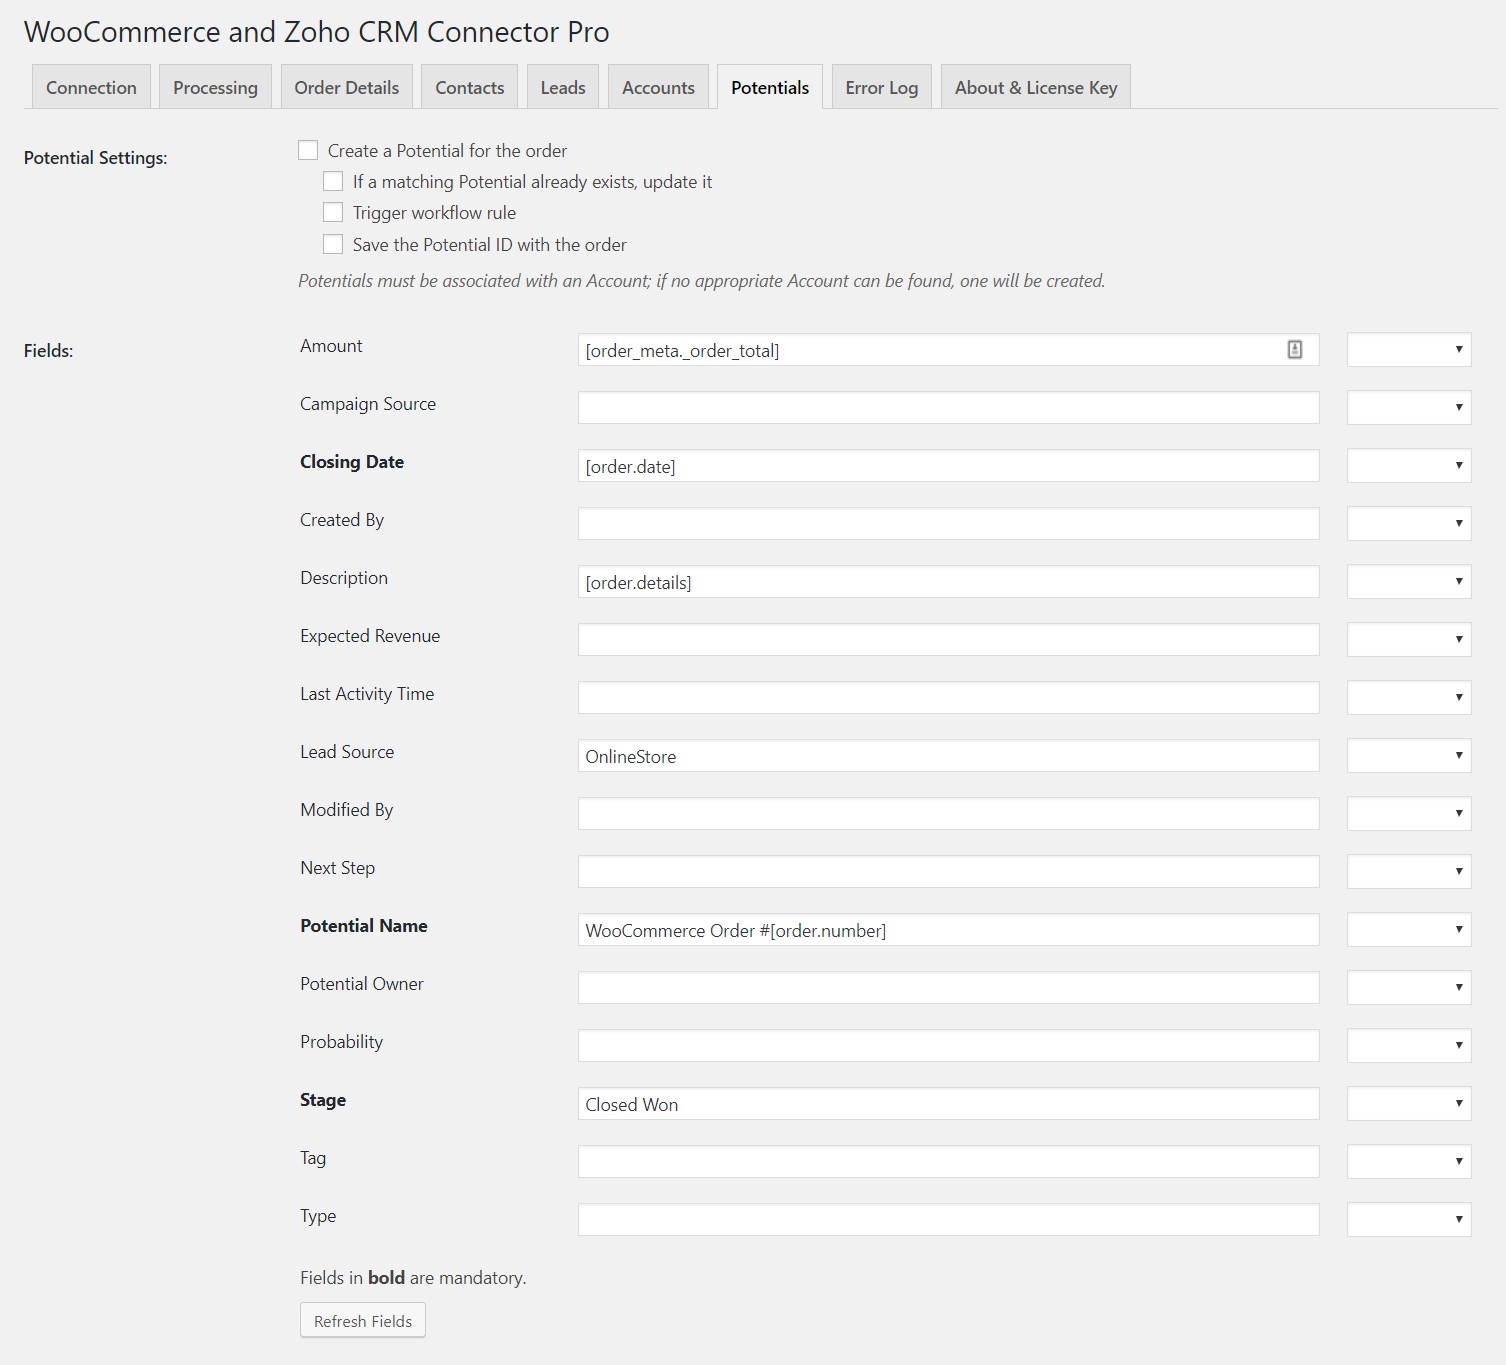
Potential Settings:
| Option | Description |
|---|---|
| Create a Potential for the order | If checked, the plugin will create a Potential for the order. If a Contact was created or found for the order, the Potential will be associated with that Contact. If an Account was created or found for the order, the Potential will be associated with that Account; otherwise, a new Account will be created since the Potential must be associated with an Account. |
| If a matching Potential already exists, update it | If checked, the plugin will update the Potential record when it finds a match to an existing Potential (based on the Potential Name). If unchecked, no action will be taken (duplicate Potentials are not created). |
| Trigger workflow rule | If checked, the plugin will tell Zoho CRM to trigger the workflow rule for Potential record insertion. |
Fields:
Use the textbox for each field to specify the content (text and/or merge fields) that should be inserted into that Potential field in Zoho CRM when the order is sent to Zoho CRM. Field names in bold indicate fields that are required by Zoho CRM. Required fields that are empty after the merge process will be inserted as "None". Click the "Refresh Fields" button to reload the list of available fields from Zoho CRM.
For more details on merge fields, see the section of this manual titled "Using Merge Fields".
Using Merge Fields
Information from your WooCommerce database is added to Zoho CRM fields and notes via merge fields. Merge fields can be added in various places in the plugin configuration using dropdowns that list the available fields for that part of the configuration. The fields are inserted in the following format: [order.id]. Various modifications can be made to the default field specification to achieve different formatting results, as follows:
| Action | |
|---|---|
| To add a space before the merged value only if the value is not empty | add a space as the first character inside the square brackets, e.g.: [order_item.sku] |
| To add a space after the merged value only if the value is not empty | add a space as the last character inside the square brackets, e.g.: [order_item.sku ] |
| To add one or more other characters before the merged value only if the value is not empty | add the characters in curly braces {} immediately after the opening square bracket, e.g.: [{SKU: }order_item.sku] |
| To add one or more other characters after the merged value only if the value is not empty | add the characters in curly braces {} immediately before the closing square bracket, e.g.: [order_item.sku{; }] |
| To format a number as currency (without the currency symbol), | add a $ inside the square brackets immediately before the field specification, e.g.: [$order_meta._order_total] |
You can combine these modifiers in various ways; however, you may not use both the space and curly brace notation on the same side of the field at the same time (e.g. both before or both after). The $ modifier must be added after the space or curly braces, if applicable.
To insert a literal square bracket, enclose it in square brackets. For example, [[] inserts a [.
Viewing the Error Log
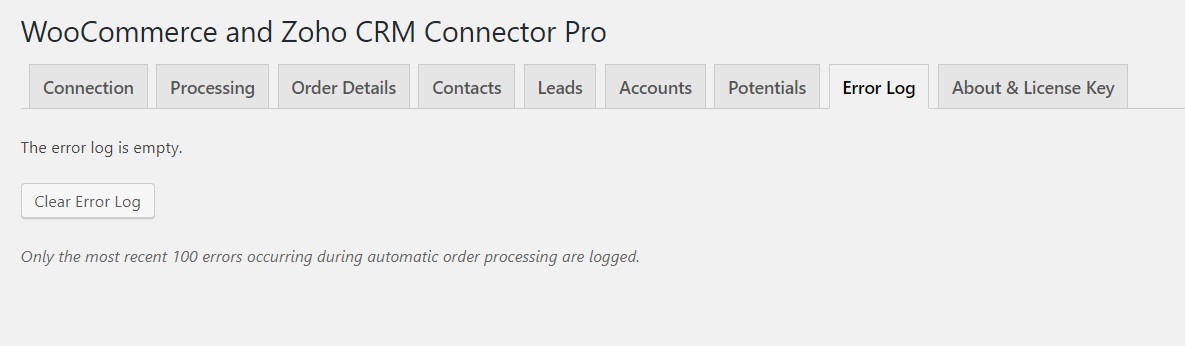
- In your WordPress Admin, select "WooCommerce" >> "Zoho CRM Connector" from the left sidebar menu.
- Click the "Error Log" tab to view the log of orders for which an error occurred while attempting to send them to Zoho CRM automatically (i.e. based on order creation or status change). Click an order ID to view that order.
- Click the "Clear Error Log" button to remove all error log entries. If you have been viewing the error log for some time, be sure to refresh the page prior to clearing the log in case new entries were added after the error log page was loaded.
Manually Sending Orders from the Order List
- In your WordPress Admin, select "WooCommerce" > "Orders" from the left sidebar menu to access the order list.
- Click the "To Zoho CRM" button in the "Actions" column for any order to send that order to Zoho CRM.
or
Select one or more orders using the checkboxes and click the " Send to Zoho CRM" button above the list to send all of the selected orders to Zoho CRM.
Manually Sending an Order from the Order Details Page
- In your WordPress Admin, select "WooCommerce" > "Orders" from the left sidebar menu to access the order list.
- Click an order number to access the Order Details page.
- Under "Order Actions" in the right sidebar, choose "Send to Zoho CRM" from the drop-down menu.
- Click the button next to the drop-down menu to send the order to Zoho CRM.
Troubleshooting Connection Issues
If you are having difficulty getting the plugin to connect (login) to Zoho CRM, here are some things to check before contacting support:
- Zoho CRM URL: Is the correct Zoho CRM URL set on the Connection tab of the plugin settings? It should match the first part of the URL shown in your browser's address bar when you are logged in to Zoho CRM, including https://, up to (not including) the first slash. For more details, click here.
- Too many authentication tokens: You may have reached the limit for the number of authentication tokens allowed for your Zoho CRM account. Check the "Active Authtokens" page under "Sessions" in your Zoho CRM account settings and delete any tokens that are no longer needed.
- Two-factor authentication: If you have two-factor authentication enabled in your Zoho CRM account, you will need to generate and use an application-specific password for the plugin. See the "Two Factor Authentication" page under "Security" in your Zoho CRM account settings for details.
- SSL certificate verification issues: Try selecting the option to disable SSL certificate verification in the Connection tab of the plugin settings. This is not recommended for security reasons. If the connection to Zoho CRM is not working, you may be able to fix the problem by selecting this option; however, if at all possible, it would be better to fix the root cause as described here (if PHP cURL is enabled on your server) or by setting one of the options described here to an up to date Certificate Authority file (if PHP cURL is not enabled on your server).
Support
If you require support for this product, please open a ticket. Support is available for one year from the date of purchase.
License Information
Plugin code is licensed under GNU General Public License version 3 or later (available at https://www.gnu.org/licenses/gpl-3.0.html).
Documentation © 2022 WP Zone. All Rights Reserved.
Changelog
See the Changelog text for this plugin by following this link: WooCommerce and Zoho CRM Connector Pro Changelog.